As an avid outdoor enthusiast, I’ve found that sewing a tent by hand is not just a project, it’s a journey toward self-sufficiency and personal accomplishment. DIY tent sewing allows for a level of customization and durability that off-the-shelf tents can’t always provide. Through the intricate process of how to sew a tent by hand, I’ve honed my skills in crafting durable outdoor gear that stands the test of time and nature’s elements. Moreover, creating a handmade camping tent is an enriching experience that epitomizes the true spirit of craftsmanship. Embarking on sewing projects for campers is a delightful challenge that I embrace, as each stitch brings me closer to the great outdoors.
Whether you’re looking to tackle the great wilderness or just craft a cozy backyard retreat, mastering the art of sewing a tent by hand is a valuable skill. The following segments of this article will dive deep into the process, providing practical advice, and revealing the wonders of creating something truly unique with your hands. Let’s thread the needle and bring our camping dreams to life, one stitch at a time.
Key Takeaways
- Handmade tents offer unparalleled customization and strength.
- DIY tent sewing involves a commitment to craftsmanship and attention to detail.
- Creating your tent allows for a deep connection with your outdoor gear.
- Hand-sewing techniques can be adapted to various fabric types and tent designs.
- Each sewing project is an opportunity to enhance camping experiences.
- Building a tent is both a practical skill and a rewarding creative outlet.
Understanding the Basics of Tent Design
Embarking on the adventure of creating my own tent from scratch, it was clear that understanding tent design fundamentals would set the stage for a functional and reliable outcome. Stitching a tent by hand is as much an art form as it is a technical endeavour, calling for a thoughtful blend of creativity and structural knowledge.
Identifying Your Tent Needs
To tailor my tent design to my specific adventures, I reflected on the essential features I sought in a shelter. What chafed against my desires in previous models? What were the sizes and shapes that seemed most conducive to my outdoors activities? I integrated these considerations into my unique tent design, ensuring that the tent making techniques I would employ would be aligned with my vision.
Learning from Past Experiences
My history with various tents informed my new project. I recalled the limitations faced and the comfort that was compromised. A list of priorities emerged: ample space for mobility, robust weatherproofing, and ventilation for those warm summer nights. This, fused with the traditional knowledge of tent making, would guide my hand as I stitched my bespoke shelter.
Inspiration from Market Trends
By studying the latest trends in tent design, I appreciated the integration of innovative technologies and progressive materials that enhance the camping experience. I aimed to harness these contemporary insights while upholding time-honored tent making techniques in my pursuit of a tent that could bravely face the wilderness.
With my design considerations neatly laid out, the stitching of a tent by hand no longer seemed a daunting task but a journey I was eager to undertake. Each stitch would be a testament to the blend of my personal needs with the wisdom gleaned from campers before me and the collective evolution of tent design.
Gathering Your Tent Crafting Materials
Embarking on the tent-making journey begins with the crucial step of acquiring the right materials. As I set out to gather what’s needed for DIY tent sewing, I look to both contemporary fabrics and rediscovered resources that can be given a second life. The material selection process is not just about finding what’s available but choosing the materials most suited to the tent’s intended environment and my personal camping style.
Finding Second-Hand Tent Materials
One sustainable strategy for sourcing materials involves scouting for second-hand tent materials. Channels such as garage sales, estate sales, or online marketplaces like Craigslist become treasure troves for the DIY tent enthusiast. On these platforms, it’s not uncommon to unearth old cabin tents boasting durable panels that can be repurposed effectively. The cost benefits of this approach are self-evident, and it adds an ecological advantage by recycling materials that might otherwise go to waste. Using garage sale finds not only makes economic sense but also adds character and story to the sewing outdoor gear.
Choosing the Right Fabric and Poles
In picking tent fabric, a multitude of factors come into play. The fabric’s durability in outdoor conditions, its resistance to water and UV rays, and its overall weight are critical for a tent’s practicality and longevity. I spend time rigorously examining fabrics for these properties, understanding that a tent’s resilience against the elements lies in the quality of its material. A well-chosen fabric becomes the stronghold against the unpredictable outdoors.
When it comes to poles, stability is key. The pole material must possess the strength to withstand winds while maintaining a lightness that allows for ease during transit. Aluminum and carbon fiber are premium selections, offering an exceptional balance between durability and portability for the DIY tent crafter.
The table below showcases some commonly sought-after materials in the DIY tent-making community, which I evaluate for my projects based on their functional properties:
| Material | Advantages | Disadvantages | Typical Use |
|---|---|---|---|
| Silnylon | Durable, Lightweight, Water-Resistant | Can Stretch When Wet | Rain Flies, Tent Floors |
| Ripstop Nylon | Tear-Resistant, Versatile | Less Water-Resistant Than Silnylon | General Tent Fabric |
| Ripstop Polyester | Better UV Resistance Than Nylon | Heavier | Tent Walls, Canopies |
| Canvas | Robust, Excellent Insulation | Heavy, Requires Treatment for Waterproofing | Glamping Tents, Long-Term Camping |
| Cuben Fiber | Ultralight, Strong, Waterproof | Expensive, Transparent | Lightweight Backpacking Tents |
As I conclude this section of my tent crafting saga, my inventory fills with potential. The materials—each an opportunity to create something that stands against the wilderness and time itself—are selected with both purpose and passion, setting the stage for the hand-sewn creation that soon will be.
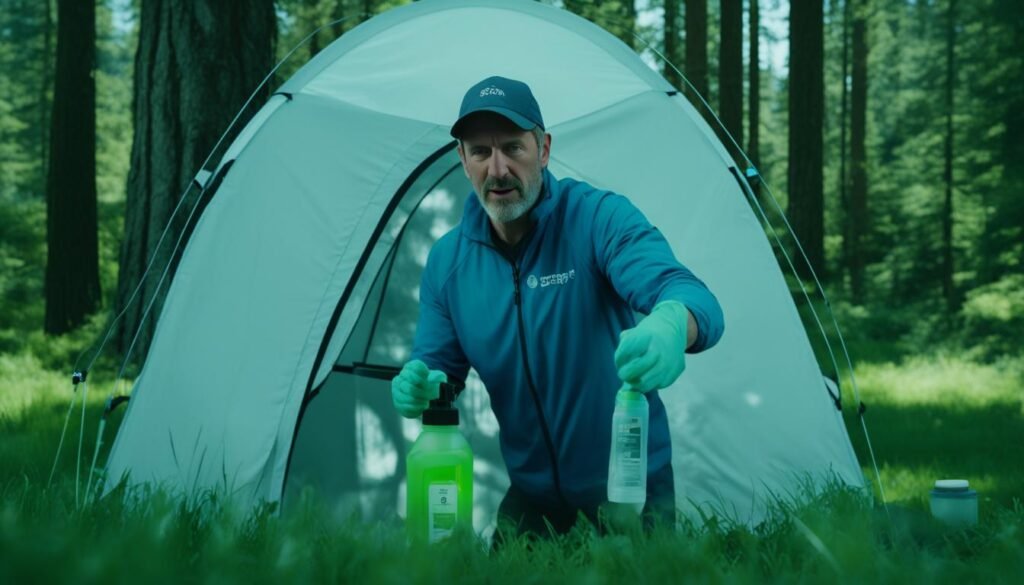
Preparation of Materials: Washing and Dyeing Tips
As I delve into my tent crafting project, I recognize that tent material preparation is a critical step in the process. To ensure that my tent can withstand the rigors of outdoor adventures, attention must be paid to properly cleaning and possibly dyeing the tent fabric. These stages are instrumental in the longevity and appearance of the final product.
When it comes to washing tent fabric, it’s important to consider the condition of the material at hand. If I’m repurposing material from an older tent, I might face unique challenges such as mold or mildew. For these materials, a thorough wash is necessary, which might strip any existing waterproof coating. If that’s the case, a re-waterproofing treatment will become essential. I usually lean towards environmentally friendly or homemade washing solutions when possible, so as to not compromise the integrity of the fabric with harsh chemicals.
Not all fabrics take kindly to dyeing. My experience has taught me that fabrics like nylon resist the dyeing process, often leading to undesirable results. In such instances, it’s preferable to source tent material in colors that align with my envisioned design. Accepting the unique hues of reclaimed fabric can add a narrative element to the finished tent, speaking of its history and my sustainable choices.
- Check the fabric condition before washing
- Determine if existing waterproofing will be affected
- Opt for gentle, eco-friendly cleaning agents
- Plan for re-waterproofing if necessary after wash
- Recognize the dyeing limitations of synthetic materials
- Embrace natural hues or source accordingly colored materials
| Fabric Type | Washing Recommendations | Rewashing Considerations | Dyeing Possibility |
|---|---|---|---|
| Nylon | Mild detergent, cold water | Rewashing may require fabric re-waterproofing | Poor – Resists dye |
| Polyester | Moderate detergent, warm water | Generally maintains water resistance | Fair – Accepts dye better than nylon |
| Cotton Canvas | Strong detergent, hot water | Often requires additional waterproofing | Good – Takes dye well |
As I continue on this tent-making venture, ensuring that the materials are clean and potentially dyed to my preference not only prepares them for the construction phase but also instills a sense of satisfaction knowing that the fabric is personalized for my outdoor narrative. Next, I will carry forward my tent fabric, cleansed and ready, towards the crucial steps of measuring, cutting, and stitching.
Deconstructing Old Tents for New Projects
My journey of transforming used tents into new adventures begins with careful deconstruction. This process, known for its sustainability, breathes new life into discarded camping gear, turning what was once deemed unusable into valuable resources. Deconstructing tents is not only a crafty endeavor but also a nod to environmental consciousness—a lesson in reusing tent materials effectively.
The initial task involves laying out the old tent, gently separating the fabric panels by dismantling the seams. This ensures that I’m left with large pieces of fabric that will serve as the building blocks for my new creation. It’s crucial to avoid damage to the materials during this process; thus, I use tools designed for precision.
A pair of sharp scissors or a specialized hot-knife becomes indispensable to cut seamlessly through old threads and open up possibilities for repurposing. As I work my way through the canvas, I’m mindful of salvaging every part—zippers are cautiously unsewn and set aside, as they’re expensive to replace, and webbing is clipped with care to be reused for future tie-downs or loops.

Below I’ve compiled my findings from the deconstruction phase in a resource table, which serves as a reference for the reclamation of old tents:
| Component | Reusability | Notes on Repurposing |
|---|---|---|
| Fabric Panels | High | Can become walls, floors, or roofs of new tent designs |
| Zippers | High | Valuable for doorways or ventilation points, ensure functionality |
| Poles | Medium | Poles may be repurposed, depending on material and condition |
| Webbing and Loops | High | Integral for structural support and attachment points |
With ample materials collected and categorized, I am poised to embark on the creation of a bespoke tent. Every reclaimed piece carries a story, a history of past encampments and nature’s embrace. By deconstructing old tents and reusing tent materials, I’m not just making a new shelter, but also preserving the essence of countless adventures past, ready to be woven into the fabric of my own outdoor narratives.
How to Sew a Tent by Hand
As I venture into the realm of DIY tent making, mastering how to sew a tent by hand begins with the foundational process of design and pattern creation. Sewing tips for tents often emphasize the significance of proper groundwork and preparation. With that in mind, my initial focus is setting up a comprehensive mock-up design, a technique that enables me to visualize spatial arrangements before committing to fabric. This preparatory step is vital as it influences the entire project’s execution and outcome, equally blending the art of tent pattern creation with the practical necessities of camping shelter design.
Setting Up a Mock-up Design
Constructing a full-scale mock-up design for tents offers an unrivaled approach to envisioning the spatial dynamics of the intended structure. Using readily available materials such as rope, stakes, and a tape measure allows me to outline the tent’s perimeter in a physical space. This hands-on method serves as an invaluable strategy to scrutinize and adjust dimensions, ensuring the final product will accommodate my camping needs. It’s this stage where I can dynamically shift the conceptual framework and preemptively resolve potential spatial concerns.
Through the manipulation of strings and poles, I can create a three-dimensional outline that stands as the precursor to the tangible tent. Every parameter—from the height that allows for comfortable movement to the footprint that dictates storage space—is meticulously adjusted during this phase. This process is not solely about dimensions but also about testing the envisioned layout under simulated environmental conditions.
Translating Measurements into Tent Patterns
The transition from tent mock-up design to pattern development brings my project into sharper focus. Equipped with a framing square and tape measure, I delve into the task of transcribing the mock-up’s measurements onto paper. Each section of cord that mapped the tent’s contours is now a line on graph paper, a practice in precision that forms the basis for my tent pattern creation. The methodology employed here reflects an attempt to maintain accuracy while simultaneously considering the constraints of my available materials.
Adopting rigorous methods, such as ensuring right angles and consistent lengths, I formulate a set of patterns that will act as a blueprint when I cut the actual tent fabric. This exercise embodies the transformative journey from an abstract design to a structured pattern, a critical juncture where the dream of personalized shelter takes one step closer to reality. It is through this careful process that sewing a tent by hand becomes more than a pastime—it emerges as a customized expression of my outdoor spirit.
Creating a Workable Tent Layout
As I delve into the creation of a tent, a key component is to devise a tent layout strategy that maximizes functionality while minimizing waste. This step in my DIY tent construction process requires a meticulous approach to ensure that every square inch of fabric is used to its full potential. Crafting a tent that aligns with personal needs yet is founded on efficiency is foremost in my plans.
Optimizing Fabric Usage
To optimize fabric, I position the panels on my fabric efficiently, considering both the width of the material and the intended design of the tent. I plot out each piece with precision, aiming to reduce the amount of leftover material, which not only conserves resources but also decreases overall tent weight—a crucial factor in backpacking applications. Juxtaposing panels in such a way that they fit together like a puzzle is part of my overarching tent layout strategy, optimizing fabric use while carving the blueprint of my outdoor abode.
Handling Fabric Stretch and Bias
Managing tent fabric stretch and its relationship to the bias of the material is fundamental to creating a resilient and durable tent. For fabrics prone to stretching, such as silnylon, I often make strategic catenary cuts that mitigate potential sagging and maintain the tent’s shape under various conditions. These curvilinear cuts are subtly incorporated into my tent design as they adeptly combat the irregular stretch patterns common in certain textiles. Familiarizing myself with each fabric’s properties, I craft a shelter capable of braving the elements, keeping in mind that managing tent fabric stretch is integral to the tent’s function and lifespan.
| Fabric Type | Stretch Characteristic | Layout Consideration | Catenary Cut Benefit |
|---|---|---|---|
| Silnylon | Stretches when wet | Orient panels to reduce bias stretch impact | Prevents sagging, maintains tautness |
| Ripstop Nylon | Minimal stretch | Panel orientation less critical | Optional, adds stability in wind |
| Silpoly | Low stretch, even on bias | Maximize panel alignment with fabric weave | Not required, but can refine tent shape |
With an optimized layout and proper handling of fabric stretch dynamics, my tent is not only a testament to smart design but an affirmation of functionality in the wilderness. The craft of laying out tent material is both an art and a science, requiring acute attention to detail and a willingness to adapt strategies as needed—a skill honed through ongoing dedication to the DIY ethos.
Tent Sewing Techniques: Stitching Your Panels Together
Embarking on DIY tent sewing, the act of stitching tent panels together is like a dance where precision leads. It takes practice, patience, and a fusion of traditional skills and innovative tent sewing techniques to ensure a sturdy tent structure.
Understanding the stretch characteristics of tent fabrics is crucial as I align and combine panels. Fabrics like silnylon might stretch under duress or when wet, affecting the tent’s shape and integrity. To counteract this, I meticulously arrange panel seams, ensuring a tight fit that maintains the tent’s form.
Acquiring new sewing skills is vital. I’ve learned to use a flat felled seam, which not only adds strength to the tent construction but also provides a clean, polished look. This type of seam encases the raw edges of the fabric, reducing the risk of fraying and water ingress.
Stitching by hand allows for a level of detail that machine sewing often cannot match, especially when it comes to complex shapes and corners. However, it also requires dexterity and an understanding of how to manage tension without the aid of a sewing machine.
- Gather all necessary tools and materials before beginning.
- Layout tent panels in the intended design to visualize end product.
- Carefully pin panels together before sewing to maintain alignment.
- Choose the right thread and needle for the fabric type.
- Execute the flat felled seam with consistency across all panel connections.
While I continue to build my tent, these detailed efforts enrich the overall experience, transforming raw materials into a functional shelter through the art of DIY creativity. The stitching of tent panels is not just a step; it’s the very seam that binds utility, durability, and bespoke aesthetics into the DIY tent sewing tradition.
Ensuring Structural Integrity with Accurate Joining
Creating a sturdy shelter is paramount in my DIY tent endeavors, with tent structural integrity hinging on the precise joining of each panel. Crafting a tent that can withstand the whims of nature requires more than just a firm stitch; it necessitates a meticulous tent construction planning approach before the first thread pierces fabric.
Planning the Construction Process
My commitment to a well-structured tent begins with a clear and coherent construction plan. This plan illustrates how each part converges and serves as a structural map, ensuring that no detail is overlooked. Laying out this plan methodically ensures that the tent stands up not only to my expectations but also to the unpredictable forces it will face in the outdoors. A well-planned construction sequence can transform a sprawling array of fabric pieces into a cohesive, robust living space—a testament to sound engineering executed with personal touch.
Calculating and Measuring Angles
One of the critical steps in calculating tent dimensions is the precise measurement of angles and dimensions. This process turns abstract ideas into concrete parts that fit together seamlessly. Utilizing online calculators and mathematical methods imbues my designs with the precision necessary for creating reliable shelters. Whether it’s my personal sanctuary away from the bustle or a safe haven during rugged expeditions, the precise calculation of these angles ensures each panel aligns faultlessly, weaving strength into every corner.

- Establish initial designs with attention to the structural requirements.
- Ascertain corner angles using mathematical precision and online resources.
- Measure twice and cut once to prevent any miscalculations.
- Join panels with confidence, reinforcing points of stress for added resilience.
As I navigate through measurements and angles, each step takes me closer to the culmination of a personalized tent, one stitch at a time. By underpinning my construction with calculative rigor, I build not just a shelter, but also a lasting ode to craftsmanship and resilience in the great outdoors.
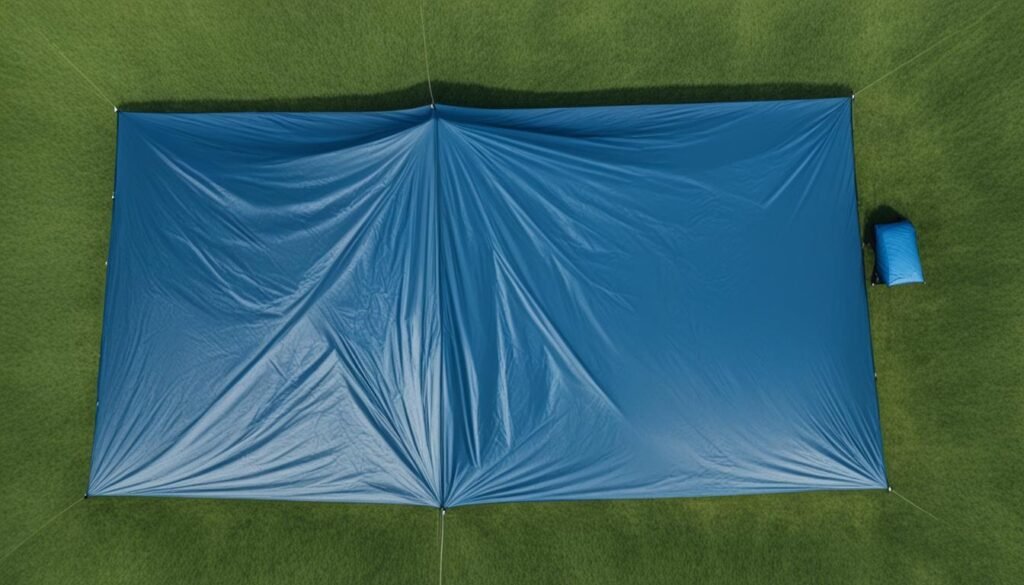
Constructing the Tent Base: A Guide to Secure Foundations
Embarking on the tent base construction process, I recognize that the foundation is the cornerstone of any reliable tent structure. A secure tent foundation is not merely a flat stretch of fabric; it is an engineered basis that carries the weight and stress of the entire tent. Thus, after extensive research and applying proven tent making techniques, I employ a systematic approach to ensure my tent foundation meets the highest standards of stability and durability.
In my blueprint, the tent base must be well-defined – a geometric harmony between angles and sides. Here, precision is not an overstatement. It’s imperative to adhere to the measurements, ensuring that every corner forms a 90-degree angle. By establishing a squared base, the structure is intuitively set for optimal tension distribution, which is fundamental for the tent to weather against natural elements like wind or rain.
Ensuring a level platform is a prime focus as it directly influences the comfort inside the tent. A skewed base leads to an uneven interior, turning what should be a restorative wilderness retreat into an ongoing battle against gravity. So, I meticulously clear the ground and employ a level tool to affirm evenness, formulating a serene interior even when perched on nature’s unpredictable landscapes.
| Aspect | Technique | Purpose | Outcome |
|---|---|---|---|
| Measurement | Use a tape measure and framing square | Accurate base dimensions | Right angles and equal sides |
| Leveling | Employ stakes and a level tool | Even tent floor surface | Comfort and stability |
| Material Choice | Select durable, weather-resistant fabric | Longevity and protection | A base that withstands the elements |
| Environmental Adaptation | Consider ground type for best fit | Foundation integrity | Less wear and optimal performance |
As I finalize the base, I’m mindful of the setting because the tent should complement its environment, not merely impose upon it. Depending on the ground type – be it sandy soil, rigid clay, or sturdy rock – my selection of stakes and their arrangement may vary, optimizing the tent base construction to hold firm no matter where my journey takes me.
Ultimately, the essence of a secure tent foundation lies in blending these measured techniques into a cohesive unit that acts as the launchpad for the remaining construction phases. With a robust and well-thought-out base, I pave the way for a tent that does more than just stand; it provides an unyielding shield in the wild, promising safety and serenity in the midst of nature’s grandeur.
DIY Tent Sewing: Adding Doors and Windows
As I progress in my DIY tent sewing project, prioritizing ventilation in tent design while bolstering shelter is key. To achieve optimal comfort and security, DIY tent openings like doors and windows become pivotal elements. They not only invite fresh air but also enrich the tent with layers of functional aesthetics. Crafting these features requires an astute balance—too small, and they won’t provide enough ventilation; too large, and they may compromise protection.
Design Considerations for Tent Openings
The planning stage for adding doors and windows entails detailed blueprints and an imaginative approach. I contemplate various shapes and sizes that could complement my tent’s structure—whether to opt for a classic rectangular door or introduce triangular windows for a custom touch. The choice hinges on the end goal: providing ample circulation without losing sight of safety and privacy.
Ensuring that every opening enhances the outdoor experience is instrumental; it’s a fusion of precision and functionality that beckons both attention and care.
Incorporating mesh panels into the design of doors and windows is another priority. This material promotes ventilation in tent design, allowing breezes to pass through while keeping unwelcome insects out. The strategic placement of these openings is equally important. I consider wind patterns and the orientation of the tent to channel airflow effectively throughout the interior.
Incorporating Ventilation while Maintaining Shelter
Added to the allure of adding doors and windows is the pursuit of a climate-adaptable tent, acknowledging that weather can shift from searing heat to sudden downpours. My design includes flaps or overhangs to protect meshed areas from rain intrusion, combining comfort with climate resilience. In this manner, I ensure a well-ventilated space that still stands as a fort against the elements.
Furthermore, it is critical to recognize the role of ventilation in managing condensation. Proper airflow through the tent reduces moisture buildup—a comfort often overlooked until one wakes up to dew-laden walls. Thus, strategically adding doors and windows is not only about granting spectacular views but also about creating an inviting and dry environment.

Below, I detail the practical considerations and dimensions I’ve taken into account for ensuring my DIY tent is equipped with efficient and protective openings:
| Feature | Dimension Consideration | Mesh Integration | Weatherproofing Strategy |
|---|---|---|---|
| Door | Height and width proportional to users; easy access | Mesh layer with roll-down flap | Overhang or awning for rain protection |
| Windows | Size for cross-breeze without structural compromise | Mesh with zip or velcro covers | Storm flaps or angled positioning |
| Ventilation Points | Adjusted based on tent size and shape | Mesh vents at different heights | Protective hoods or vents that can close |
| Skylights | Ample view of the sky; considerations for privacy | Clear, fine mesh | Sealable covers to prevent rain entry |
Ventilation and light are the essence of a comfortable tent, and with the right openings, I am on track to create a shelter that feels like a natural extension of the outdoors. This thoughtful integration of DIY tent openings will not just elevate my camping experience, but will clothe my wilderness corner in bespoke functionality and embrace.
Sewing Outdoor Gear: The Fly and Final Touches
The journey of crafting outdoor gear reaches its peak as I bring my focus to sewing the tent fly, arguably the most crucial element for shelter against the unpredictable elements. Like a protective cocoon, the fly safeguards the tent and its occupants from rain, wind, and dew, becoming the cornerstone of the tent’s resilience.
A significant piece of fabric is earmarked for the fly, one that’s carefully selected for its water-resistant qualities and suitability for the outdoors. Sewing the tent fly involves assiduous attention to detail to ensure it covers the entire expanse of the tent amply, extending over edges to prevent water from slipping into the shelter.
Techniques may vary, but I found aligning the corners and adjusting as needed gives my tent its distinct silhouette while boosting functionality. As I lay out the fabric, it’s a dance of precision and judicious management of materials, an exercise that underscores the symbiosis between form and function in crafting outdoor gear.
With the fly’s blueprint etched in fabric and the silhouette emerging from cloth cuttings, it is time for those final, defining features that elevate a simple structure to a personalized haven. These last touches encapsulate the accumulated knowledge gleaned through each step of crafting outdoor gear.
Adding final touches to tents is more than just an artistic pursuit; it’s a nuanced blend of aesthetics and practicality. Operational ease is bolstered with color-coded setup systems designed to make assembly straightforward, even for the first-time camper under a canopy of stars. Pockets sewn into the tent’s interior foster organization and convenience, keeping essentials within arm’s reach.
In every loop stitched and every fastener attached, a new layer of functionality and character is weaved into the narrative of the tent.
Below is my approach to implementing the final enhancements that depict my commitment to quality and my passion for the outdoors:
| Addition | Purpose | Methodology |
|---|---|---|
| Add Rainproof Pockets | Organization and easy access | Water-resistant materials, strategic placement |
| Color-Coded Set-Up System | Simplify assembly | Colored tags on tent poles and corresponding sleeves |
| Reinforced Seams | Enhanced durability | Double stitching on stress points |
| Custom Zipper Pulls | Ease of use and personal touch | Hand-crafted pulls for zippers |
As I secure the last piece of hardware and affix every clasp in place, the satisfaction of sewing the tent fly and adding final touches to tents swells within me. This embodiment of effort and creative expression not only serves as a testament to DIY dexterity but also stands ready to accompany me on every escapade under the open sky.
From Patterns to Parts: Making a Detailed Tent Parts List
Transitioning my ideas from tent patterns to an actual DIY tent creation means meticulously breaking down each component into a clear and comprehensive tent parts list. This critical step translates the physical mock-up of my tent into an itemized checklist, defining the scope of materials needed to bring the project to fruition.
While working on the prototype, I’ve captured every measurement, factoring in the necessary seam allowances, ensuring nothing is overlooked. This precision is paramount, as each dimension directly impacts the size, shape, and ultimately, the performance of the finished product in the great outdoors. My journey from sketch to structure exemplifies a harmony of form and function, with each recorded contour representing a future panel or seam in the ultimate assembly.

With guidance from well-established sewing principles and a dedication to creating a resilient shelter, my tent parts list serves as the bridge between design and creation. Here, every item is annotated, each measurement checked twice, ensuring my vision is faithfully translated from paper to pole, and needle to nylon.
| Part Name | Quantity | Dimensions | Material | Additional Notes |
|---|---|---|---|---|
| Tent Body Panels | 4 | 72″ x 60″ | Ripstop Nylon | Includes windows; add 1″ seam allowance for attachment |
| Tent Base | 1 | 85″ x 60″ | Durable Polyester | Water-resistant treatment recommended |
| Tent Fly | 1 | 92″ x 65″ | Silnylon | Extends beyond tent body for rain protection |
| Doors | 2 | 35″ x 45″ | Mesh and Ripstop Nylon | Roll-up design with toggle closures |
| Support Poles | 2 | Adjustable to 70″ | Aluminum | Lightweight, corrosion-resistant |
| Pegs and Guy Lines | 8 pegs, 4 lines | N/A | Durable Plastic/Metal, Paracord | Ensure secure anchoring |
| Storage Pockets | 3 | 12″ x 8″ | Ripstop Nylon | For organizing small items; place strategic locations |
As thorough as I strive to be in creating my DIY tent creation, the tent parts list also demands flexibility and adaptability. Circumstances will dictate revisions, with the environment suggesting modifications or the materials inspiring innovation. In each change, however, my list remains the reference point, the taskmaster ensuring that every piece, every cut, and every stitch contributes to a shelter that is both unique and effective against the wilderness it will face.
Handmade Camping Tent: Assembling Your DIY Creation
The assembly phase truly brings the essence of assembling a handmade tent to life. After days of preparing materials, stitching patterns, and envisioning the final form, I now stand before the culmination of effort—a flat spread of fabric ready to transform into a three-dimensional symbol of shelter and resilience. It is here, within the intertwining of needle and thread, that I find the very heart of craft meeting creativity.
Facing the Challenges of Hand Sewing
As I commence, the hand sewing challenges make themselves known. Guiding the needle through multiple layers of fabric requires a steady hand and a dose of patience. Even threading this point, I confront the realities of complex designs and thick materials. Securing the needle’s path becomes a balanced act of strength and finesse, a practiced technique honed over time.
Encountering areas like seams and corners tests my resolve, demanding attention to the pressure applied and the consistency of stitches. But as each panel connects and forms the semblance of a tent, so does my competence grow. I take pride in overcoming these hurdles, the stitching becoming as persistent and reliable as the tent’s eventual purpose—protection in the wild.
Creativity and Problem-Solving in Tent Crafting
The art of creative tent crafting unfurls with each problem solved. The alignment of zippers, the secure fastening of tie-downs, and the seamless incorporation of windows and doors—they all call for an inventive spirit. I am continuously adapting, allowing the process to steer me towards unexpected, yet functional solutions.
No template is without the need for adaptation, and here, amidst the evolving structure, I become a tailor of the outdoors. The addition of a makeshift awning or an unplanned pocket is not a misstep, but a stroke of inventiveness, born of the moment and necessity—a personalized touch on my DIY creation.
Yet, the true test of creativity emerges when envisioning solutions for integrating components like robust flooring or an expansive fly. These are the strokes that turn a swath of fabric into a bastion against the gusts and downpours that mother nature bestows.
| Component | Challenge Overcome | Creative Solution |
|---|---|---|
| Zippers | Aligning for smooth operation | Handcrafted zipper pulls for easier handling |
| Tie-Downs | Ensuring strong attachment points | Reinforcing seams around stress areas |
| Ventilation | Balancing airflow with protection | Adjustable mesh panels with waterproof covers |
| Seam Sealing | Protecting against water ingress | Applying sealant and creating drainage channels |
As the assembly of my tent approaches completion, I am reminded that assembling a handmade tent is not a straight path—it zigzags and backtracks as much as the trails it will soon occupy. But within this labyrinth lies growth, a rise to the challenges, and a nurturing of creativity that infuses this craft with life and purpose. I emerge not just with a structure of fabric and poles, but with a creation imbibed with the indelible mark of personal artistry and a readiness to embrace the wilderness.
Stitching a Tent by Hand: Decorative and Practical Seams
The process of stitching a tent by hand bridges the gap between durability and aesthetic elegance. It’s in the craftsmanship of practical tent stitching that the true essence of a homemade shelter comes to life. Flat felled seams are my go-to technique for their robust structure and sleek finish, proving to be as functional as they are pleasing to the eye.
But it’s the decorative tent seams that infuse personality into my canvas hideaway. Whether it’s a subtle, embroidered edge that traces the doorway or a signature cross-stitch along the base, these embellishments tell a story—they narrate the hands-on dedication poured into every fiber of this tent.
I believe that every stitch serves a purpose, be it for reinforcing the tension points or adding a flourish to the tent’s appearance. Below is a table highlighting different seam techniques I employ, striking a balance between functional necessities and decorative desires:
| Seam Type | Functionality | Decorative Value | Best Use |
|---|---|---|---|
| Flat Felled Seam | High durability, prevents fraying | Clean, professional look | Main tent body and high-stress areas |
| French Seam | Enclosed seam, smooth on both sides | Elegant, no visible raw edges | Interior lining or tent walls |
| Decorative Topstitch | Additional seam strength | Custom patterns and colors | Highlighting tent features like pockets and flaps |
| Embroidered Edging | Minimal functional value | Unique, personalized touch | Doorways, window covers, and trims |
| Reinforced Bar Tack | Strengthens points of tension | Selective use can add visual appeal | Attachment points for guy lines and zippers |
In hand-sewing my tent, each choice of stitch adds to the narrative of its creation. A functional seam guards against the elements, a decorative one casts a line of memory—a fused reflection of practicality and artistry. As I thread each stitch, I weave a piece of myself into the tapestry of my outdoor domicile, ensuring a creation that is as reliable as it is distinctive.
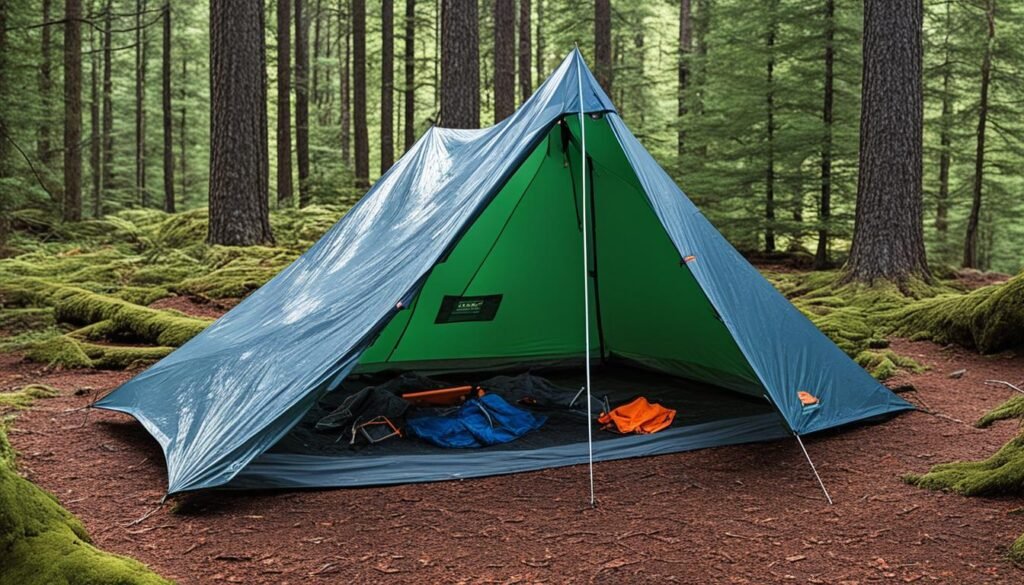
Making Memories with a Handmade A-Frame Tent
The concept of creating camping memories takes on a tangible form when you stitch together a handmade A-Frame tent. It’s a structure that not only fosters imaginative play and relaxation but also harks back to the classic days of pitching a tent beneath the stars. The inherent simplicity of its design puts the joy of DIY within reach, making it a perfect project for those looking to craft a lightweight yet enchanting DIY tent for kids.
Through constructing this personalized abode, the moments spent threading the canvas, anchoring the frame, and embellishing each corner stitch with love, manifest into an environment ripe for happiness and adventures. Whether nestled in the heart of your backyard or serving as a quaint refuge in the wilderness, this tent stands as a beacon of creativity and shared experiences.
| Activity | Benefit |
|---|---|
| Reading | Cozy, enclosed space promotes concentration and imagination. |
| Playing | Encourages role-playing and creativity in a personal haven. |
| Stargazing | Open design allows for uninterrupted night sky viewing. |
| Camping Trips | Easy to carry and set up for an instant, comfortable shelter. |
As I journey through the process of constructing my own A-Frame, delightful challenges emerge. Calculating the precise angles for the wood support, ensuring the stability for a breezy afternoon, and choosing a fabric that’s resilient yet welcoming—all are tasks that call upon a diverse set of skills and my passion for outdoor living.
- Simple and quick setup perfect for spontaneous outings
- Customizable size to fit any space or number of occupants
- Compact dismantling for easy storage and transport
- Creative liberty to decorate and theme the tent
There’s a unique joy in seeing a piece of fabric and wooden poles transform into a space that houses laughter, whispers, and dreams. Every time the tent is unfolded, it brings with it the prospect of new stories and cherished chapters in life’s grand adventure.
In this era of rapid consumption, taking the time to sew a handmade A-Frame tent is a noble act, one that slows us down and reminds us of the beauty in crafting something with our hands. It’s a tangible representation of love and effort—an emblem of the memories to be made. Each stitch is not only a part of the tent but also part of a story that will be told for years to come. This is the true beauty of creating camping memories with a DIY tent for kids—it’s not just about the structure; it’s about the legacy it represents.
Conclusion
Reflecting on the tapestry of experiences from this tent crafting journey, I am filled with a profound sense of satisfaction. Not only have I molded a pile of fabric and poles into a dependable sanctuary, but through my diligence and craftsmanship, a deeply personal connection to my creation has been forged. The skill of hand-sewing a tent has melded the functional with the personal, yielding not just a protective layer against nature’s whims, but a second skin that carries the indelible mark of my touch, my time, and my tales.
Reflecting on the Tent Crafting Journey
The path of DIY tent sewing has been riddled with challenges and triumphs. Throughout this endeavor, each step—from selecting materials to the final stitch—has been steeped in learning and growth. The process has underscored not only the importance of precision and planning but also the value of patience and perseverance. As my hands worked the fabric, my mind grappled with problem-solving, and my spirit rejoiced in creating something unique—a bespoke home under the stars. This tent crafting reflection is an internal mirror, one that reveals the beauty of crafting not just a product, but a palpable slice of the self.
Sharing Tips and Encouragement for Fellow DIYers
To those who tread the path of DIY tent sewing, my advice is layered in practicality and encouragement. Begin with a clear vision, invest in quality materials, and embrace the learning curve. Equip yourself with robust tent making techniques, and don’t shy away from asking the community for pointers. Understand that mistakes are simply the stepping stones to mastery. I offer these tips for DIY tent sewing as a guiding lantern to help illuminate your journey. And to all my fellow DIYers, let this be your encouragement: your hands have the power to stitch together not just fabric, but an enclave of freedom—a movable feast of adventure waiting to unfurl with every campground you call home.
FAQ
What essential factors should I consider when designing my own tent?
When designing a tent, consider your specific needs such as size, shape, portability, visibility, and weather resistance. Reflect on your past camping experiences to identify what worked and what didn’t, and look at market trends for modern tent innovations to inspire your design.
Where can I find materials for sewing my DIY tent?
You can find second-hand tent materials at garage sales, thrift stores, or online platforms. Look for old cabin tents with solid panels that you can repurpose. Choose fabrics and poles that offer durability and suit the conditions your tent will face.
Do I need to prepare the materials before I start sewing my tent?
Yes, preparing your materials is critical for the longevity and performance of your tent. Clean old tents with specialized or homemade detergents, and consider re-waterproofing if necessary. Remember that dyeing may not be effective for certain fabrics, so select materials in your preferred color or embrace their natural shades.
How do I deconstruct old tents for new projects?
Carefully dismantle old tents by gently ripping the seams to flatten the material and preserving any hardware like zippers and webbing. Use scissors or a hot-knife for clean cuts so you can efficiently repurpose the material.
What is the purpose of setting up a mock-up design for tents?
A mock-up design helps visualize the tent in full-scale using a 3D string model. This allows you to adjust dimensions and shapes before cutting the actual fabric, saving time, and reducing the possibility of mistakes during the construction process.
How should I handle fabric stretch and bias when laying out my tent panels?
To manage the fabric’s stretch and bias, make catenary cuts on fabric edges that are prone to stretching, and arrange your tent panels considering the stretch characteristics. This will help maintain the tent’s shape and resilience under tension.
Can you provide some tent sewing techniques for stitching the panels together?
When stitching your tent panels together, opt for strong and durable seams such as flat felled seams to ensure weather resistance and longevity. Practice different stitches on scraps before sewing the actual tent to build confidence and skill.
What should I focus on when ensuring the structural integrity of my tent?
Focus on accurate measurements, angles, and a well-planned assembly process when joining the panels. Use online calculators or manual methods to ensure the pieces fit together precisely, forming a stable and sturdy tent structure.
How do I construct a stable tent base?
For a stable tent base, ensure your corners are properly squared, and create a level foundation. This step is vital because it provides the groundwork for a secure and structurally sound tent.
What considerations are there for adding doors and windows to a tent?
When adding doors and windows, balance the need for ventilation against protection from the elements. Choose dimensions that will make the openings functional, and consider using mesh to keep insects out while allowing for airflow.
How do I approach sewing the tent fly and adding final touches?
For the tent fly, allocate enough fabric to allow for adjustments, and add practical features like pockets or color coding for easy setup. This layer is critical for weather protection, so sew it meticulously to fit over the tent framework properly.
How can I transform tent patterns into an organized parts list?
Document each pattern piece and their dimensions, including seam allowances, and create a visually clear diagram or schematic. This will help you ensure that all components are cut to the correct size and ready for assembly.
What challenges might I face when hand sewing my tent and how can I overcome them?
Hand sewing a tent may present challenges such as managing large fabric panels and incorporating hardware like zippers. Practice and patience are vital, as is creative problem-solving to find the best methods of connecting pieces.
How can practical and decorative seams enhance my handmade tent?
Practical seams like flat felled seams ensure durability and weatherproofing, while decorative stitching can add a personalized and aesthetic touch. Combining both types of seams can make your tent functional and unique.
What are the benefits of creating a handmade A-Frame tent?
A handmade A-Frame tent provides a simple, portable shelter that is easy to set up and takedown. It’s a beloved choice for camping trips and can be designed as a creative space for children, adding a personalized touch to your outdoor adventures.
Why is reflecting on the tent crafting journey important?
Reflecting on your tent crafting journey allows you to appreciate the hard work and creativity that goes into making your own gear. Sharing your experiences and tips can inspire others to start their own DIY projects, building a community of like-minded outdoor enthusiasts.