Setting up a 20×30 tent can be a bit overwhelming, especially when you’re preparing for a large group camping trip. However, with the right guidance and a step-by-step approach, it can be a breeze. In this guide, I will walk you through the process of setting up your tent, from choosing the perfect location to securing it properly.
Key Takeaways:
- Follow a step-by-step approach when setting up your 20×30 tent.
- Choose a suitable location that offers a flat surface and good drainage.
- Select the appropriate tent based on your group size and weather conditions.
- Familiarize yourself with the different components of a pole tent.
- Properly stake and secure the tent to ensure stability.
Choosing the Right Location
When it comes to setting up your 20×30 tent, choosing the right location is crucial for a successful camping experience. Consideration must be given to factors such as a flat and level surface, good drainage, sun and shade positioning, and accessibility for both guests and equipment.
One of the primary things you need to ensure is a flat surface for your tent. A flat surface provides stability and makes it easier to set up and secure the tent properly. Look for a location that is free of rocks, tree roots, and other debris that could potentially make the surface uneven or uncomfortable.
Good drainage is also essential. You don’t want your tent to be in a low-lying area prone to flooding or accumulating water during rain showers. This can lead to a soggy and uncomfortable camping experience or even damage to your tent.
Consider the positioning of the sun and shade when choosing the location for your tent. You want to take advantage of natural shade provided by trees or nearby structures to keep the tent cooler during hot summer days. Additionally, the sun’s positioning will affect the temperature and lighting inside the tent, so choose a location that aligns with your preferences.
Choosing a location with easy accessibility is key, especially if you have guests and equipment to transport. The closer the location to parking areas or amenities, the more convenient it will be for everyone involved.
By taking these tent location factors into consideration, you can ensure a comfortable and safe camping experience for yourself and your guests. Being mindful of the terrain, drainage, sun and shade, and accessibility will make the setup and enjoyment of your 20×30 tent much smoother.
Tent Location Considerations:
- Choose a flat surface, free of rocks and debris.
- Ensure good drainage to prevent water accumulation.
- Consider the position of the sun and shade.
- Choose a location with easy accessibility for guests and equipment.
Selecting the Appropriate Tent
Choosing the right tent is crucial for a successful camping experience. To ensure you select the most suitable tent for your needs, consider the following factors:
Tent Size
The size of the tent depends on the number of people you plan to accommodate. A 20×30 tent is ideal for larger groups and provides ample space for sleeping, storage, and moving around comfortably.
Tent Purpose
Determining the purpose of your tent will help you choose the right features and design. Are you planning a week-long camping trip, a backyard party, or a special event? Understanding the purpose will guide your decision on the type and durability of the tent.
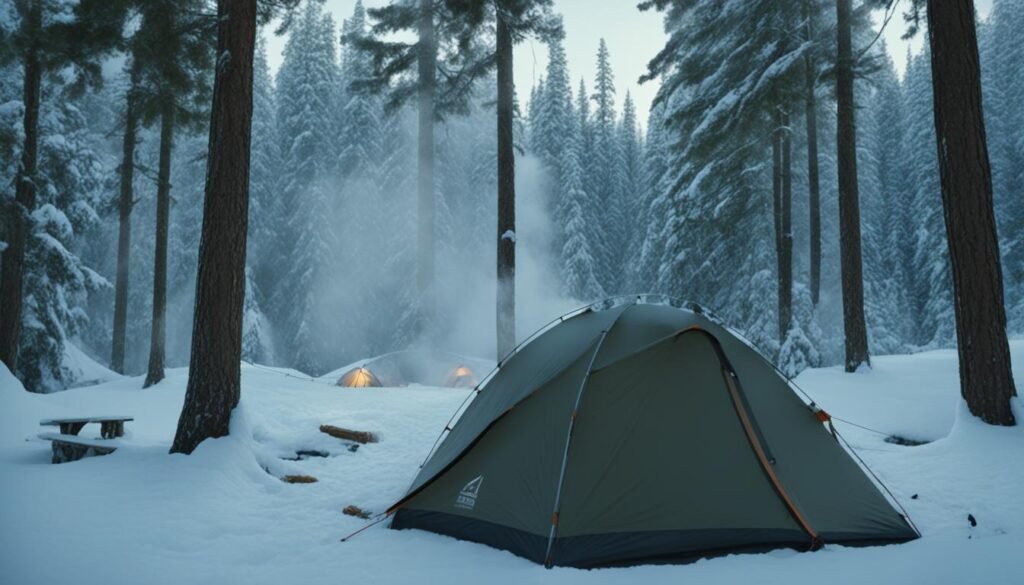
Tent Type for Weather
The weather conditions are a crucial consideration when selecting a tent. If you anticipate camping in areas with frequent rain or strong winds, opt for a tent specifically designed to withstand such conditions. Look for tents with reinforced materials, waterproof coatings, and sturdy construction.
Tent Budget Considerations
Your budget will play a significant role in the tent selection process. Determine the amount you’re willing to spend and look for options within that price range. Keep in mind that investing in a high-quality tent can provide better durability and longevity, making it a worthwhile long-term investment.
By carefully considering these factors, you can choose a tent that suits your needs, provides comfort, and ensures an enjoyable camping experience.
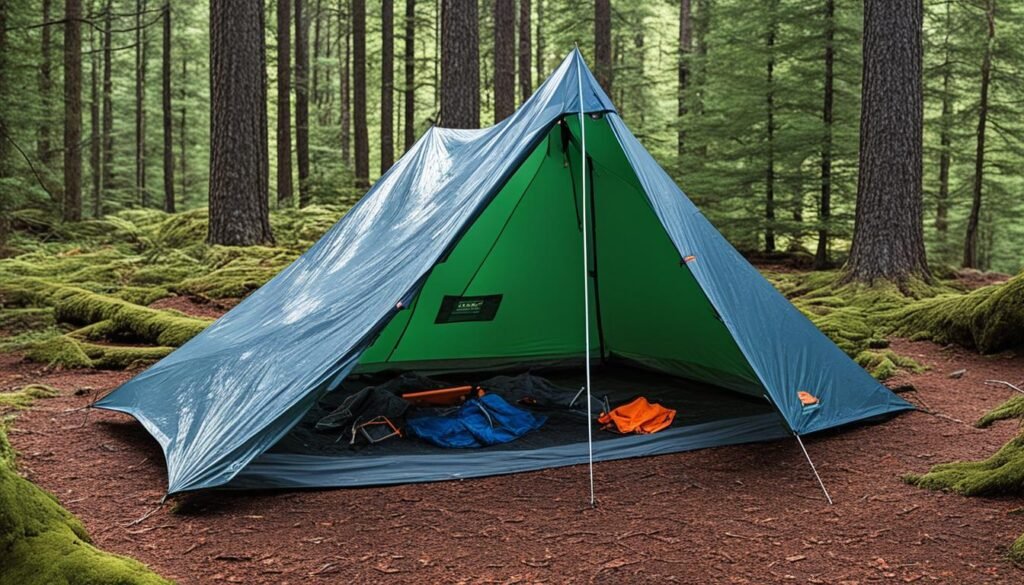
Understanding Tent Components
Familiarize yourself with the different components of a pole tent to ensure a smooth and successful setup process. Understanding the purpose and function of each component will help you assemble your tent with ease.
Tent Poles
The tent poles provide the structure and support for the tent. They are typically made of lightweight materials such as aluminum or fiberglass. Understanding how to properly assemble and connect the poles is essential for a sturdy and secure tent.
Tent Stakes
Tent stakes are used to anchor the tent to the ground. They are inserted into the soil and provide stability and resistance against winds. Different types of tent stakes are available, including metal stakes and plastic stakes. Choosing the appropriate stakes for your camping environment is crucial for a secure setup.
Tent Body
The tent body refers to the main fabric structure of the tent. It provides shelter and protection from the elements. The tent body is typically made of durable and waterproof materials, ensuring comfort and safety during your camping experience.
Tent Frame
The tent frame is the internal structure that supports the tent body. It consists of the tent poles and connectors, providing stability and shape to the tent. Understanding how to assemble and connect the tent frame is essential for a secure and well-structured tent.
Tent Rainfly
The tent rainfly is an additional waterproof layer that covers the tent body. It provides an extra barrier against rain and keeps the tent dry. Attaching and securing the rainfly properly is important for protecting the tent and its occupants from wet weather.
Tent Footprint
The tent footprint is a ground cloth or tarp placed beneath the tent to protect the tent floor from dirt, rocks, and moisture. It acts as a barrier between the tent and the ground, extending the lifespan of the tent. Using a tent footprint is highly recommended to maintain the longevity of your tent.
Tent Shock Cord
The tent shock cord is an elastic cord threaded through the tent poles. It provides tension and flexibility to the tent structure. Understanding how to properly thread and tension the shock cord is important for an efficient and secure tent setup.
Tent Top
The tent top refers to the uppermost portion of the tent, forming the roof. It is typically made of weather-resistant and durable fabric. The tent top provides protection from the elements and helps maintain the temperature inside the tent.
Tent Fabric
The tent fabric refers to the material used for the tent body, rainfly, and other components. It is important to choose a tent with high-quality fabric that is waterproof, durable, and resistant to UV rays. Understanding the properties of the fabric will ensure a comfortable and long-lasting tent.
Tent Vents
Tent vents are openings or mesh panels strategically placed on the tent to allow for proper air circulation. They help prevent condensation and reduce the buildup of heat inside the tent. Understanding the location and purpose of tent vents will ensure good ventilation and a comfortable camping experience.
Tent Windows
Tent windows are transparent panels that provide natural light and a view of the surrounding environment. They can be opened or closed depending on your preference and weather conditions. Understanding how to properly operate and secure tent windows is important for ventilation and enjoying the outdoor scenery.
Tent Walls
Tent walls are additional fabric panels that can be attached to the tent to create separate rooms or provide privacy. They can be installed or removed based on your camping needs. Understanding how to properly attach and secure tent walls will enhance the versatility and functionality of your tent.
| Component | Description |
|---|---|
| Tent Poles | Provide structure and support |
| Tent Stakes | Anchor the tent to the ground |
| Tent Body | Main fabric structure of the tent |
| Tent Frame | Internal support structure |
| Tent Rainfly | Additional waterproof layer |
| Tent Footprint | Protects tent floor from dirt and moisture |
| Tent Shock Cord | Elastic cord for tension |
| Tent Top | Uppermost portion forming the roof |
| Tent Fabric | Material used for the tent components |
| Tent Vents | Openings for air circulation |
| Tent Windows | Transparent panels for natural light |
| Tent Walls | Additional fabric panels for privacy |
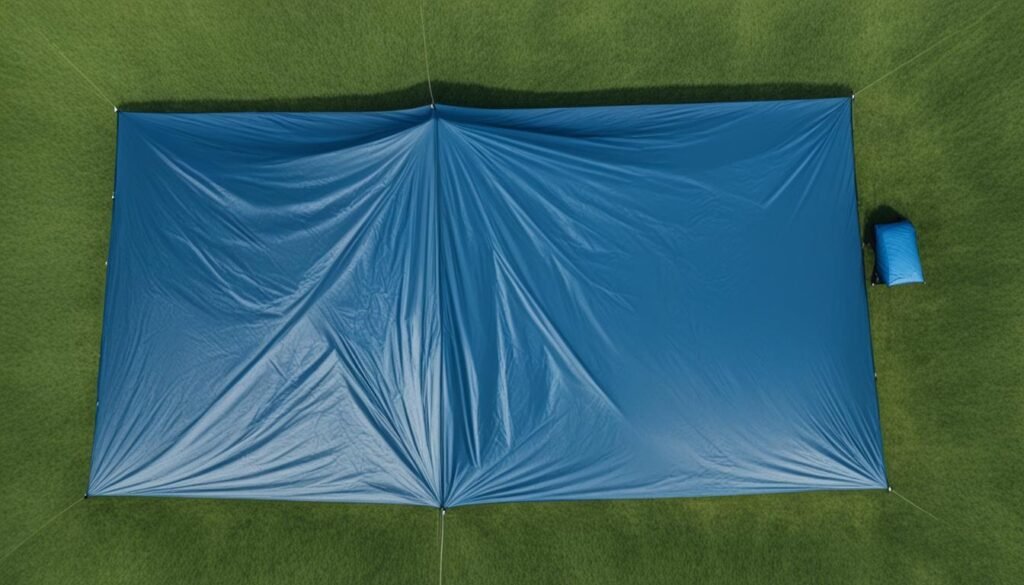
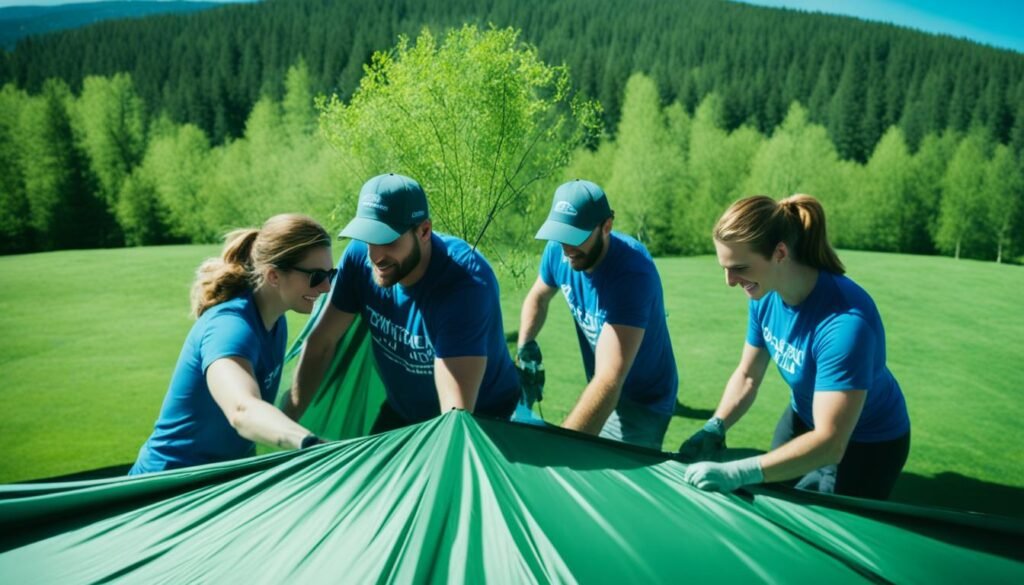
Setting Up the Tent
Follow this step-by-step guide to set up your 20×30 tent. The tent setup process involves several key steps, including tent location preparation, tent pole assembly, tent raising, and tent securing. By following these instructions, you can ensure a successful tent setup for your outdoor event.
Tent Location Preparation
Before setting up your tent, it’s important to choose a suitable location. Look for a flat surface that is free of rocks and debris. Clear the area of any sharp objects that could potentially damage the tent. It’s also advisable to select a location with good drainage to avoid any water accumulation inside the tent. Take into consideration the position of the sun and shade to ensure maximum comfort for your guests. Lastly, ensure that the location is easily accessible for both guests and the necessary equipment.
Tent Pole Assembly
Once you’ve chosen the location, unpack your tent and start assembling the poles. Carefully follow the manufacturer’s instructions to ensure proper assembly. Most tents come with numbered or color-coded poles, making it easier to identify and connect the corresponding sections. Make sure all the poles are securely connected before proceeding to the next step.
Tent Raising
With the help of a few people, start raising the tent. Begin by lifting one side of the tent while others hold the poles in an upright position. Gradually raise the tent to its full height, ensuring that the poles remain stable and properly aligned. It’s recommended to have someone guide the tent as it is being raised to prevent any accidental damage. Take your time during this step to ensure a safe and sturdy setup.
Tent Securing
Once the tent is raised, it’s crucial to properly secure it. Start by staking down the tent using stakes or pegs provided with the tent. Insert the stakes at a 45-degree angle, driving them securely into the ground. Leave enough length above the ground to prevent them from dislodging. Attach the guy ropes to the designated points on the tent and secure them to additional stakes or anchor points. This step provides extra stability and prevents the tent from shifting or collapsing in windy conditions.
By following this step-by-step tent setup guide, you will have your 20×30 tent ready for your outdoor event. Remember to pay close attention to the tent location preparation, tent pole assembly, tent raising, and tent securing process to ensure a safe and enjoyable experience for all.
Are the Tent Setup Instructions for Large Group Camping Similar to Pitching a Beginner’s Shelter?
Yes, the tent setup instructions for large group camping are quite similar to pitching a beginner’s tent. Both require following step-by-step guides, connecting poles, securing stakes, and ensuring proper tension. The main difference lies in scale and complexity, but the principles of beginner’s tent pitching still apply.
Staking the Tent
Staking the tent is a critical part of ensuring its stability and security. To properly stake your 20×30 tent, follow these steps:
- Begin by driving the stakes into the ground at a 45-degree angle, using a mallet or hammer. Make sure the stakes are fully inserted, so they provide maximum hold.
- Place the stakes at strategic positions around the tent, focusing on the corners and any areas where the tent may be exposed to high winds or other external forces.
- Attach the guy ropes to the tent and secure them to the stakes. This will provide added stability and prevent the tent from being easily swayed by wind or movement.
- The number of stakes required will depend on the size of your tent and the prevailing weather conditions. As a general guideline, use the following stake quantities:
- 20×30 Tent: We recommend using at least 12 stakes for a secure setup.
By staking your tent properly, you can ensure that it remains firmly in place, even during challenging weather conditions. This will provide you and your guests with a safe and comfortable camping experience.
Securing the Tent
When setting up your pole tent, ensuring its stability is crucial for a safe and enjoyable camping experience. Here are some effective methods to secure your tent:
1. Using Weights
One of the easiest ways to anchor your tent is by using weights. Attach weights to each corner of the tent to prevent it from shifting or being blown away by strong winds. You can use sandbags, water containers, or specially designed tent weights.
2. Windbreaks
Setting up windbreaks around your tent can help reduce the impact of strong winds and provide extra stability. Utilize natural barriers such as trees, bushes, or hills to create a shield against the wind. Alternatively, you can use portable windbreak panels or fabric to create a barrier around your tent.
3. Bungee Ropes
Bungee ropes are an excellent tool to absorb the impact of windy conditions. Attach bungee ropes to the tent’s guy lines, connecting them to secure points on the ground. This method allows the tent to flex and absorb the force of the wind, reducing strain on the tent structure.
4. Proper Tent Installation
Ensuring that your tent is correctly installed plays a vital role in its stability. Follow the manufacturer’s instructions carefully, paying attention to the correct placement of poles, stakes, and guy lines. Double-check that all components are securely attached and tightened to minimize the risk of the tent collapsing or shifting.
5. Checking for Security
Regularly inspect your tent to ensure that all parts are secure. Check the tension of guy lines and make any necessary adjustments. Also, examine the stakes to ensure they are fully inserted into the ground at the appropriate angle. By regularly inspecting and reinforcing the security of your tent, you can prevent accidental damage and maintain its stability.
By utilizing these tent securing methods, such as weights, windbreaks, bungee ropes, and proper installation, you can ensure that your pole tent remains secure even in challenging weather conditions.

| Tent Securing Methods | Advantages | Disadvantages |
|---|---|---|
| Using Weights |
|
|
| Windbreaks |
|
|
| Bungee Ropes |
|
|
| Proper Tent Installation |
|
|
Frame Tents
When planning your outdoor gathering, frame tents are an excellent option to consider. These tents offer versatility and stability, making them ideal for various events. Whether you’re hosting a small party or a large gathering, frame tents come in different sizes to suit your needs. Sizes such as 10×10, 20×20, and 20×30 are available, each with its own setup guide and assembly instructions.
Frame tents are known for their durability and easy setup. With sturdy frames and tensioned fabric, they provide a reliable shelter for your event. Whether you’re setting up in a backyard, park, or any outdoor space, frame tents can be easily assembled and disassembled, making them convenient for different occasions.
Setting up a frame tent is relatively straightforward. It typically involves connecting the frame components, inserting the tent poles, and securing the fabric. Many frame tent manufacturers provide detailed assembly guides and instructions to ensure a smooth setup process.
Advantages of Frame Tents:
- Stability: Frame tents feature a robust framework that provides stability and can withstand various weather conditions.
- Flexibility: Frame tents offer adjustable canopy heights, allowing you to customize the space according to your needs.
- Spaciousness: With no obstructing center poles, frame tents maximize the usable space, providing ample room for guests and event activities.
- Durability: The sturdy construction of frame tents ensures they can withstand prolonged use and remain in top condition.
Frame tents offer versatility, stability, and ample space for your outdoor gathering. With different sizes available, each with its own setup guide, you can choose the perfect frame tent for your event.
Here is an example of a frame tent assembly guide for a 20×30 size:
| Frame Tent Assembly Guide (20×30 Size) |
|---|
|
With this assembly guide, you’ll be able to successfully set up your 20×30 frame tent and create a comfortable and inviting space for your event.
Pole Tents
When it comes to outdoor events, pole tents are a popular choice, especially the 20×30 size. These tents offer ample space and are perfectly suited for larger groups.
For step-by-step instructions on setting up your pole tent, refer to the pole tent setup guide. It will walk you through the entire tent assembly process, ensuring you have a hassle-free experience.
Advantages of Pole Tents
- Spacious: With their high center poles and graceful curves, pole tents provide a spacious and airy atmosphere, making them ideal for events that require ample room.
- Easy Assembly: Pole tent setup is relatively straightforward, requiring minimal effort compared to other tent types.
- Flexible Sizing: Pole tents come in various sizes, including the popular 20×30 size, allowing you to choose the dimensions that best fit your event.
- Durable and Reliable: Constructed with sturdy poles and durable materials, pole tents offer reliability and stability in various weather conditions.
Sample Pole Tent Setup Instructions
Follow these general guidelines to set up your pole tent:
- Position the tent on a flat surface, ensuring it is free from any sharp objects or debris.
- Unpack and lay out all the tent components, including the poles, stakes, and tent fabric.
- Assemble the poles according to the manufacturer’s instructions, making sure they are securely connected.
- With the help of a few assistants, raise the assembled poles, making sure they are vertical and centered within the tent fabric.
- Attach the tent fabric to the poles, starting from the center and working outward.
- Secure the tent by staking down each corner and inserting stakes at regular intervals along the tent perimeter.
- Use guy ropes to provide additional stability, attaching them to the tent corners and staking them securely into the ground.
Remember, specific instructions may vary depending on the brand and model of your pole tent, so always refer to the manufacturer’s assembly guide for detailed instructions.
| Tent Size | Occupancy Capacity | Recommended Uses |
|---|---|---|
| 20×30 | 60-100 people | Weddings, corporate events, large parties |
| 30×40 | 120-200 people | Outdoor festivals, trade shows, small concerts |
| 40×60 | 240-400 people | Large-scale events, fundraisers, exhibitions |
As you can see from the table above, pole tents are available in various sizes to accommodate different occupancy needs. Consider the size of your event and choose a tent size that provides optimal space for your guests.
With their spacious interiors and straightforward assembly process, pole tents are an excellent choice for your outdoor event. Follow the setup instructions, and you’ll have a beautiful and comfortable space for your guests to enjoy.
Cross Cable Tents
If you’re looking for a unique and stylish outdoor space for your gathering, cross cable tents are an excellent option to consider. These tents come in various sizes, ensuring that you can find the perfect fit for your event. Whether you’re hosting an intimate gathering or a larger outdoor celebration, cross cable tents provide a comfortable and visually appealing environment.
Why Choose Cross Cable Tents?
One of the key advantages of cross cable tents is their sturdy and reliable construction. The innovative cross cable design provides excellent stability, allowing the tent to withstand various weather conditions. This makes them ideal for outdoor events and gatherings.
Another benefit of cross cable tents is their spacious interior. The unique design eliminates the need for center poles, providing a clear and open space for maximum functionality and flexibility. Whether you’re planning a wedding reception, corporate event, or outdoor party, cross cable tents offer ample room to accommodate your guests and set up tables, chairs, and other equipment.
Setup Sizes and Assembly Guides
Cross cable tents are available in different sizes to suit various event requirements. From smaller sizes suitable for intimate gatherings to larger tents perfect for hosting large groups, there is a size that fits your needs.
Each cross cable tent comes with its own setup instructions and assembly guide, ensuring a smooth and efficient setup process. These guides provide step-by-step instructions, helping you assemble the tent correctly and securely. Following the setup instructions will ensure that your cross cable tent is properly erected and ready for your event.
Pop-Up Tents
If you’re looking for an easy and effortless option, consider a pop-up tent. These tents come in various sizes, such as 10×10 and 20×20, and have simple assembly instructions. Pop-up tents are quick to set up and take down.
Advantages of Pop-Up Tents:
- Easy Tent Setup: Pop-up tents are designed for quick and hassle-free assembly. With their simple setup instructions, you can have your tent ready in no time.
- Convenient Portability: Pop-up tents are lightweight and compact, making them easy to transport and store. They are perfect for camping trips, outdoor events, and festivals.
- Various Sizes Available: Whether you need a small tent for solo camping or a larger one for group gatherings, pop-up tents come in a range of sizes to accommodate your needs.
- Durable Construction: Despite their convenient setup, pop-up tents are built to withstand outdoor conditions. They are made with sturdy materials that offer durability and protection.
Pop-up tents are a great choice for those who value convenience and efficiency in their camping experience. With their easy setup, you can spend more time enjoying the outdoors and less time struggling with complicated assembly processes.
Sidewalls
Sidewalls are a valuable addition to enhance your tent setup. They provide extra protection from the elements and offer privacy for your event. With various sidewall options available, you can customize your 20×30 tent to suit your specific needs.
Benefits of Sidewalls
- Protection: Sidewalls provide an additional layer of protection against wind, rain, and sun, ensuring a comfortable environment inside the tent.
- Privacy: Sidewalls create a private space for your event, making guests feel more comfortable and allowing for intimate gatherings.
- Visual Appeal: Sidewalls add a polished and professional look to your tent setup, elevating the aesthetic appeal of your event.
Sidewall Options
When choosing sidewalls for your 20×30 tent, you have several options to consider:
- Standard Solid Sidewalls: These sidewalls offer complete coverage with solid fabric and are ideal for events where privacy and protection are top priorities.
- Window Sidewalls: Window sidewalls feature transparent windows that allow natural light inside the tent while maintaining privacy. They are perfect for events that require visibility or scenic views.
- Mesh Sidewalls: Mesh sidewalls are designed to offer ventilation while keeping insects and bugs out. They provide excellent airflow and ensure a comfortable atmosphere.
Installing Sidewalls
Installing sidewalls for your 20×30 tent is a straightforward process. Follow these steps:
- Attach the sidewall starting from one corner of the tent.
- Ensure the sidewall is aligned with the edges of the tent and secure it using the provided fasteners.
- Repeat the process for each sidewall, ensuring a snug fit and proper attachment.
An illustration of sidewall installation:
Sidewall Sizes
Sidewalls come in various sizes to match the dimensions of your 20×30 tent. They are designed to fit securely and seamlessly, providing optimal coverage and functionality.
| Sidewall Type | Size | Features |
|---|---|---|
| Standard Solid Sidewalls | 20×7 feet | Complete coverage, enhances privacy |
| Window Sidewalls | 20×7 feet | Transparent windows, allows natural light |
| Mesh Sidewalls | 20×7 feet | Mesh fabric, provides ventilation |
Choose the sidewalls that best suit your event requirements and create a comfortable and inviting atmosphere inside your 20×30 tent.
Compare Local Campground Options
If you’re planning a large group camping event, it’s important to explore local campground options to ensure a memorable and enjoyable experience. Local campgrounds often offer a range of amenities and services that cater to the needs of large groups. By comparing different campgrounds, you can find the perfect location that suits your requirements and provides the necessary facilities for your event.
When researching local campgrounds, consider the following:
- The campground’s capacity: Ensure that the campground can accommodate your group size comfortably. Check the number of available campsites or accommodations to make sure everyone has enough space.
- Group options: Look for campgrounds that offer specific options for large groups. Some campgrounds may have designated areas or blocks of campsites reserved for group camping, making it easier to keep your group together.
- Event services: Consider campgrounds that provide event services such as pavilion rentals or catering options. These services can enhance your camping experience and make organizing group activities more convenient.
- Campground extras: Some campgrounds go the extra mile by offering additional amenities like playgrounds, swimming pools, hiking trails, or recreational facilities. These extras can add to the overall enjoyment of your event.
- Tents for large groups: If you don’t have enough tents for your group, look for campgrounds that offer tent rentals or have large tents available for rent. This can be a convenient option for those who don’t own or want to transport large tents.
By carefully considering these factors and comparing different local campground options, you’ll be able to choose the best campground for your large group camping event. Take the time to read reviews, check out the campground’s website, and contact the campground directly for more information. With the right choice, you’ll create lasting memories in a beautiful outdoor setting.

| Campground Name | Capacity | Group Options | Event Services | Campground Extras | Tents for Large Groups |
|---|---|---|---|---|---|
| Campground A | 100 campsites | Designated group area | Pavilion rentals | Playground, swimming pool | Tent rentals available |
| Campground B | 50 campsites | Group campsites | Catering options | Hiking trails, recreational facilities | Large tents for rent |
| Campground C | 200 campsites | Reserved group blocks | None | Swimming pool, fishing lake | Tent rentals available |
Dedicated Group Codes / Campsite Blocks
If you’re organizing lodging for a large group, inquiring about dedicated group codes or campsite blocks can provide you with convenience and coordination for group reservations. These options ensure that your group can stay together and have peace of mind knowing that the campsites won’t get booked by others. It’s the perfect solution for campsite booking for large groups.
When you inquire about dedicated group codes, you’ll be assigned a unique code that can be used by your group members when making their individual reservations. This code guarantees that your group will be allocated campsite blocks that are in close proximity to each other, allowing you to create a sense of community during your camping experience.
Moreover, campsite blocks offer the flexibility to accommodate the specific needs of your group. Whether you prefer larger campsites to set up communal areas or prefer to have neighboring campsites to keep families closer, campsite blocks provide the level of customization required for a successful large group camping trip.
By utilizing dedicated group codes and campsite blocks, you can streamline the reservation process and eliminate the hassle of individually coordinating with each member of your group. It ensures that everyone can reserve their spot at the campground without any unwanted surprises or inconveniences.
Overall, dedicated group codes and campsite blocks are invaluable tools for securing the perfect camping experience for your large group. Whether you’re planning a family reunion, corporate retreat, or any other group gathering, these options make campsite booking seamless and guarantee a memorable outdoor adventure for everyone involved.
Benefits of Dedicated Group Codes / Campsite Blocks:
- Guarantees that your group stays together
- Prevents campsites from getting booked by others
- Allows for customization of campsite arrangements
- Simplifies the reservation process for group members
- Creates a sense of community during the camping experience
Pavilion Party Tents & Games
Looking to add some extra flair and fun to your outdoor event? Consider renting a pavilion party tent! Pavilion party tents provide additional covered seating and space for various activities, ensuring that your guests have a comfortable and enjoyable experience.
With a pavilion party tent, you can create a designated area where guests can relax, socialize, and enjoy the festivities. These tents offer protection from the elements, providing shade on sunny days and shelter during inclement weather.
When it comes to seating options, pavilion party tents offer flexibility. You can choose from different arrangements such as banquet-style seating for formal events or lounge seating for a more relaxed atmosphere. Customize the seating arrangement to suit the needs and style of your event.
To make your outdoor gathering even more entertaining, consider incorporating rental games into the setup. From classic lawn games like cornhole and giant Jenga to interactive games like inflatable obstacle courses and bounce houses, there are plenty of options to cater to guests of all ages.
Pavilion Party Tent Rental Options
When renting a pavilion party tent, you’ll have a variety of options to choose from. Here are some popular pavilion party tent rental sizes:
- 10×10 Pavilion Party Tent
- 20×20 Pavilion Party Tent
- 20×30 Pavilion Party Tent
These sizes can accommodate different group sizes and event requirements. Whether you’re hosting a small gathering or a larger celebration, there’s a pavilion party tent size that’s perfect for your needs.
Additionally, rental companies often provide a range of accessories to enhance your pavilion party tent setup, such as sidewalls for added privacy and protection, lighting options for evening events, and flooring solutions to create a solid and comfortable surface.
| Benefits of Pavilion Party Tents | Benefits of Rental Games |
|---|---|
| Provides additional covered seating | Offers entertainment for all ages |
| Protection from the elements | Promotes social interaction and engagement |
| Flexible seating options | Wide variety of games to choose from |
| Customizable to suit different event styles | Creates a festive and lively atmosphere |
With pavilion party tents and rental games, you can elevate the experience of your outdoor event, creating a memorable and enjoyable gathering for all attendees. Explore the options available for your 20×30 tent setup and make your event a success.
Conclusion
Setting up a 20×30 tent for your large group camping event requires careful planning and attention to detail. By following the step-by-step process and considering the location, tent selection, and understanding the tent components, you can ensure a successful tent setup.
Choosing the right location is crucial for a comfortable and safe camping experience. Look for a flat surface free of rocks and debris, consider sun and shade positioning, and ensure good drainage. Accessibility for guests and equipment is also important.
When selecting the appropriate tent, consider the purpose of the tent, the size needed for your group, the weather conditions you’ll be camping in, and your budget. Pole tents, such as the 20×30 size, are popular for their ample space and durability.
Ensure a stable tent setup by staking the tent at a 45-degree angle, attaching guy ropes for added stability, and using weights, windbreaks, and bungee ropes to secure it. Proper installation and checking all parts are secure are essential for tent security.
FAQ
How do I choose the right location for my 20×30 tent?
Consider factors such as a flat surface, good drainage, sun and shade positioning, and accessibility for guests and equipment.
What factors should I consider when selecting a tent?
Consider the purpose of the tent, the size needed for the group, the weather conditions, and your budget.
What are the different components of a pole tent?
The components include tent poles, stakes, tent body, frame, rainfly, footprint, shock cord, top, fabric, vents, windows, and walls.
How do I set up my 20×30 tent?
Start by choosing a suitable location, then unpack and assemble the poles. Next, raise the tent with the help of a few people and secure it by staking it down and attaching guy ropes.
How do I stake my tent?
Drive the stakes into the ground at a 45-degree angle, making sure they are fully inserted and secure. Attach the guy ropes to the tent and stakes for added stability.
How do I secure my tent?
Use weights to anchor the tent, set up windbreaks, and use bungee ropes to absorb wind impact. Ensure the tent is installed correctly and all parts are secure.
What are frame tents?
Frame tents are another option for outdoor gatherings. They offer versatility and stability and come in various sizes.
Why are pole tents popular for outdoor events?
Pole tents, including the 20×30 size, are popular for their ample space and suitability for larger groups.
What are cross cable tents?
Cross cable tents provide a unique and stylish outdoor space. They come in different sizes and have their own setup instructions.
Are there easier options than setting up a pole tent?
Yes, pop-up tents are quick to set up and take down, making them an easy and effortless option.
Can I add sidewalls to my tent?
Yes, sidewalls provide extra protection from the elements and privacy for your event. Explore different options and learn how to install them.
What should I consider when exploring local campground options?
Look for campgrounds that offer extras such as pavilion rentals, event services, group codes, and catering options to enhance your camping experience.
How can I keep my group together at a campground?
Inquire about dedicated group codes or campsite blocks to ensure your group stays together and campsites don’t get booked by others.
Can I rent a pavilion party tent for my event?
Yes, pavilion party tents provide additional covered seating and space for activities. Rental games can also add fun to your outdoor gathering.
What do I need to know about setting up a 20×30 tent?
Setting up a 20×30 tent requires careful consideration of the location, tent selection, understanding of tent components, and following a step-by-step process, including proper staking and securing techniques.