Tent mesh screens can easily get damaged, either from small holes or larger tears. However, with the right techniques and materials, repairing mesh on a tent can be a simple DIY task. In this guide, I will explore different methods and supplies for effectively repairing tent mesh, ensuring a bug-free and enjoyable outdoor adventure.
Key Takeaways:
- Learn how to repair mesh on a tent to prolong the lifespan of your outdoor gear.
- Understand the different types of mesh damage, such as small holes, tears, and mesh separation at the seams.
- Discover patch kits as a popular choice for repairing tent mesh, along with the steps involved in using them.
- Explore sewing as an alternative repair method, including the necessary tools and stitching patterns.
- Find out how to repair mesh separation at the seam using Gear Aid Seam Grip.
Understanding Different Types of Mesh Damage
When it comes to the repair of tent mesh, understanding the different types of damage is essential. Properly assessing the damage will help determine the most suitable repair method. The three common types of mesh damage include:
1. Small Holes
Small holes in the tent mesh can occur due to various reasons, such as contact with sharp objects or wear and tear over time. These holes are typically less than half an inch in diameter. Repairing small holes is a relatively simple process that involves patching or stitching.
2. Tears of Varying Sizes
Tears in the tent mesh can occur from accidents, branches, or objects forcefully coming into contact with the mesh. These tears can range in size, from small slits to larger openings. Repairing tears requires different techniques depending on the size and extent of the damage. Patching or sewing methods may be necessary for effective repair.
3. Mesh Separation at the Seams
Mesh separation at the seams can occur when the mesh fabric detaches from the seam due to stress or improper stitching. This type of damage often requires adhesive bonding to reattach the mesh to the seam. Gear Aid Seam Grip is a recommended adhesive for repairing mesh separation at the seams.
Before proceeding with any repairs, it’s crucial to carefully assess the type and extent of the damage. This will ensure that you choose the most appropriate repair method and achieve a successful outcome.
Stay tuned for the next section where I will explore the different methods and supplies for repairing tent mesh using patch kits.
Repairing Mesh with Patch Kits
When it comes to repairing mesh on tents, patch kits are a popular and convenient option. These kits usually contain adhesive patches that can be easily applied to the damaged area, providing a quick and effective solution. However, it is crucial to use patch kits specifically designed for tent mesh to ensure proper adhesion. While other materials like window screen repair tape may seem like a viable alternative, they may not bond well with the mesh, compromising the longevity of the repair.
One highly recommended brand for mesh repair patch kits is Gear Aid. Their mesh repair patches feature adhesive on the edges, allowing for easy application. These patches are sold in circular shapes, ensuring seamless integration with the tent mesh. By using these adhesive patches, you can effectively mend tears and holes in your tent mesh, restoring its integrity and prolonging its lifespan.
| Image for illustration purposes only |
Steps to Repairing Tent Mesh with a Patch
Repairing tent mesh with a patch is a relatively straightforward process. By following these steps, you can effectively mend any tears or holes in your tent mesh and ensure a bug-free camping experience. Here is a simple guide detailing the necessary steps to repair tent mesh:
- Cleaning the Mesh: Before applying the patch, it is essential to clean both sides of the mesh thoroughly. Use an alcohol wipe to remove any dirt, debris, or adhesive residue that could hinder the patch’s effectiveness.
- Applying the Patch: Once the mesh is clean, lay the patch over the hole or tear. Make sure the patch extends beyond the damaged area to provide sufficient coverage and reinforcement.
- Patching Both Sides of the Screen: To ensure a strong and durable repair, it is recommended to apply the patch on both sides of the screen. This double-layered approach enhances the patch’s bond and strengthens the repaired area.
- Curing Time: After applying the patch to both sides of the screen, allow it to cure for at least 24 hours. This curing time ensures that the adhesive forms a secure bond with the mesh, maximizing the longevity of the repair.
By following these steps, you can effectively repair tent mesh, restoring its functionality and preventing further damage. Remember to clean the mesh, apply the patch on both sides, and allow sufficient curing time for a successful repair.
Sewing Mesh as an Alternative Repair Method
In some cases, sewing may be a more suitable repair method for tent mesh. This is especially true for larger or more complicated repairs. Sewing can be done by hand or with a sewing machine, using nylon thread and specific stitching patterns. If the mesh is ripped in a straight line, it can be sewn directly. For holes or jagged tears, a patch of mesh fabric can be sewn over the damaged area.
To prevent tension when the tent is set up, it is recommended to sew a zig-zag pattern about ¼ inch away from the edge of the hole or tear. This technique distributes the stress evenly along the seam, ensuring a stronger and more durable repair.
Tools needed for sewing mesh repair:
- Nylon thread: Strong and durable thread suitable for outdoor repairs.
- Sewing machine or needle: Choose the appropriate tool based on the size and complexity of the repair.
- Scissors: Use sharp, fabric scissors to cut the mesh fabric for patches or trimming excess thread.
- Mesh fabric patch: For larger holes or jagged tears, a separate piece of mesh fabric can be used as a patch.
- Thimble (optional): If sewing by hand, a thimble can protect your finger while pushing the needle through the tough mesh fabric.
When sewing the mesh fabric, it’s essential to use the correct stitching patterns and techniques:
- If the mesh is ripped in a straight line, start sewing from one end to the other, using a straight stitch pattern.
- For holes or jagged tears, place the patch over the damaged area and secure it in place. Then, sew around the edges of the patch using a zig-zag stitch pattern. This helps distribute tension and reinforces the repair.
Sewing mesh provides a durable and long-lasting repair solution, especially for more extensive or complicated damages. It allows you to maintain the integrity of the tent and prevent further deterioration of the mesh, ensuring a bug-free and enjoyable camping experience.

Repairing Mesh Separation at the Seam
If the tent mesh is separating at the seam, a quick and easy repair can be done using Gear Aid Seam Grip. This adhesive is specifically designed for repairing outdoor gear and can effectively bond the mesh back together. Simply apply the Seam Grip to the separated area and allow it to cure.
Repairing mesh separation at the seam is crucial to maintaining the integrity of your tent’s mesh. The seam is where multiple panels of mesh fabric are stitched together, and over time, it can begin to separate due to wear and tear or exposure to harsh weather conditions.
Gear Aid Seam Grip is a reliable solution for repairing mesh seam separation. This adhesive is not only strong and durable but also waterproof, ensuring a long-lasting repair. Applying Seam Grip is a simple process that can be done in just a few steps.
Here’s a step-by-step guide on repairing mesh separation at the seam using Gear Aid Seam Grip:
- Clean the separated area: Before applying Seam Grip, make sure the area is clean and free from dirt or debris. Use a mild detergent or rubbing alcohol to clean the mesh fabric.
- Apply Seam Grip: Squeeze a small amount of Seam Grip onto the separated area. Use a brush or your finger to spread the adhesive evenly, ensuring complete coverage.
- Press and hold: Press the separated edges of the mesh fabric together firmly and hold them in place for a few seconds to allow the adhesive to bond.
- Allow it to cure: Leave the repaired area undisturbed and allow the Seam Grip to fully cure. Follow the manufacturer’s instructions for the recommended curing time.
Once the Seam Grip has cured, the mesh fabric will be securely bonded together, restoring the integrity and functionality of the seam. This quick and easy repair ensures that your tent’s mesh will continue to provide essential ventilation while keeping out bugs and other unwanted critters.
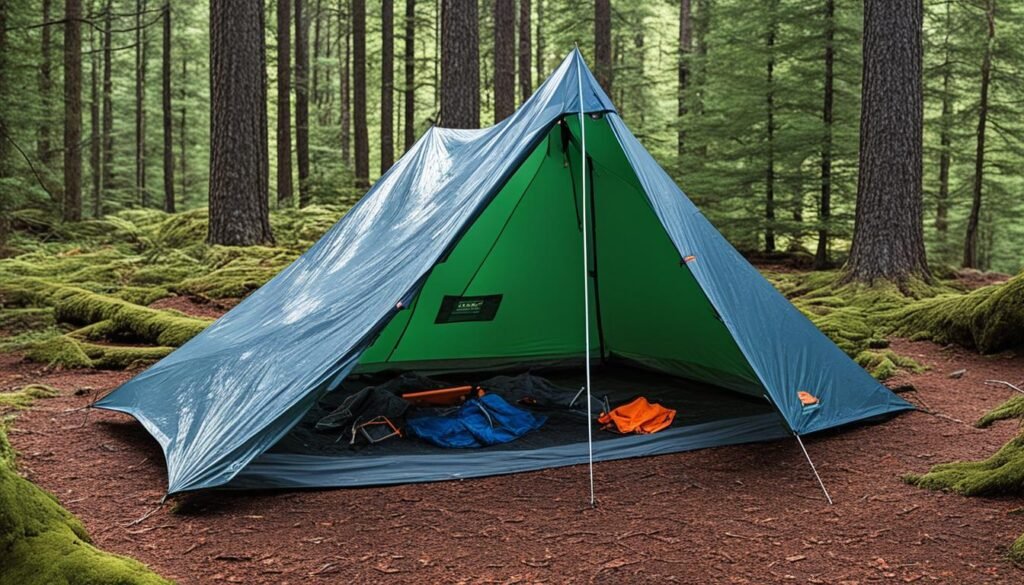
Image: Gear Aid Seam Grip – Quick and Easy Repair for Mesh Separation at the Seam
Can Nylon be Repaired?
Yes, nylon can be successfully repaired, including both nylon mesh and other types of fabric commonly used in outdoor gear. When it comes to repairing nylon materials, such as tent mesh or synthetic fabric, the use of nylon or synthetic fabric patches is highly recommended. These patches are specifically designed to adhere well to nylon and synthetic fabrics, ensuring a strong and durable repair.
When repairing nylon materials, it’s important to select patches that utilize adhesives and heat bonding methods. These techniques create a secure bond between the patch and the nylon, effectively restoring the integrity of the damaged area.
Whether you’re repairing a tear in a tent mesh or patching a hole in a nylon jacket, utilizing nylon or synthetic fabric patches will help ensure a successful repair that withstands the elements and extends the lifespan of your gear.

| Advantages of Nylon Repair | Disadvantages of Nylon Repair |
|---|---|
|
|
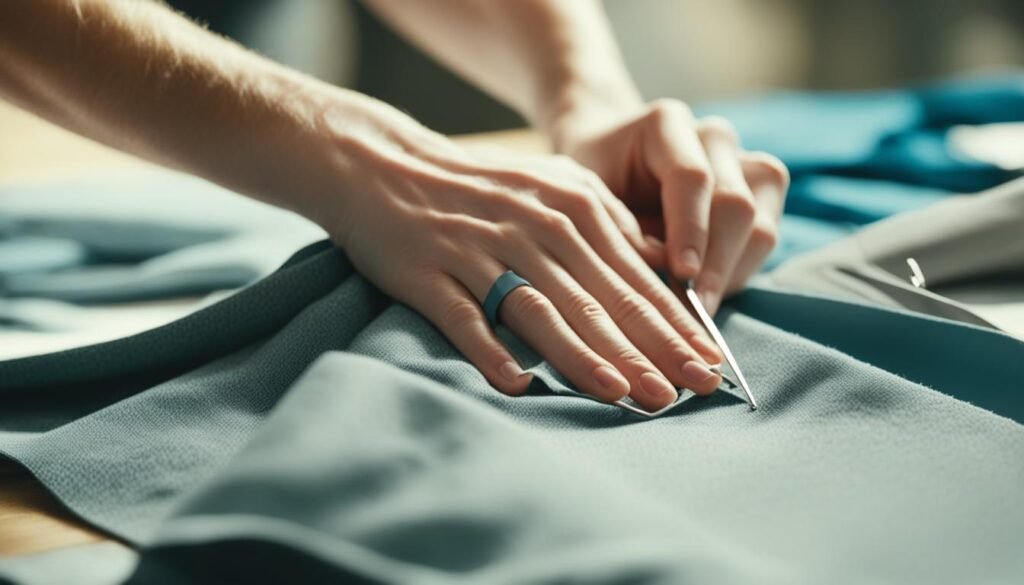
Sewing Mesh Screens
When it comes to repairing damaged mesh screens on your tent, sewing can be a viable option, depending on the size and complexity of the repair. While smaller rips or straight tears can be easily sewn using nylon thread and a zig-zag pattern, larger holes may require a different approach, such as patching with a separate piece of mesh or using a patch with adhesive.
Sewing a patch onto the mesh can be a practical solution, as it helps distribute tension when the tent is set up, preventing further damage. Nylon thread is recommended for its strength and durability, ensuring a secure and long-lasting repair.
When sewing mesh screens, it’s important to consider the type of stitching pattern to use. A zig-zag pattern, done about ¼ inch away from the edge of the hole or tear, helps reinforce the repaired area and provides added strength.
However, it’s worth noting that sewing may not always be the best option for every repair. Assessing the size, location, and complexity of the damage will help determine whether sewing or patching is the most effective method.
“Sewing a patch onto the mesh can be a practical solution, as it helps distribute tension when the tent is set up, preventing further damage.”
Overall, sewing mesh screens can be a useful skill to have when it comes to tent repairs. However, it’s important to evaluate the specifics of each repair case to determine the best approach, whether it be sewing, patching, or a combination of both.
| Sewing Mesh Screens | Patching Mesh Screens |
|---|---|
| Smaller rips or straight tears | Larger holes |
| Nylon thread and zig-zag pattern | Separate piece of mesh or patch with adhesive |
| Distributes tension when set up | Prevents further damage |
Note: Image below showcases a sewing pattern for repairing tent mesh using nylon thread:
Essential Items for a Backpacking Repair Kit
A backpacking repair kit is an essential companion for any outdoor enthusiast. It allows you to quickly fix common gear issues while out in the backcountry. Here are some essential items to include in your backpacking repair kit:
1. Needle and Thread
Having a needle and thread in your repair kit is crucial for on-the-go sewing repairs. From repairing torn clothing to fixing gear attachments, needle and thread can come in handy for various repairs.
2. Tape
Tape is an excellent temporary fix for various gear issues. It can be used to patch small holes, secure loose ends, or even mend tent seams. Include a roll of durable tape, such as duct tape or gear repair tape, in your repair kit.
3. Patches
Carry a variety of patches suitable for different materials in your repair kit. These patches can be used to mend torn clothing, patch up holes in tents or sleeping bags, and even fix backpacks. Make sure to include adhesive patches for quick and easy repairs.
4. Multi-tool
A multi-tool is a versatile tool that can be used for various repairs in the backcountry. It typically includes pliers, screwdrivers, a knife, and other useful tools. A multi-tool can help you fix broken gear, tighten loose screws, or perform minor adjustments.
5. Replacement Buckles
Carrying a few spare replacement buckles is a smart move. Buckles can break or get damaged, and having replacements on hand ensures you won’t be stranded without a functioning buckle. Choose buckles that are compatible with your gear.
6. Safety Pins
Safety pins are incredibly versatile and can be used for quick adjustments and temporary fixes. They are handy for securing gear, closing gaps, or even mending clothing. Include a few different sizes of safety pins in your repair kit.
With these essential items in your backpacking repair kit, you’ll be prepared to tackle any gear issue that comes your way. Remember to regularly check and replenish your kit to ensure it’s ready for your next adventure.
| Item | Description |
|---|---|
| Needle and Thread | Essential for sewing repairs |
| Tape | Durable tape for temporary fixes |
| Patches | Adhesive patches for various materials |
| Multi-tool | Versatile tool for different repairs |
| Replacement Buckles | Spare buckles for gear |
| Safety Pins | Various sizes for quick adjustments |
Repairing Holes in Mesh Backpack Pockets
When it comes to repairing holes in mesh backpack pockets, the approach will depend on the size and type of damage. For small rips, a direct sewing method can be employed, while larger holes may require the use of a patch. It is always recommended to consult the manufacturer for specific repair options and advice tailored to your particular backpack.
To repair a small rip in a mesh backpack pocket, follow these steps:
- Identify the location and size of the rip.
- Gently clean the surrounding area to remove any dirt or debris.
- Using a needle and nylon thread, sew the edges of the rip together using small, evenly spaced stitches.
- Secure the stitches with a knot at the end to prevent unraveling.
- Inspect the repair to ensure it is secure and the rip is closed.
For larger holes in mesh backpack pockets, a patching method is recommended:
- Clean the area around the hole to ensure proper adhesion.
- Obtain a mesh patch or fabric that matches the original mesh.
- Cut the patch to a size slightly larger than the hole.
- Apply a fabric adhesive or use a heat bonding method to affix the patch over the hole.
- Smooth out any wrinkles or bubbles and allow the adhesive to cure according to the manufacturer’s instructions.
Remember, each backpack may have specific repair instructions provided by the manufacturer. Always refer to these guidelines for the best results and to ensure the longevity of your backpack.
Manufacturer Advice:
“When repairing holes in mesh backpack pockets, it is essential to follow the manufacturer’s instructions and recommendations. Different backpacks may have specific repair kits or techniques that are best suited for their construction and materials. Contact the manufacturer directly for guidance on repairing your backpack’s mesh pockets.”
By addressing holes in your mesh backpack pockets promptly and following the appropriate repair method, you can prolong the lifespan of your backpack and maintain its functionality while enjoying your outdoor adventures.
Additional Tips for Repairing Gear
In addition to repairing tent mesh, there are other gear repair tips to consider when maintaining your outdoor equipment. These additional tips will help you keep your gear in optimal condition for your next adventure.
Seam Sealer
One essential gear repair item is seam sealer. Seam sealer is a specialized adhesive that can be applied along seams to strengthen and protect them from wear and tear. It forms a protective barrier that helps prevent moisture from seeping through the seams, enhancing the durability and longevity of your gear.
Floss for Sewing
When it comes to sewing repairs, using floss as a thread is a smart choice. Floss is made of strong, durable fibers that can withstand the rigors of outdoor use. It provides a reliable alternative to traditional sewing thread, ensuring that your repairs hold up even in challenging conditions.
Lightweight Canopy Fabric
For patching larger holes or reinforcing weak areas, lightweight canopy fabric is an excellent choice. This type of fabric is specifically designed to be lightweight yet strong, making it ideal for gear repairs. Use it to patch holes in tents, backpacks, or other outdoor equipment for a sturdy and long-lasting fix.
Zipper Repair Options
When dealing with zipper issues, there are several repair options to consider. One option is using screw-on zippers, which are easy to install and can bring new life to a damaged zipper. Alternatively, replacement zipper sliders can be obtained and installed by a professional. If the repair seems complex or beyond your expertise, you may also consider sending your gear to a professional repair service for zipper replacement.
| Repair Tip | Description |
|---|---|
| Seam Sealer | Apply seam sealer along seams for added strength and moisture protection. |
| Floss for Sewing | Use strong floss as an alternative thread for durable repairs. |
| Lightweight Canopy Fabric | Patch larger holes or reinforce weak areas with lightweight canopy fabric. |
| Zipper Repair Options | Consider screw-on zippers, replacement sliders, or professional repair services for zipper issues. |
By utilizing these additional gear repair tips, you can extend the lifespan of your outdoor equipment and continue to enjoy your outdoor adventures with confidence.
How to Fix Zippers
When a zipper is not functioning properly, it can be frustrating and inconvenient. Luckily, there are several options for repairing a zipper, depending on the extent of the damage. Whether it’s a broken zipper slider or a zipper that won’t close properly, there are solutions available to get your gear back in working order.
FixNZip: A Convenient Solution
If you’re looking for an easy and convenient option to fix your zipper, consider using FixNZip. FixNZip offers screw-on zippers that can be quickly and securely attached to damaged zippers. With FixNZip, you don’t have to worry about sewing or replacing the entire zipper. This innovative solution is suitable for a variety of items, including tents, jackets, backpacks, and more. Plus, FixNZip can be shipped worldwide, making it accessible to anyone in need of a zipper repair.
Replacement Zipper Sliders
If your zipper slider is broken or damaged, replacing it with a new one can often solve the problem. Replacement zipper sliders can be obtained from various retailers, online marketplaces, or sewing supply stores. To install a replacement zipper slider, carefully remove the old slider and attach the new one according to the manufacturer’s instructions. This option requires a bit more manual dexterity and time compared to using FixNZip, but it is a cost-effective solution for zipper repair.
Professional Zipper Repair Service
In some cases, the damage to the zipper may be too severe or complex to repair on your own. If you’ve tried other methods without success or simply prefer to leave the repair to the professionals, consider utilizing a zipper repair service. These specialized services have the expertise and tools necessary to handle a wide range of zipper issues. By sending your gear to a professional repair service, you can ensure that your zipper is fixed properly and functions like new.
Repairing a zipper can save you money and extend the life of your gear. With options like FixNZip, replacement zipper sliders, and professional repair services, you can choose the method that best fits your needs and get your zipper back in working order.
What are the essential tools and materials needed to mend tent mesh and patch tears in a tent?
When it comes to tent repair essentials, having a few key tools and materials on hand can make all the difference. A strong needle and heavy-duty thread are essential for mending tent mesh, while patching tears in a tent may require adhesive tape, seam sealer, and extra fabric for reinforcement.
Would Upgrading a Tent with Velcro Affect the Mesh Repair Process?
When considering upgrading your tent zipper with velcro, it could potentially affect the mesh repair process. The addition of velcro could interfere with the seamless repair of the mesh, so it’s important to carefully consider the implications before making any modifications to your tent.
Conclusion
Repairing mesh on a tent is a crucial skill for any outdoor enthusiast. Whether it’s a small hole or a large tear, knowing how to effectively repair tent mesh can save you from a bug-infested camping experience. By understanding the different repair methods and having the right tools and materials, you can confidently tackle any mesh repair project and prolong the lifespan of your tent.
When it comes to DIY tent repairs, it’s important to choose the right repair method for the specific type of damage. Patch kits, such as Gear Aid’s mesh repair patches, are ideal for small holes and tears. Simply clean the area, apply the adhesive patch, and let it cure. For larger or more complicated repairs, sewing can be a reliable alternative. Use a zig-zag stitching pattern and nylon thread to ensure a strong and durable repair.
Remember to assess the type of damage before proceeding with any repairs. Whether you opt for patching or sewing, always prioritize the integrity and functionality of your tent mesh. With the right skills and techniques, you can enjoy bug-free camping trips for years to come. Happy repairing!
FAQ
What types of damage can occur to tent mesh?
Tent mesh can be damaged by small holes, tears of varying sizes, and mesh separation at the seams.
How can I repair tent mesh with patch kits?
Patch kits designed for tent mesh can be used to repair holes and tears. Clean the mesh, apply the adhesive patch, and allow it to cure.
Can I sew tent mesh to repair it?
Sewing can be used to repair tent mesh, especially for larger or more complicated repairs. Use nylon thread and specific stitching patterns.
How do I repair mesh separation at the seam?
Use Gear Aid Seam Grip adhesive to bond the mesh back together at the seam.
Can nylon mesh be repaired?
Yes, nylon mesh can be repaired using nylon or synthetic fabric patches with adhesives or heat bonding.
Should I sew or patch mesh screens?
Sewing is suitable for smaller rips or straight tears, while patching is recommended for larger holes or jagged tears to prevent tension when the tent is set up.
What items should be included in a backpacking repair kit?
A backpacking repair kit should include a needle and thread, tape, patches, a multi-tool, replacement buckles, and safety pins.
How can I repair holes in mesh backpack pockets?
Small rips can be sewn directly, while large holes may require a patch. Check with the manufacturer for specific repair options for your backpack.
What are some additional gear repair tips?
Consider using seam sealer to strengthen seams, floss for sewing repairs, lightweight canopy fabric for patching larger holes, and various options for zipper repairs.
How can I fix a malfunctioning zipper?
Options for zipper repair include using screw-on zippers, replacement zipper sliders, or sending the gear for professional repair.
How can I conclude my tent mesh repair project?
By understanding different repair methods and having the right tools and materials, you can confidently tackle any mesh repair project and extend the lifespan of your tent.