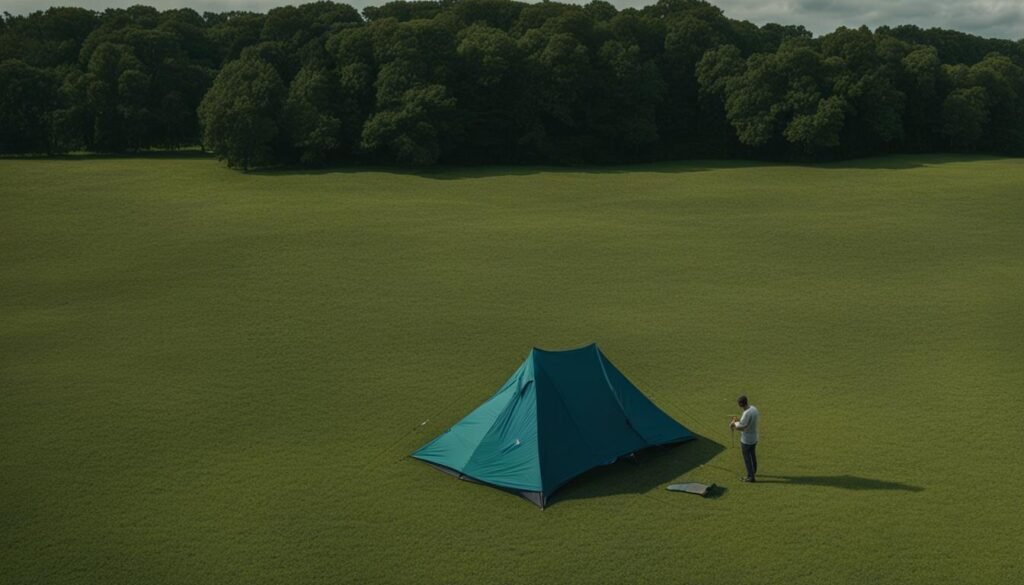
Putting up a pop-up tent by yourself can seem daunting, but with the right steps, it can be quick and hassle-free. In this guide, I’ll provide you with a step-by-step tutorial on how to set up a pop-up tent on your own. From choosing the right location to securing the tent, you’ll become a pro at solo tent assembly.
Key Takeaways
- Learn how to put up a pop-up tent by yourself with this step-by-step guide.
- Master the art of solo pop-up tent setup for easy and quick installation.
- Follow the step-by-step pop-up tent pitching instructions to ensure a hassle-free assembly.
- Discover the tips and tricks for single person pop-up tent erection in our DIY pop-up tent setup tutorial.
- Gain confidence in your ability to assemble a pop-up tent on your own with this self-setup pop-up tent tutorial.
What Do I Need To Do Before Starting Setup?
Before you embark on the process of setting up your pop-up tent, it’s essential to make necessary preparations. By following these steps, you can ensure a smooth and successful setup.
Choosing a Good Location
One of the first things you should do is select a suitable location for your pop-up tent. Look for a flat area that is free of any obstacles such as rocks or tree roots. A level surface will make the setup process much easier and provide a stable foundation for your tent.
Assessing the Surface
Before you begin the actual setup, take some time to assess the surface where you plan to pitch your tent. Check for any hidden surprises, such as soft or uneven ground, that could hinder the stability of your tent. Ensure that the surface is solid and capable of supporting the weight of the tent and its occupants.
Gathering Tools and Supplies
Next, gather all the necessary tools and supplies that you’ll need for the setup. This includes your pop-up tent kit, stakes, guy lines, mallet, and any additional accessories such as a footprint or rainfly. Having everything on hand will save you time and prevent any delays during the setup process.
Managing Time Effectively
Time management is key when it comes to setting up your pop-up tent. Start early to allow yourself ample time to complete the setup without rushing. It’s always a good idea to allocate extra time for any adjustments or unforeseen challenges that may arise. By managing your time effectively, you can ensure a stress-free and successful tent assembly.
“Proper preparation lays the foundation for a seamless setup. By choosing a suitable location, assessing the surface, gathering all necessary tools and supplies, and managing your time effectively, you’ll be well-prepared to put up your pop-up tent with ease.”
How To Set Up a Canopy Tent: Step-by-Step
Setting up a canopy tent may seem like a daunting task, but with the right steps, it can be a breeze. Follow this step-by-step guide to assemble your canopy tent and create the perfect outdoor space for your event.
1. Frame Assembly
Start by assembling the frame according to the manufacturer’s instructions. Lay out all the frame pieces and connect them using the provided connectors. Ensure that the frame is sturdy and securely fitted together.
2. Attaching the Fabric
Once the frame is assembled, it’s time to attach the fabric top. Carefully place the fabric over the frame and secure it using the hook-and-loop or clip fasteners provided. Make sure the fabric is evenly stretched and taut for a professional finish.
3. Expanding and Elevating
With the help of a friend, lift the tent frame and expand it to its full size. Move backward together, allowing the tent to fully open and take shape. Be mindful of any finger-pinching points during this step.
4. Adjusting and Leveling
Once the tent is expanded, adjust and level the legs to ensure stability. Lift each leg individually and extend or retract it to the desired height. Use a level to ensure that the tent is balanced and even on all sides.
5. Anchoring the Tent
Next, anchor the tent to the ground for added stability. Use stakes or weights to secure each leg of the tent. Insert stakes at a 45-degree angle into the ground, or place weights around the base of each leg. This will prevent the tent from being blown away by strong winds.
6. Adding Sidewalls
If desired, add sidewalls to your canopy tent for added protection and privacy. Attach the sidewalls securely to the frame using the provided fasteners. Choose from options such as solid walls for privacy or mesh walls for ventilation.
7. Installing Canopy Lights
Create a magical ambiance by adding canopy lights to your tent. String lights along the frame or attach them to the fabric top using clips. Ensure that the lights are securely installed and provide the desired lighting effect for your event.
Congratulations! You have successfully assembled your canopy tent. Take a step back and admire your work. Your canopy tent is now ready to provide shelter and create an inviting atmosphere for your outdoor event.
Choose a Good Location
When it comes to setting up your pop-up tent, selecting the right location is crucial for a successful and hassle-free experience. By choosing a flat and obstacle-free area, you can ensure a smooth and efficient setup process. Avoiding slopes and uneven terrain will make the assembly easier and prevent any stability issues during your event.
An ideal location for your tent should provide a level surface that serves as a sturdy foundation. This flat surface not only simplifies the pitching process but also guarantees the stability of your tent throughout your entire event.
Here are a few key considerations when choosing the right tent location:
- Look for a flat area: Find a spot with minimal or no incline to ensure stability.
- Avoid obstacles: Clear the area of any rocks, branches, or other objects that could impede the setup.
- Assess the terrain: Check for any dips, bumps, or uneven ground that could make assembly challenging.
Remember, a well-selected location is the first step towards a problem-free pop-up tent setup. It lays the groundwork for a smooth and successful event.
By taking the time to choose a good location, you’ll set yourself up for a stress-free and enjoyable experience, from pitching your tent to enjoying your outdoor adventure.
Comparison of Tent Locations
| Location | Advantages | Disadvantages |
|---|---|---|
| Flat and obstacle-free area | Easier setup process Increased stability |
N/A |
| Slopes or uneven terrain | N/A | Challenging setup process Potential stability issues |
Assess The Surface
Before setting up your pop-up tent, it’s important to assess the condition of the ground where you plan to pitch it. Taking the time to check the ground condition will ensure a smooth and successful installation.
Start by inspecting the ground for any hidden obstacles that could pose challenges during setup. Look out for rocks, roots, or any buried objects that could interfere with the tent’s stability. By identifying these hidden obstacles in advance, you can avoid potential mishaps and ensure a safe and secure tent.
Additionally, aim to find a smooth surface for easy installation. A flat and level ground provides a solid foundation for your pop-up tent, enhancing its stability. It also makes the setup process more efficient and convenient.
Remember, a thorough assessment of the surface is crucial to ensure a hassle-free tent installation. By checking the ground condition and ensuring a smooth surface, you’ll be well-prepared to set up your pop-up tent with ease.
Gather Your Tools and Supplies
To efficiently set up your pop-up tent, make sure you have all the necessary tools and supplies within reach. Double-check that you have all the essential items, including the canopy legs, canopy top, stakes, guy lines, ropes, and any wrenches or mallets needed for securing the tent. Having everything organized and easily accessible will make the assembly process smoother.
Tent Tools and Supplies Checklist
| Items | Quantity |
|---|---|
| Canopy Legs | 4 |
| Canopy Top | 1 |
| Stakes | 8 |
| Guy Lines | 4 |
| Ropes | 4 |
| Wrenches | 1 |
| Mallets | 1 |
Make sure you have all of these items in the appropriate quantities to ensure a successful tent setup. Check each item off the list as you gather them to prevent any last-minute surprises. Having all the necessary tools and supplies ready in advance will save you time and ensure a smoother assembly process for your pop-up tent.
Mind The Clock
Time management is a crucial factor when it comes to setting up a pop-up tent by yourself. To ensure a smooth and stress-free setup process, it’s important to start early and allocate enough time for adjustments and finishing touches. Rushing through the setup can lead to mistakes or an incomplete installation, so it’s best to allow yourself plenty of time for each step.
Starting early gives you the opportunity to tackle any unexpected challenges that may arise during the setup process. It allows you to assess the situation calmly and find solutions without feeling rushed. By beginning your tent setup well in advance, you can ensure that you have ample time to make any necessary adjustments and ensure everything is in place before your event or camping trip.
Additionally, allocating extra time for adjustments and finishing touches is vital to creating a perfect event space. This includes adjusting the tent legs to level the structure, securing the tent firmly to the ground, and adding any final decorative touches. Allowing this extra time ensures that your tent setup is not only functional but also visually appealing.
Remember, time management is not just about finishing quickly; it’s about taking the necessary time to complete each task effectively and efficiently. By starting early and allowing extra time for adjustments and finishing touches, you can ensure a successful tent setup that meets your desired standards.
“Time management is the key to a successful tent setup. Starting early and allowing extra time for adjustments and finishing touches ensures a stress-free experience and a perfectly installed pop-up tent.”
| Benefits of time management for tent setup: | Tips for effective time management: |
|---|---|
| – Minimizes stress and pressure during the setup process | – Start the setup early in the day to allow for troubleshooting |
| – Provides ample time to address any unexpected challenges | – Create a checklist to stay organized and prioritize tasks |
| – Allows for thorough adjustments to ensure stability | – Allocate extra time for finishing touches and decorations |
| – Enhances the overall quality of the tent setup | – Take breaks during the process to maintain focus and energy |
Attach The Fabric
Once the tent frame is in place, it’s time to attach the fabric top. Carefully position the fabric over the frame, ensuring that it’s centered and evenly distributed. Firmly attach it to the frame, making sure it’s snug and secure. This step completes the overall structure of your pop-up tent.
| Steps to Attach the Fabric |
|---|
| 1. Position the fabric over the frame, ensuring it’s centered. |
| 2. Align the corners and edges of the fabric with the frame. |
| 3. Firmly secure the fabric to the frame, pulling it taut and avoiding any wrinkles. |
| 4. Double-check that the fabric is evenly distributed and there are no gaps or loose areas. |
Start with The Frame
When it comes to setting up your pop-up tent, the first step is to lay out the tent frame at your desired location. Choosing the right location is crucial for creating the perfect setting for your event or camping trip. Look for a clutter-free area that provides ample space and serves as the foundation for an extraordinary experience.
Make sure to clear the area of any debris or obstacles that could hinder the tent assembly process. A clutter-free space not only makes it easier to lay out the frame but also ensures a smooth and hassle-free setup. By starting with a clean slate, you’ll have more room to work with and can easily organize the frame pieces.
Once the location is selected and the area is clutter-free, lay out the tent frame systematically. Ensure that all the frame pieces are properly aligned and in order, following the manufacturer’s instructions. Taking the time to lay out the frame properly not only makes the setup process more organized but also reduces the chances of missing or misplacing any components.
“The foundation of a successful event or camping trip starts with a well-laid-out tent frame. Choosing the right location and preparing a clutter-free area sets the stage for an extraordinary experience.”
With the tent frame properly laid out, you’re one step closer to enjoying your event or outdoor adventure. In the next section, we’ll explore how to assemble and elevate the tent to create a sturdy and comfortable space.
Tent Frame Layout:
| Frame Piece | Quantity |
|---|---|
| Frame Pole A | 4 |
| Frame Pole B | 4 |
| Frame Pole C | 4 |
| Frame Pole D | 4 |
| Frame Pole E | 4 |
| Frame Pole F | 4 |
| Frame Pole G | 4 |
| Frame Pole H | 4 |
Teamwork
Assembling the tent frame becomes easier with a helping hand. Consider recruiting a friend to assist you. Have your friend stand on the opposite side of the frame and hold two outer legs. Lift them off the ground together and take a step backward, ensuring that the frame remains upright. This teamwork ensures a smooth and balanced lift-off, making it much easier to handle the tent.

Expand and Elevate
With your friend’s assistance, grasp the bottom of the diamond-shaped portion of the upper frame on opposite sides. Lift it up and step backward until the tent is fully opened. Be cautious during this step to avoid any finger-pinching surprises. This action expands and elevates the tent frame, preparing it for the next steps of assembly.
Expanding and elevating the tent frame is a crucial step in the setup process. It allows the tent to reach its full size and provides the necessary height for a comfortable and spacious interior. By expanding the frame, you create a stable structure that can withstand various weather conditions, ensuring the safety and security of your outdoor shelter.
During this step, it’s important to maintain coordination and communication with your friend to ensure a smooth and seamless expansion. Working together, you can avoid any mishaps and quickly progress to the next stages of assembly.
Adjust and Level
When setting up your pop-up tent, it’s essential to adjust and level it properly to ensure stability and functionality throughout your event. Follow these simple steps to achieve a steady and secure tent:
- Lift two adjacent outer legs of the tent.
- Extend the inner leg until it snaps into place.
- Repeat this process for all legs of the tent.
The adjustment and leveling process allow the tent to sit evenly on the ground, minimizing any potential wobbling or tilting. This ensures a secure and stable structure that can withstand various weather conditions.
Properly aligned legs contribute to the overall stability and functionality of your pop-up tent, providing you and your guests with a safe and enjoyable outdoor experience.
Pop-Up Tent Stability Checklist
| Step | Checklist Item |
|---|---|
| 1 | Adjust and level the tent by lifting and snapping the legs into place. |
| 2 | Securely anchor the tent to the ground using stakes or weights. |
| 3 | Ensure the tent is properly aligned and centered. |
| 4 | Check for any loose connections or missing parts. |
| 5 | Test the stability of the tent by gently shaking it. |
Anchor It Down
To ensure the stability of your pop-up tent, it’s important to anchor it down securely. By attaching stakes, sandbags, or weight bags to each leg, you can prevent the tent from being blown away, especially on windy days or during heavy rain.
If you’re using stakes, insert them into the ground at a 45-degree angle. This angle helps to provide maximum stability and prevent the stakes from easily loosening or pulling out. Make sure the stakes are firmly embedded in the ground to ensure a strong anchor.
If you prefer using weights instead, snugly place them around the legs of the tent. This way, the weights will counterbalance any movement and keep the tent securely in place. Whether you choose stakes or weights, the key is to ensure a snug and secure placement.

Preventing tent movement is crucial to maintaining a safe and comfortable camping experience. By properly anchoring your pop-up tent, you can relax and enjoy your outdoor adventures without worrying about unexpected tent shifts or collapses.
Conclusion
Congratulations! You’ve now mastered the art of setting up a pop-up tent by yourself. With the easy-to-follow step-by-step guide and the helpful tips and tricks provided, you can confidently assemble your pop-up tent for all your outdoor adventures. No more struggling with complicated tent setups or relying on others to help you. Now you can enjoy the convenience and comfort of a properly installed tent whenever and wherever you want.
By mastering solo tent assembly, you have unlocked the freedom to embark on solo camping journeys or host events hassle-free. Setting up your tent should no longer be a daunting task but rather an opportunity to immerse yourself in nature and savor the joy of outdoor adventures. With a properly installed pop-up tent, you can create a cozy sanctuary in the wilderness or a sheltered space for your outdoor gathering.
So, whether you’re a seasoned camping enthusiast or a first-time adventurer, don’t let the fear of tent setup hold you back. Take your pop-up tent, put your newly acquired knowledge into practice, and set off on unforgettable outdoor experiences. With an easy pop-up tent setup, you’re ready to embrace the great outdoors and create memories that will last a lifetime.
FAQ
What do I need to do before starting the setup?
Before setting up your pop-up tent, choose a good location, assess the surface, gather all the necessary tools and supplies, and manage your time effectively.
How do I set up a pop-up tent step-by-step?
The step-by-step process involves assembling the frame, attaching the fabric, expanding and elevating the tent, adjusting and leveling the legs, anchoring the tent, adding sidewalls, and installing canopy lights.
How do I choose a good location for my pop-up tent?
Select a flat and obstacle-free area, avoiding slopes and uneven terrain.
What should I consider when assessing the surface for my pop-up tent?
Check the ground condition, looking out for hidden obstacles and ensuring a smooth surface for easy installation.
What tools and supplies do I need for pop-up tent assembly?
You will need canopy legs, a canopy top, stakes, guy lines, ropes, and any wrenches or mallets necessary for securing the tent.
How can I manage my time effectively during pop-up tent setup?
Start early and allocate extra time for adjustments and finishing touches.
How do I attach the fabric top to the tent frame?
Position the fabric over the frame, ensuring it is centered and evenly distributed, and firmly attach it to the frame for a snug and secure fit.
What should I do when starting with the tent frame?
Lay out the frame at the desired location, making sure all the pieces are properly organized for a smoother setup process.
Should I have someone help me assemble the tent frame?
Yes, consider recruiting a friend to assist you. This will make it easier to handle the tent and ensure a balanced lift-off.
How do I expand and elevate the tent frame?
Lift the bottom of the diamond-shaped portion of the upper frame and step backward until the tent is fully opened.
How do I adjust and level the tent?
Lift two adjacent outer legs and pull out the inner leg until it snaps into place. Repeat this step for all the legs to ensure stability and balance.
How do I anchor down the tent?
Attach stakes or weights to each leg, ensuring the tent is securely anchored to the ground, preventing it from blowing away or moving.
Can I add sidewalls or canopy lights to my pop-up tent?
Yes, adding sidewalls can provide added protection, and canopy lights can create a magical ambiance for your event.
What are the benefits of properly setting up a pop-up tent?
With a properly installed pop-up tent, you can enjoy easy and hassle-free outdoor adventures or host events confidently and securely.