Are you tired of shivering in your tent during cold camping trips? Do you dream of enjoying a hot meal while surrounded by the beauty of nature? Adding a stove jack to your tent can provide both warmth and cooking capabilities, making your outdoor adventures more enjoyable and comfortable.
In this DIY guide, I will walk you through the process of installing a stove jack in your tent. By following these steps, you can enhance your camping experience and create lasting memories around a cozy fire. Let’s get started!
Key Takeaways:
- Adding a stove jack to your tent allows for warmth and cooking capabilities during camping trips.
- Wood burning stoves offer heat output, cost-effective fuel options, and versatility for cooking and drying gear.
- Choosing the right wood burning stove involves considering factors such as size, heating capacity, and portability.
- Gather essential materials and tools before starting the installation process.
- Preparing the tent involves clearing the area, creating a fireproof base, and installing a stove jack.
Understanding the Benefits of a Wood Burning Stove
A wood burning stove offers numerous advantages when it comes to heating your tent during cold weather camping. Not only does it provide excellent heat output, but it also offers cost-effective fuel options, making it a practical choice for outdoor enthusiasts. Let’s explore the benefits in detail:
1. Excellent Heat Output
A wood burning stove generates a powerful heat that can quickly warm up your tent, even in the harshest conditions. Its high-efficiency design allows for optimal heat distribution, ensuring that you stay comfortable throughout your camping trip.
2. Cost-Effective Fuel Options
Wood is a readily available and affordable fuel source, making a wood burning stove a cost-effective choice. You can easily gather firewood from the surrounding area, eliminating the need to carry heavy propane tanks or rely on expensive fuel canisters.
3. Versatility for Cooking and More
In addition to providing warmth, a wood burning stove offers versatility for cooking and other activities. With a sturdy cooking surface, you can prepare delicious meals while enjoying the outdoors. It can also serve as a reliable source of heat to dry your wet gear and melt snow.
4. Cozy Ambiance
There’s something undeniably cozy and inviting about sitting around a wood burning stove. The crackling sound, the flickering flames, and the radiant warmth create a pleasant ambiance, perfect for relaxing evenings or gathering with friends and family.
5. Gear Drying and Snow Melting
One of the practical benefits of a wood burning stove is its ability to help dry out wet gear. Whether it’s wet clothes, boots, or equipment, the heat generated by the stove can accelerate the drying process, ensuring that you’re prepared for the next adventure. Additionally, a wood burning stove can melt snow, providing a convenient water source during winter camping trips.
Installing a wood burning stove in your tent brings numerous benefits that can significantly enhance your camping experience. From its excellent heat output and cost-effective fuel options to its versatility for cooking and gear drying, a wood burning stove provides both practical functionality and a cozy atmosphere.
Embrace the warmth and convenience of a wood burning stove in your tent for enjoyable and comfortable cold weather camping.
Selecting the Right Wood Burning Stove
When choosing a wood burning stove for your tent, it’s important to consider several factors to ensure the best fit for your camping needs. Reputable brands like FireHiking, POMOLY, Seekoutside, and Winnerwell offer a wide range of models designed for different camping scenarios.
To find the perfect wood burning stove for your tent, keep the following considerations in mind:
- Tent Size: Determine the size of your tent as it will affect the heating capacity required for optimal warmth.
- Heating Capacity: Consider the heat output and efficiency of the stove you choose to ensure it can adequately heat your tent.
- Weight: Evaluate the weight of the stove and its portability, especially if you plan to carry it on backpacking trips.
By conducting thorough research and carefully considering these factors, you’ll be able to find the best wood burning stove that meets your specific needs and preferences.
Comparison of Wood Burning Stove Models
| Brand | Model | Tent Size | Heating Capacity | Weight | Portability |
|---|---|---|---|---|---|
| FireHiking | Trailblazer | 1-2 Person | Up to 1,000 sq. ft. | 8 lbs | Portable with carry handle |
| POMOLY | Little Bug | 1-3 Person | Up to 1,200 sq. ft. | 11 lbs | Foldable design for easy transport |
| Seekoutside | Srednek | 2-4 Person | Up to 1,500 sq. ft. | 15 lbs | Removable legs for compact storage |
| Winnerwell | Nomad View | 3-6 Person | Up to 2,000 sq. ft. | 20 lbs | Integrated detachable chimney for easy setup |
It’s essential to compare the features, specifications, and customer reviews of different wood burning stove models to make an informed decision. The table above provides a brief comparison of some popular models, but it’s recommended to delve deeper into the details and select the stove that best aligns with your camping requirements.
Gathering the Materials and Tools
Before you begin the installation process, it’s essential to gather all the necessary materials and tools for a successful stove jack installation in your tent. Having everything prepared ensures a smooth and efficient installation process. Here’s a list of the materials and tools you’ll need:
Materials:
- Tent stove kit
- Stove jack
- Fireproof hearth mat
Tools:
- Fireproof gloves
- Wrenches
- Saw
With these materials and tools on hand, you’ll have everything you need to install a stove jack and enjoy the benefits of a wood burning stove in your tent.
Preparing the Tent for Stove Installation
Before installing the stove in your tent, it’s crucial to properly prepare the space to ensure safety and functionality. Follow these steps to get your tent ready for stove installation:
- Identify a Suitable Location: Choose a spot in your tent where the stove can be placed securely. Consider factors such as proximity to the entrance for ease of wood loading, and proximity to a stove jack opening.
- Clear Flammable Materials: Remove any flammable materials from the chosen location, including loose fabric, bedding, or any other objects that could potentially come into contact with the stove.
- Create a Fireproof Base: Place a fireproof hearth mat on the floor to serve as the base for your stove. This will protect the tent floor from heat and sparks.
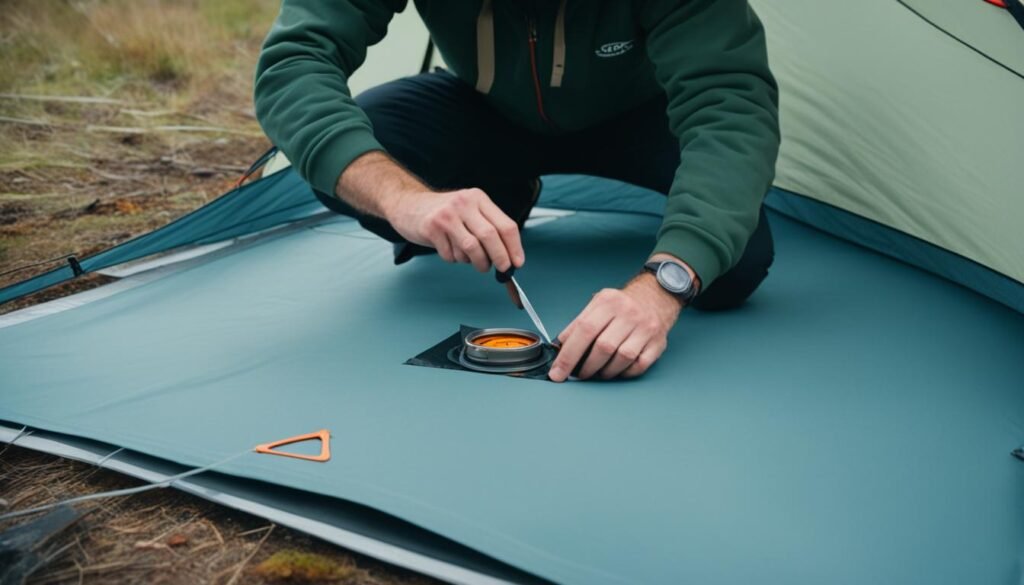
- Install the Stove Jack: If you haven’t already done so, install a stove jack to safely pass the stovepipe through the tent roof or wall. Ensure proper placement and alignment with the stove location.
By carefully preparing your tent for stove installation, you can minimize fire hazards and ensure a safe and enjoyable camping experience.
Building and Installing the Wood Burning Stove
Now that you have gathered all the necessary materials and prepared your tent, it’s time to build and install your wood burning stove. Follow these simple steps to ensure a successful DIY stove installation:
- Step 1: Assemble the Stove
- Step 2: Connect the Stovepipe
- Step 3: Place the Stove Inside the Tent
- Step 4: Align the Stovepipe with the Stove Jack
- Step 5: Secure the Stovepipe to the Tent
Refer to the manufacturer’s instructions and carefully assemble the stove, ensuring all components are tightly connected. Take your time and double-check that everything is correctly aligned.
Using heat-resistant tape and wrenches, connect the stovepipe sections together. This will provide a secure and stable connection for the stovepipe.
With the fireproof base prepared, carefully place the stove on top, ensuring it is centered and stable. Consider the placement to maximize heat distribution and minimize any potential hazards.
Align the stovepipe with the stove jack, ensuring a proper fit. The stovepipe should be inserted snugly into the stove jack opening, allowing for a secure connection.
Using the appropriate fasteners, secure the stovepipe to the tent fabric or structure. This step will ensure that the stovepipe remains stable and in place during use.
Note: It’s essential to follow proper safety guidelines during the installation process and when using your wood burning stove. Always prioritize ventilation, avoid placing flammable objects near the stove, and monitor the stove regularly to prevent any potential hazards.
By following these steps, you can successfully build and install your wood burning stove in your tent. Enjoy the warmth and convenience of a DIY stove installation while immersing yourself in the beauty of the great outdoors.
| Pros | Cons |
|---|---|
| Provides efficient heating | Requires regular cleaning and maintenance |
| Allows for cooking and boiling water | Requires a safe and well-ventilated environment |
| Adds a cozy ambiance to your camping experience | Requires a fireproof base for installation |
Safety Precautions and Maintenance
Prioritizing safety is crucial when using a wood burning stove in your tent. By implementing a few essential stove safety tips and following proper wood stove maintenance, you can ensure a safe and enjoyable camping experience.
Stove Safety Tips
Follow these stove safety tips to minimize the risk of accidents and ensure safe operation:
- Install a carbon monoxide detector: Carbon monoxide is a silent and deadly gas produced by wood burning stoves. Install a carbon monoxide detector in your tent to detect any dangerous levels and provide early warning.
- Ensure proper ventilation: Adequate ventilation is essential to prevent the buildup of harmful gases. Keep windows or vents open to allow fresh air circulation while the stove is in use.
- Keep flammable materials away: Clear the stove’s surroundings from any flammable materials like clothing, bedding, or camping gear. Maintain a safe distance between the stove and combustible items.
- Use fireproof barriers: Place fireproof mats or shields around the stove to protect the tent floor and minimize the risk of accidental fires.
- Supervise children and pets: Keep a watchful eye on children and pets around the stove to prevent accidental burns or injuries.
Wood Stove Maintenance
Maintain your wood burning stove regularly to ensure optimal performance and safety. Follow these wood stove maintenance guidelines:
- Regularly clean the stove and chimney: Remove ashes and debris from the stove’s interior and clean the chimney to prevent creosote buildup, which can pose a fire hazard. Use appropriate cleaning tools and materials as recommended by the stove manufacturer.
- Inspect for wear and tear: Regularly inspect your stove for any signs of damage or wear, such as cracks, loose parts, or broken seals. Address any issues promptly to maintain the stove’s efficiency and prevent potential safety hazards.
- Follow manufacturer’s guidelines: Adhere to the manufacturer’s guidelines for operating and maintaining your specific wood burning stove. This includes using the recommended fuel types, lighting techniques, and safety precautions.
By following these stove safety tips and performing regular wood stove maintenance, you can enjoy the warmth and convenience of a wood burning stove in your tent while prioritizing the safety of yourself and others.

Enjoying the Cozy Ambiance and Practicality
With a properly installed wood burning stove in your tent, you can enjoy the cozy ambiance of a warm fire while simultaneously using it for cooking, drying gear, and melting snow. Embrace the practicality and versatility that a wood stove brings to your camping trips.
A wood burning stove creates a warm and inviting atmosphere inside your tent, providing a comfortable retreat from the chilly outdoor temperatures. The crackling sound of the fire and the soft glow of the flames add to the overall camping experience, making it feel cozy and relaxing.
Besides the comforting ambiance, a wood stove offers practical benefits for camping enthusiasts. The ability to cook meals directly on the stove opens up a whole new world of culinary possibilities while enjoying the great outdoors. You can prepare warm and hearty meals, brew hot beverages, and even bake delicious treats inside your tent.
Additionally, a wood stove can effectively dry wet gear, such as wet clothes or boots, ensuring optimum comfort during your camping adventure. Furthermore, melting snow for drinking water becomes quick and convenient with a wood stove, ensuring a readily available water source even in snowy conditions.
The practicality of a wood stove extends beyond the primary function of heating and cooking. It also helps reduce reliance on traditional fuel sources, such as propane or electricity, which may not always be available in remote camping locations.
Overall, a properly installed wood burning stove in your tent enhances the camping experience, offering warmth, convenience, and the freedom to enjoy delicious meals and dry gear. It provides unmatched comfort and versatility, making it an essential addition to any camping enthusiast’s gear.
Table: Benefits of Wood Stove in a Tent
| Benefits | Description |
|---|---|
| Cozy Ambiance | The warm fire and soft glow create a cozy atmosphere inside the tent. |
| Cooking | Allows for cooking meals directly on the stove, expanding culinary options. |
| Gear Drying | Effectively dries wet gear, such as clothes and boots, for increased comfort. |
| Snow Melting | Enables quick and convenient snow melting for drinking water. |
| Reduced Reliance | Reduces reliance on traditional fuel sources, such as propane or electricity. |
Choosing the Right Stove Jack Size
When it comes to installing a stove jack in your tent, selecting the right size is crucial for a proper fit and optimal performance. The sizing of the stove jack depends on the diameter of the stovepipe you will be using. By choosing a stove jack that matches the size of your stovepipe, you can ensure a snug and efficient connection.
Before purchasing a stove jack, take accurate measurements of your stovepipe to determine its diameter. This measurement is essential in finding the recommended stove jack size for your setup. It’s important to note that stovepipe diameters can vary, so be sure to measure your specific stovepipe diameter rather than relying on generic sizing assumptions.
Once you have determined the diameter of your stovepipe, look for a stove jack that corresponds to that size. Most stove jack manufacturers provide sizing guides or charts, making it easier for you to find the right stove jack for your tent and stovepipe combination.
By choosing the correct stove jack size, you can ensure a proper installation that minimizes the risk of heat loss or leaking. A snug and secure fit between the stovepipe and stove jack enhances the efficiency of your wood burning stove, allowing you to enjoy a warm and cozy camping experience.
Tips for Choosing the Right Stove Jack Size:
- Measure the diameter of your stovepipe accurately.
- Refer to the manufacturer’s sizing guide or chart for stove jack selection.
- Avoid making assumptions based on generic sizing. Always prioritize the specific diameter of your stovepipe.
- Choose a stove jack that matches the measured diameter for a snug and efficient fit.
A properly sized stove jack is essential for ensuring a secure and efficient connection between your stovepipe and tent. By taking accurate measurements and selecting the recommended stove jack size, you can enjoy the benefits of a well-functioning wood burning stove during your camping adventures.
Tips for Efficient Stove Jack Installation
To ensure a successful stove jack installation, there are several tips and best practices that you should follow. These will help optimize the performance of your stove jack and ensure a safe and efficient setup. Here are the key tips for a seamless installation:
- Carefully cut the hole for the stovepipe: Use a sharp knife or hole saw to create a precise hole in the tent roof or wall for the stovepipe. Take accurate measurements to ensure a snug fit for the stove jack.
- Secure the stove jack with appropriate fasteners: Use the recommended fasteners, such as screws or rivets, to securely attach the stove jack to the tent fabric. Make sure the fasteners are tight to prevent any movement or leaks.
- Seal any gaps with heat-resistant tape: Apply heat-resistant tape around the edges of the stove jack to create a tight seal. This will prevent any drafts or leaks, ensuring efficient airflow and minimizing the risk of fire hazards.
- Check for proper fit and stability: After installing the stove jack, double-check the fit and stability of the stovepipe. Ensure that the stovepipe is aligned correctly with the stove jack and that there are no loose connections or wobbling. This will ensure optimal performance and reduce the risk of accidents.
By following these tips, you can ensure a successful stove jack installation and enjoy a safe and efficient wood burning stove in your tent. Remember to always prioritize safety and adhere to manufacturer guidelines throughout the installation process.
Now that you know the best practices for stove jack installation, let’s explore some troubleshooting tips in the next section.

Troubleshooting Stove Jack Issues
If you’ve recently installed a stove jack in your tent and are experiencing issues such as leaks or instability, don’t worry. Troubleshooting these problems can help ensure the safety and functionality of your wood burning stove. Here are some common problems with stove jack installation and steps to resolve them:
1. Leaks
If you notice water or smoke leaking through the stove jack, there might be an issue with the sealing.
- Check the stove jack gasket for any signs of damage or wear.
- Ensure that the stove jack is securely fastened to the tent roof or wall.
- Apply a high-temperature silicone sealant around the stove jack to create a watertight seal.
2. Instability
If your stove jack feels unstable or wobbly, it’s important to address the issue promptly for safety reasons.
- Inspect the fasteners connecting the stove jack to the tent. Tighten any loose screws or bolts.
- Verify that the stovepipe is properly aligned with the stove jack. Misaligned pipe can cause instability.
- Consider using additional supports such as brackets or guy lines to stabilize the stovepipe and prevent movement.
If troubleshooting the problem does not resolve the issues with your stove jack installation, it may be beneficial to consult a professional or reach out to the manufacturer for further assistance. It’s essential to fix any problems promptly to ensure a safe and enjoyable camping experience with your wood burning stove.
Remember, a properly installed and well-maintained stove jack will provide you with reliable heating and cooking capabilities during your outdoor adventures.
Extending the Life of Your Stove Jack
Proper maintenance is essential for prolonging the lifespan of your stove jack and ensuring its optimal performance during future camping adventures. By following these simple steps, you can keep your stove jack in excellent condition:
- Regular Inspection: Conduct routine inspections of your stove jack to check for any signs of wear and tear. Look for any cracks, fraying, or damage to the materials. (SEO keyword: stove jack maintenance)
- Thorough Cleaning: After each camping trip, clean your stove jack meticulously. Remove any debris, ashes, or soot from the surface. Use a soft brush or cloth to gently scrub the area. Ensure it is completely dry before storage.
- Proper Storage: Store your stove jack in a dry place when not in use. Avoid exposing it to moisture or extreme temperatures, as this can lead to deterioration.
By following these maintenance practices, you can prolong the lifespan of your stove jack, ensuring it remains in optimal condition for many camping trips to come.
Note: It’s important to mention that the maintenance process may vary depending on the specific brand and model of your stove jack. Always refer to the manufacturer’s instructions for any additional maintenance recommendations.
Exploring Additional Stove Jack Accessories
Enhance your wood burning stove setup with a range of stove jack accessories that can elevate your camping experience. These optional add-ons provide added safety, weather protection, and improved performance for your stove jack installation. Consider incorporating the following stove jack accessories into your outdoor gear:
1. Spark Arresters
Ensure fire safety with the addition of a spark arrester. This accessory helps prevent sparks and embers from escaping the stove chimney, reducing the risk of accidental fires. By capturing these hot particles, a spark arrester adds an extra layer of protection to your campsite and surrounding environment.
2. Rain Caps
Don’t let rain dampen your camping experience. A rain cap is designed to keep moisture out of the stovepipe and prevent it from entering your tent. This accessory is especially useful during wet weather conditions, ensuring your wood stove remains dry and functional for cooking and heating.
3. Stovepipe Heat Shields
Maximize heat distribution and minimize the risk of accidental burns with a stovepipe heat shield. This accessory acts as a barrier, dissipating heat and protecting nearby objects, walls, or tent materials from excessive heat exposure. It adds an extra layer of safety to your stove jack installation.
Remember to choose stove jack accessories that are compatible with your specific wood burning stove and tent setup. Consult the manufacturer’s recommendations and guidelines to ensure proper fit and functionality.
By customizing your stove jack installation with these optional add-ons, you can enhance safety, protect against the elements, and optimize the performance of your wood burning stove. Enjoy a comfortable and memorable camping experience, no matter the weather.
Conclusion
In conclusion, the installation of a stove jack in your tent is a game-changer for your camping adventures. Not only does it provide comfortable heating during chilly nights, but it also opens up a world of cooking possibilities. By following the step-by-step guide and adhering to safety precautions, you can confidently install a stove jack and enjoy the warmth and convenience of a wood burning stove.
With a properly installed stove jack, you can experience the cozy ambiance of a warm fire while preparing delicious meals, drying your gear, or melting snow. It enhances the practicality of your outdoor experience and allows for more enjoyable camping trips year-round.
Remember to prioritize safety when using a wood burning stove in your tent. Install a carbon monoxide detector, ensure proper ventilation, and regularly maintain the stove and chimney to prevent any issues. By adopting these safety measures, you can rest assured that your stove jack installation is both safe and efficient.
So, prepare your tent, gather the necessary tools and materials, and embark on your DIY stove jack installation. Stay warm, stay safe, and create lasting memories as you embrace the comfort and convenience of a wood burning stove in your camping adventures.
FAQ
How do I install a stove jack in my tent?
To install a stove jack in your tent, follow these steps: gather the necessary materials and tools, select a suitable location in your tent, create a fireproof base, install the stove jack, assemble the wood burning stove, and ensure proper safety measures.
What are the benefits of using a wood burning stove in a tent?
A wood burning stove in a tent provides excellent heat output, cost-effective fuel options, and versatility for cooking and other activities. It also creates a cozy ambiance and allows for drying gear and melting snow.
How do I select the right wood burning stove for my tent?
When choosing a wood burning stove for your tent, consider factors such as tent size, heating capacity, weight, and portability. Research reputable brands and select a stove that meets your specific needs and preferences.
What materials and tools do I need for stove jack installation?
You will need a tent stove kit, stove jack, fireproof hearth mat, fireproof gloves, wrenches, and a saw. Ensure you have all these essential materials and tools ready before starting the installation process.
How do I prepare my tent for stove installation?
To prepare your tent for stove installation, identify a suitable location, clear any flammable materials, and create a fireproof base using a fireproof hearth mat. This base will protect your tent from heat and embers.
How do I build and install the wood burning stove in my tent?
Follow the manufacturer’s instructions to assemble the wood burning stove. Connect the stovepipe sections with heat-resistant tape and wrenches. Place the stove on the fireproof base inside the tent and align the stovepipe with the stove jack. Secure the stovepipe to the tent for stability.
What are some safety precautions and maintenance tips for using a wood burning stove in a tent?
Install a carbon monoxide detector, ensure proper ventilation in the tent, clean the stove and chimney regularly to prevent creosote buildup, follow the manufacturer’s safety guidelines, and exercise caution when operating the stove to ensure a safe camping experience.
How can I extend the life of my stove jack?
To prolong the lifespan of your stove jack, regularly inspect it for wear and tear, clean it thoroughly after each camping trip, and store it in a dry place when not in use. Proper maintenance will help ensure its optimal condition for future camping adventures.
Are there additional accessories I can use with my wood burning stove and stove jack?
Yes, you can enhance your wood burning stove setup with accessories such as spark arresters, rain caps, or stovepipe heat shields. These accessories provide added safety, weather protection, and improved performance for your stove jack installation.
How do I troubleshoot stove jack installation issues?
If you encounter issues with your stove jack installation, such as leaks or instability, examine the sealing, fastening, and fit of the stove jack. Make necessary adjustments or consult a professional if needed to ensure the safety and functionality of your wood burning stove.
Can you give me some tips for an efficient stove jack installation?
To ensure a successful and efficient stove jack installation, carefully cut the hole for the stovepipe, secure the stove jack with appropriate fasteners, seal any gaps with heat-resistant tape, and check for proper fit and stability. These best practices will optimize the performance of your stove jack installation.
What should I do if I encounter issues with my stove jack installation?
If you encounter issues such as leaks or instability with your stove jack installation, troubleshoot the problem by examining the sealing, fastening, and fit of the stove jack. Make necessary adjustments or consult a professional if needed to ensure the safety and functionality of your wood burning stove.
Are there any additional tips or best practices for stove jack installation?
Follow the manufacturer’s instructions, take necessary safety precautions, ensure proper sealing and fastening of the stove jack, and conduct periodic inspections to maintain the performance and safety of your stove jack installation.
Is there anything else I should know about stove jack installation?
Regularly clean the stove and chimney, install a carbon monoxide detector, and prioritize safety when using a wood burning stove in your tent. A properly installed stove jack can provide warmth, cooking capabilities, and a cozy ambiance during your camping trips.

