Baking bread on a campfire can be a delightful outdoor cooking experience. With the right tools and techniques, you can enjoy the process of baking bread while surrounded by the beauty of nature. In this article, I will explore how to cook bread on a campfire and provide some delicious campfire bread recipes for you to try.
Key Takeaways:
- Learn how to cook bread on a campfire and embrace the joy of baking outdoors.
- Discover essential tools for campfire bread baking, including a cast iron skillet and a Dutch oven.
- Master the art of starting and prepping the fire for baking, ensuring a steady source of heat.
- Try delicious recipes like cast iron skillet pizza and Dutch oven bread for rustic, flavorful loaves.
- Explore gluten-free options for campfire bread to accommodate different dietary needs.
The Joy of Baking Outdoors
Baking outdoors is a unique experience that combines the joy of cooking with the beauty of the great outdoors. While it may require some adjustments compared to baking in a traditional oven, the rewards are well worth it. Baking over a campfire allows you to embrace the process, connect with nature, and create delicious, rustic loaves of bread.
“There is something magical about baking bread outdoors, surrounded by the sights and sounds of nature. It’s a chance to slow down, appreciate the simple pleasures, and enjoy the taste of homemade goodness.” – Sarah Johnson, Outdoor Cooking Enthusiast
Connecting with Nature
When you bake bread outdoors, you get to immerse yourself in the natural elements. As the aroma of freshly baked bread fills the air, you can take in the refreshing scents of the surrounding forest or feel the gentle breeze on your face. It’s a sensory experience that goes beyond just cooking, allowing you to truly connect with nature.
Embracing Campfire Cooking Techniques
Unlike baking in a conventional kitchen, campfire cooking requires a different set of techniques. You’ll need to learn how to control the temperature of the fire, position your bread properly, and adjust cooking times accordingly. It’s a learning process that brings a sense of adventure and accomplishment, making each loaf of bread a small victory.
Through trial and error, you’ll discover the perfect balance of charred crust and tender crumb, learning to adapt your recipes to the open flame. Campfire cooking techniques add a rustic touch to your bread, infusing it with unique flavors and textures that can’t be replicated in a traditional oven.
Easy Campfire Bread Recipes
Don’t let the idea of baking bread outdoors intimidate you. There are plenty of easy campfire bread recipes that even novice cooks can master. From simple skillet bread to hearty sourdough loaves, you’ll find a variety of recipes that cater to different tastes and skill levels.
Here’s a quick and delicious recipe to get you started:
- Mix together 3 cups of all-purpose flour, 2 teaspoons of yeast, 1 teaspoon of salt, and 1 1/2 cups of warm water.
- Knead the dough for about 10 minutes until it becomes smooth and elastic.
- Place the dough in a greased bowl, cover it with a damp cloth, and let it rise for about 1 hour.
- Divide the dough into smaller portions and shape them into individual rolls.
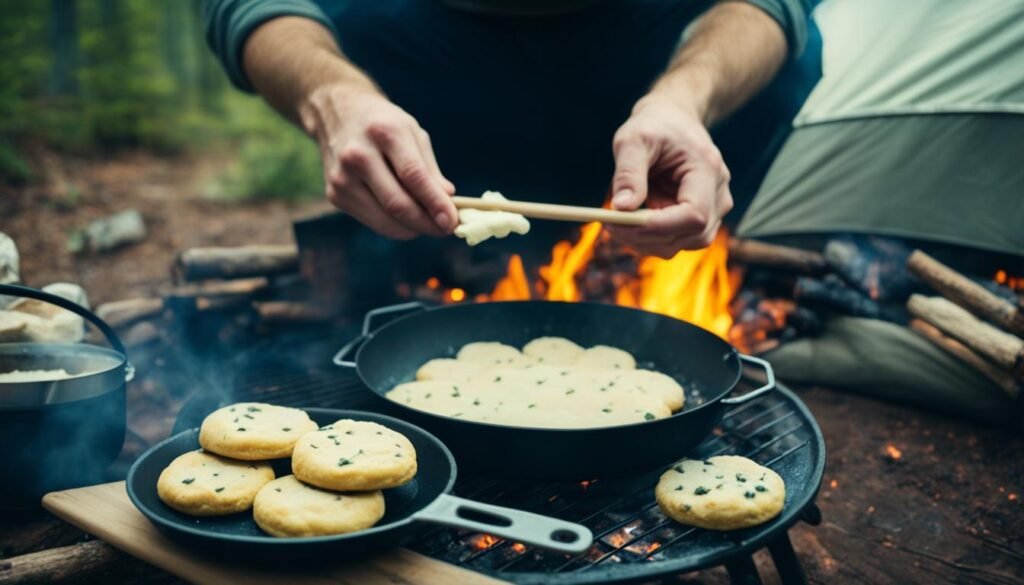
- Grease a cast iron skillet and place the rolls inside, leaving space between each one.
- Set the skillet over the campfire and cook the rolls for about 15-20 minutes, turning them occasionally, until they are golden brown and sound hollow when tapped.
- Remove from the heat, let them cool for a few minutes, and enjoy your freshly baked campfire bread!
The Joy of Outdoor Baking
The joy of baking outdoors goes beyond the final product. It’s about immersing yourself in nature, experimenting with campfire cooking techniques, and savoring the flavors of rustic bread. So the next time you embark on an outdoor adventure, don’t forget to pack your ingredients and unleash your inner baker!
Essential Tools for Campfire Bread Baking
To successfully bake bread on a campfire, you will need a few essential tools. These tools will help you cook your bread safely and efficiently over the open fire.
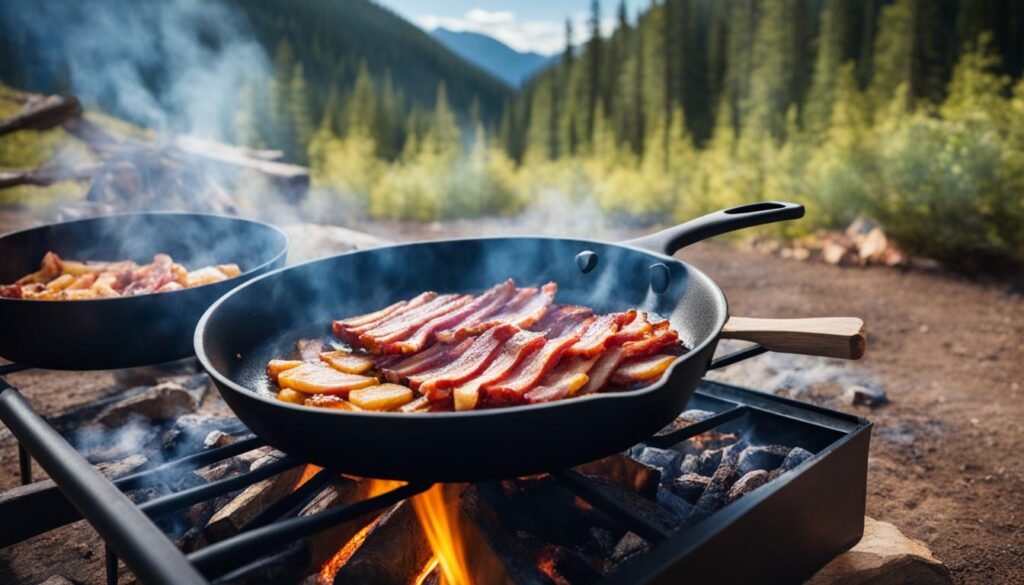
Cast Iron Skillet
A cast iron skillet is a versatile tool for campfire cooking. It provides even heat distribution and retains heat well, making it ideal for baking bread on a campfire. The skillet can be placed directly on the coals to create a makeshift oven for your bread.
Dutch Oven
A Dutch oven is another essential tool for campfire bread baking. This heavy-duty pot with a tight-fitting lid is perfect for baking bread in an outdoor setting. The cast iron construction ensures even heat distribution, resulting in a perfectly baked loaf of bread.
Stainless Steel Bowls
Stainless steel bowls are necessary for preparing and mixing the bread dough. They are durable, easy to clean, and resistant to heat. Choose different sizes of bowls to accommodate various stages of the bread-making process.
Knife Kit
A knife kit is indispensable when it comes to camping and outdoor cooking. It includes a bread knife for slicing the finished loaf and a chef’s knife for general food preparation tasks. Make sure to pack a sharp knife for effortless bread slicing.
Heatproof Gloves
Handling hot cookware and utensils is inevitable when baking bread on a campfire. Heatproof gloves protect your hands from burns and allow you to handle hot items comfortably and safely.
Long Metal Tongs
Long metal tongs are an excellent tool for maneuvering hot coals and adjusting the position of cookware over the fire. They provide a safe distance between your hands and the heat source, allowing precise control while protecting you from burns.
Cutting Board
A cutting board is essential for slicing the bread and preparing other ingredients. Look for a portable and lightweight cutting board that is easy to clean and can withstand outdoor conditions.
Laser Thermometer (optional but helpful)
A laser thermometer is a handy tool for measuring the temperature of the fire and the interior of the bread. It ensures that your fire is at the optimal temperature for baking and helps you achieve consistent results.
With these essential tools in your campfire bread baking arsenal, you’ll be ready to create delicious, homemade bread in the great outdoors. So gather your equipment and get ready to enjoy the satisfaction of baking bread over a campfire.
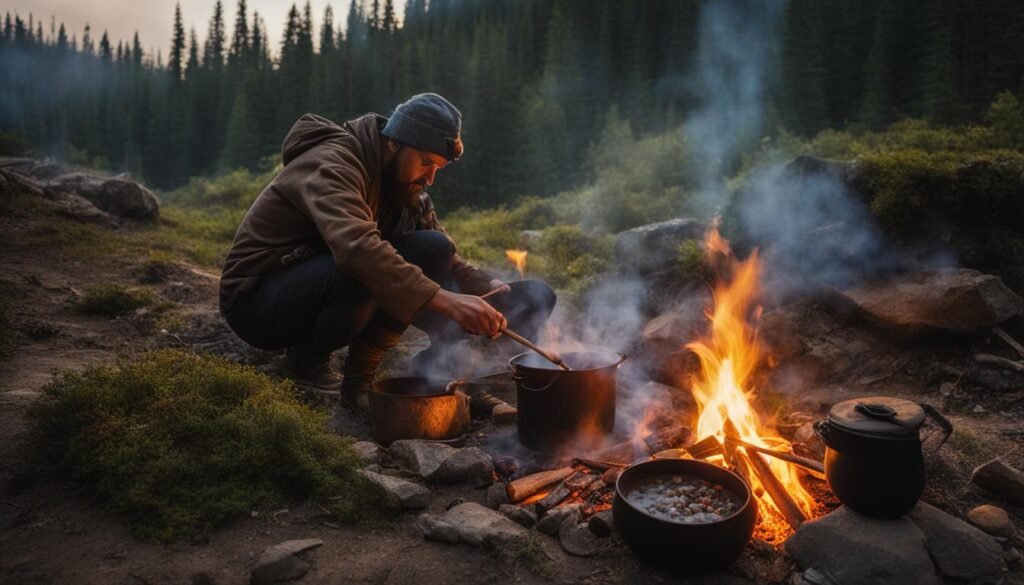
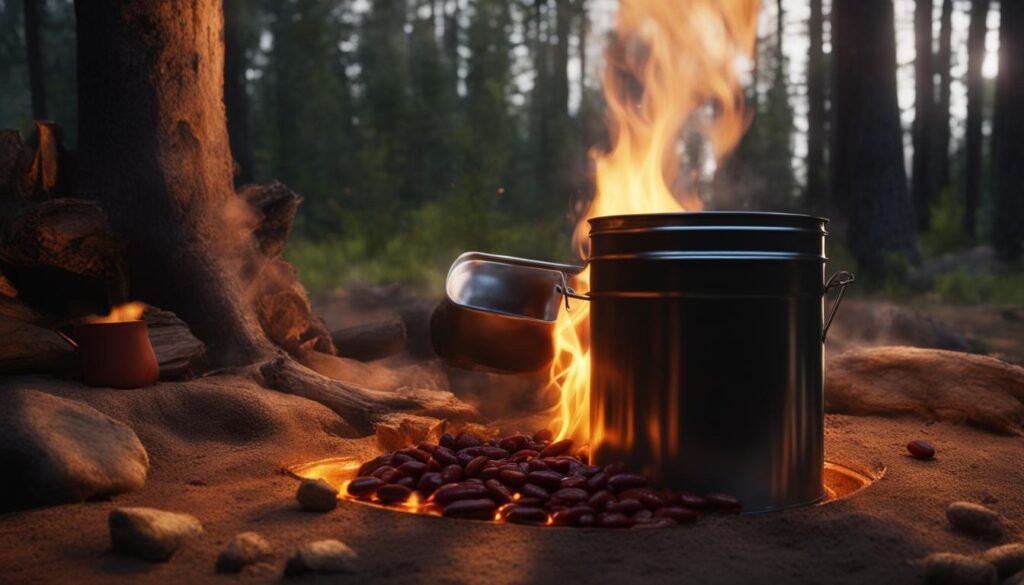
Starting the Fire for Baking
To achieve perfect campfire baking, it’s essential to understand how to start a campfire for baking. Instead of focusing on the flames, the secret lies in harnessing and controlling the heat from the coals. Here’s how to get your fire burning just right.
Gather your supplies
Before starting the fire, gather the necessary supplies:
- Firewood or kindling
- Newspaper or fire starter
- Hardwood charcoal
Build your fire
Begin by arranging the firewood or kindling in a teepee shape in the center of your fire pit. Place some newspaper or fire starter underneath the bundle to help ignite the flames. Light the newspaper or fire starter, allowing the flames to catch onto the kindling.
Pro Tip: Avoid using lighter fluid or accelerants, as these can leave an unpleasant taste on the food.
Add hardwood charcoal
Once the flames have subsided and the kindling has created a good base of hot coals, it’s time to add hardwood charcoal. Arrange the charcoal around the fire, ensuring it’s evenly distributed. Wait for approximately 20 minutes until the charcoal has turned white and appears as glowing embers. This indicates that the coals are hot and ready for baking.
Monitor and adjust
Keep an eye on the fire and adjust as needed. If the coals start to cool down, add additional hardwood charcoal to maintain the desired temperature. Remember, a consistently hot bed of coals is crucial for successful campfire baking.
With your fire properly started and a bed of hot coals ready, you’re now prepared to embark on the delightful journey of campfire baking.
Prepping the Fire for Baking
Once you have a bed of hot coals, it’s time to prepare the fire for baking your delicious campfire creations. To ensure a successful baking experience, it’s essential to divide your fire pit into two sections: one dedicated to baking and the other for lighting more coals.
Start by creating a designated area for baking, either by clearing a space or using a separate fire pit. This will help you maintain better control over the baking process and prevent any mishaps.
To maintain a steady source of heat for baking, keep adding unlit coals near the flames. These coals will gradually ignite and provide the necessary heat for your baking endeavors. Keep an eye on the coals and adjust accordingly to maintain the desired baking temperature.
The number of coals required will depend on the number of dishes you plan to bake and the baking time required. Remember that different dishes may require different levels of heat, so be sure to adjust the number of coals accordingly.
Creating a steady source of heat is crucial for achieving perfectly baked bread or other campfire treats. The consistent heat from the coals will ensure even baking and prevent any burnt or undercooked spots.
Now that you have prepared the fire for baking, it’s time to get creative with your campfire recipes. Whether it’s savory bread, sweet treats, or hearty meals, the fire is ready to transform your ingredients into delicious outdoor delights.

With the fire properly prepared, it’s time to explore some mouthwatering recipes that are perfect for campfire baking. From homemade pizzas cooked in a cast iron skillet to crusty bread baked in a Dutch oven, there are endless possibilities to satisfy your culinary cravings.
So, grab your ingredients, assemble your baking tools, and let the magic of campfire baking ignite your taste buds. The enticing aroma of freshly baked bread wafting through the air is just the beginning of the delightful experience that awaits you.
Cast Iron Skillet Pizza – Satisfying and Easy
If you’re looking for a delicious and simple recipe for campfire cooking, cast iron skillet pizza is the perfect choice. Whether you’re camping, hiking, or just enjoying a backyard bonfire, this campfire pizza recipe is sure to satisfy your cravings.
Ingredients:
- Your favorite pizza dough recipe or sourdough dough
- Cast iron skillet
- Favorite pizza toppings (e.g., cheese, sauce, vegetables, meats)
Instructions:
- Prepare your pizza dough in advance or use store-bought dough.
- Build a hot bed of coals in your campfire.
- Place the cast iron skillet on the hot coals to preheat.
- Once the skillet is hot, carefully spread the pizza dough in the skillet.
- Cook the dough until it becomes golden and crisp, flipping if necessary.
- Add your favorite pizza toppings, such as cheese, sauce, and any other ingredients you desire.
- Continue cooking until the cheese is melted and the dough is cooked through.
Once your cast iron skillet pizza is ready, remove it from the fire, let it cool slightly, and then slice it into wedges. The combination of crispy crust, melted cheese, and flavorful toppings will leave you craving more.
“The secret to a delicious cast iron skillet pizza lies in the perfect balance of crispy crust and gooey cheese.” – Chef James
Enjoy your homemade cast iron skillet pizza while still warm, and savor the delightful flavors of a campfire-cooked meal.
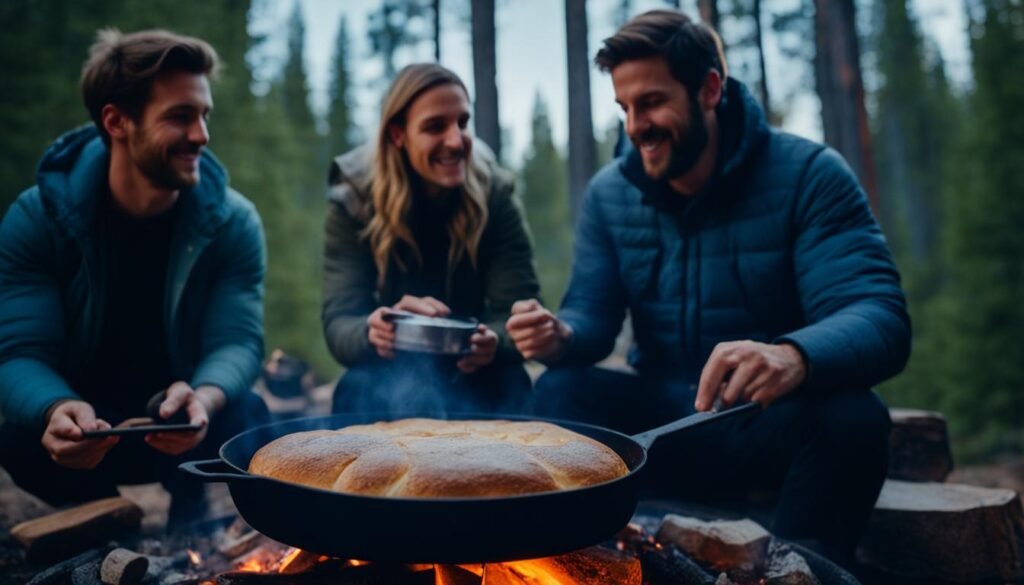
Crisp, Crusty Bread – Simple and Delicious
Baking a loaf of bread in a Dutch oven is another fantastic option for campfire baking. You can prepare the dough at home and shape it before your camping trip, making the process even more convenient. Once you have a bed of hot coals, it’s time to start baking!
Here’s how to create a delicious campfire bread using a Dutch oven:
- Place the Dutch oven on top of the hot coals, ensuring the lid is securely in place. Let it heat for at least 20 minutes to ensure even temperature distribution.
- Add your prepared loaf of sourdough bread to the Dutch oven. Cutting a slit in the top of the dough will allow it to expand properly during baking.
- Cover the Dutch oven with additional coals to create a consistent heat source. Make sure to rotate the pot regularly to ensure even baking and check for browning.
- After about 50 minutes, your campfire bread should be golden brown and perfectly crusty. Remove it from the Dutch oven and let it cool before slicing.
Baking bread in a Dutch oven over a campfire infuses it with a delicious smoky flavor, and the crust turns out beautifully crisp. It’s the perfect accompaniment to any camping meal or a delightful treat on its own.

Tips for Perfect Dutch Oven Bread
Create a bed of coals that provides a steady, consistent heat throughout the baking process. This will help ensure even baking and a uniform crust on your loaf.
Don’t forget to rotate the Dutch oven periodically to promote even baking. This will prevent any hot spots that could result in an unevenly cooked loaf of bread.
Experiment with different types of bread recipes to find your favorite campfire bread. Whether it’s a classic sourdough, multigrain, or a deliciously herbed loaf, the options are endless.
Comparison: Dutch Oven Bread vs. Campfire Skillet Bread
| Dutch Oven Bread | Campfire Skillet Bread |
|---|---|
| Uses a Dutch oven for baking | Uses a cast iron skillet for baking |
| Results in a crusty exterior and soft, fluffy interior | Produces a crisp, golden crust |
| Requires a longer baking time due to the enclosed, indirect heat | Cooking time is relatively shorter and quicker |
| Perfect for making larger loaves of bread | Great for smaller individual servings |
Step-by-Step Guide to Baking Bread on a Wood Stove
If you have a wood stove, you can bring the joy of baking bread indoors. Follow these step-by-step instructions to create delicious, homemade bread using your wood stove:
- Preheat and Prepare: Preheat your Dutch oven on the wood stove. This will help distribute the heat evenly while baking. Shape your dough into a loaf and let it rise for 15 minutes. A warm environment will encourage proper rising.
- Bake Covered: Place the prepared dough in the preheated Dutch oven and cover it with the lid. The enclosed environment will create steam, allowing the bread to rise and attain a soft, moist texture. Bake the bread covered for approximately 50 minutes. Use a timer to ensure precise baking time.
- Uncover and Brown: After 50 minutes, remove the lid of the Dutch oven to expose the bread. This step is crucial for achieving a beautiful golden-brown crust. Continue baking the bread for an additional 10 minutes, or until the desired color is achieved.
- Cool and Slice: Once the bread is golden brown and baked to perfection, remove it from the Dutch oven and let it cool on a wire rack. Allow the bread to cool completely before slicing into it. This will help preserve the moisture and texture of the loaf.
Now you can savor the aroma and taste of freshly baked bread right from your wood stove. Enjoy this wholesome treat for breakfast, lunch, or any time you crave a warm slice of homemade goodness.
Gluten-Free Options for Campfire Bread
If you follow a gluten-free diet, you don’t have to miss out on the joy of campfire bread. With a few adjustments and the right ingredients, you can create delicious gluten-free loaves that are perfect for outdoor baking. Here are some tips and a gluten-free bread recipe to get you started.
Substitute Traditional Flour with a Gluten-Free Blend
To make gluten-free campfire bread, you’ll need to replace traditional wheat flour with a gluten-free flour blend. There are many options available, such as almond flour, rice flour, tapioca flour, or a pre-made gluten-free flour mix. Experiment with different blends to find the one that suits your taste and dietary needs.
Adjust Baking Time for Gluten-Free Bread
Gluten-free bread tends to retain more moisture than regular bread, which can affect the baking time. To ensure your bread is cooked through, you may need to extend the baking time slightly. Keep a close eye on the bread and use a toothpick to test for doneness. If the toothpick comes out clean, your gluten-free bread is ready.
Gluten-Free Campfire Bread Recipe
Here’s a simple and delicious gluten-free bread recipe that you can bake over the campfire:
- Ingredients:
- 2 cups gluten-free flour blend (e.g., almond flour, rice flour, tapioca flour, or a pre-made mix)
- 1 teaspoon baking powder
- 1/2 teaspoon salt
- 2 tablespoons honey or maple syrup
- 1/4 cup olive oil
- 1 cup warm water
- Optional add-ins: seeds, nuts, or dried fruits
Instructions:
- In a mixing bowl, combine the gluten-free flour blend, baking powder, and salt.
- Add the honey or maple syrup, olive oil, and warm water. Mix until well combined.
- If desired, add any optional add-ins, such as seeds, nuts, or dried fruits.
- Shape the dough into a ball and let it rest for 15-20 minutes.
- Prepare your campfire and let it burn down to hot coals.
- Place a cast iron skillet or Dutch oven over the hot coals.
- Transfer the dough into the preheated skillet or Dutch oven.
- Cover the skillet or Dutch oven with a lid and arrange additional coals on top.
- Bake for about 40-45 minutes, or until the bread is golden brown and sounds hollow when tapped.
- Remove from the heat and let cool before slicing and serving.
Enjoy your homemade gluten-free campfire bread!
With this gluten-free bread recipe, you can savor the delicious flavors of fresh, warm bread even if you have dietary restrictions. So gather around the campfire, enjoy the outdoor ambiance, and indulge in the goodness of gluten-free campfire bread.
Embrace the Adventure of Outdoor Baking
Baking bread on a campfire or wood stove allows you to embrace the adventure of outdoor cooking. It’s a chance to escape the confines of a traditional kitchen and connect with the simplicity of nature. As the scent of freshly baked bread fills the air, you’ll be reminded of the joys of simple living and the satisfaction of creating something delicious from scratch.
When you bake bread in the great outdoors, you have the opportunity to become one with your surroundings. Whether you’re camping deep in the wilderness or spending a leisurely afternoon in your backyard, the serenity of nature provides the perfect backdrop for your baking adventures. Close your eyes and listen to the gentle rustle of leaves, feel the warmth of the sun on your face, and allow yourself to be completely present in the moment.
There’s something undeniably satisfying about kneading dough as you breathe in the fresh air and bask in the natural beauty around you. The rhythmic motions of working the dough create a sense of calm and harmony, allowing you to fully immerse yourself in the process. As you shape the dough and place it in the heat of the fire, there’s an anticipation that builds, knowing that soon you’ll be rewarded with a loaf of warm, fragrant bread.
Outdoor bread baking also gives you the opportunity to experiment with rustic recipes that have been passed down through generations. These time-honored recipes rely on simple ingredients and minimal equipment, showcasing the beauty of natural flavors. Whether you’re making a classic sourdough or trying your hand at a unique wilderness bread recipe, each bite is a taste of tradition and a testament to the wonders of nature.
As the bread bakes, it transforms from a simple lump of dough into a golden masterpiece. The crust forms a deliciously crispy exterior, while the inside remains soft and fluffy. Each slice offers a delightful contrast of textures, a testament to the skill and dedication you’ve poured into your outdoor baking adventure.
“Cooking and baking in nature allows us to disconnect from the hustle and bustle of everyday life and reconnect with our primitive roots. The crackling of the fire, the smell of the wood smoke, and the taste of freshly baked bread make for a truly magical experience.” – Emma Johnson, Outdoor Cooking Enthusiast
So, whether you’re baking bread under the starlit sky or beside a crackling wood stove, embrace the adventure of outdoor baking. Let the wilderness inspire you to create culinary masterpieces, and savor the taste of fresh, warm loaves that carry the essence of nature. With each bite, you’ll feel a sense of accomplishment and a deep appreciation for the simple pleasures that life has to offer.
Experience the joy of baking in nature and discover the magic that comes with every loaf. Unleash your inner baker and embark on a journey to create delicious breads infused with the spirit of the outdoors. Whether you’re a seasoned outdoor enthusiast or a novice camper, outdoor bread baking is an adventure well worth undertaking.
Can the same method used for cooking bread on a campfire be used for baking a cake?
Yes, the same method for cooking bread on a campfire can be used for baking a cake. With the right equipment and preparation, you can create a delicious dessert while enjoying the great outdoors. Just be sure to monitor the heat and cooking time carefully for a perfect result.
Conclusion
Baking bread on a campfire or wood stove is not just a cooking method, but a unique and fulfilling experience. It allows you to connect with nature, embrace the adventure, and create delicious, rustic loaves that rival those baked in a traditional oven. Whether you are an experienced outdoor baker or just starting out, the joy and satisfaction of cooking bread over a campfire are unparalleled.
By using the right tools, such as a cast iron skillet or Dutch oven, and mastering the techniques for preparing and maintaining the fire, you can achieve that perfect golden crust and soft, warm interior in your homemade bread. The process may require some adjustments compared to baking in a conventional oven, but the results are well worth the effort.
So, whether you’re camping in the wilderness, hiking in the mountains, or simply enjoying a backyard gathering, don’t miss the opportunity to try your hand at campfire bread baking. It’s a chance to slow down, savor the flavors, and create lasting memories with friends and family. Embrace the adventure, enjoy the process, and immerse yourself in the magic of cooking bread in the great outdoors.
FAQ
What tools do I need for baking bread on a campfire?
You will need a cast iron skillet, a Dutch oven, stainless steel bowls, a knife kit, heatproof gloves, long metal tongs, a cutting board, and a laser thermometer (optional but helpful).
How do I start a campfire for baking?
Build a fire as you normally would and then add hardwood charcoal around the fire. After about 20 minutes, you should have a nice bed of hot coals.
How do I prepare the campfire for baking?
Divide your fire pit into two sections: one for baking and the other for lighting more coals. Keep adding unlit coals near the flames to keep them hot and maintain a steady source of heat for baking.
Can I make pizza on a campfire?
Yes, you can. Use a cast iron skillet and your favorite pizza dough recipe. Cook the pizza dough in the skillet over the hot coals until golden, add toppings, and continue cooking until the cheese is melted and the dough is cooked through.
How do I bake bread in a Dutch oven on the campfire?
Prepare the dough at home, shape it before your camping trip, and place it in a preheated Dutch oven on top of hot coals. Cover the Dutch oven with coals and rotate it regularly to ensure even baking. After about 50 minutes, your bread will be ready to enjoy.
Can I bake bread on a wood stove indoors?
Yes, preheat your Dutch oven on the wood stove, shape the dough into a loaf, and let it rise. Bake the bread covered for around 50 minutes, remove the lid, and continue baking until the bread is golden brown.
How do I make gluten-free campfire bread?
Substitute traditional flour with a gluten-free flour blend and adjust the baking time as needed. Gluten-free bread may require longer baking time due to excess moisture. Experiment with different flours and flavors to create delicious gluten-free bread over the campfire.
Why should I bake bread on a campfire?
Baking bread on a campfire allows you to embrace the adventure of outdoor cooking, connect with the simplicity of rustic recipes, and enjoy the taste of fresh, warm loaves while surrounded by nature.
How can I bake bread in the wilderness?
You can bake bread in the wilderness by using a cast iron skillet or a Dutch oven over the campfire. Just make sure to have the necessary tools and follow the proper fire setup and baking techniques.