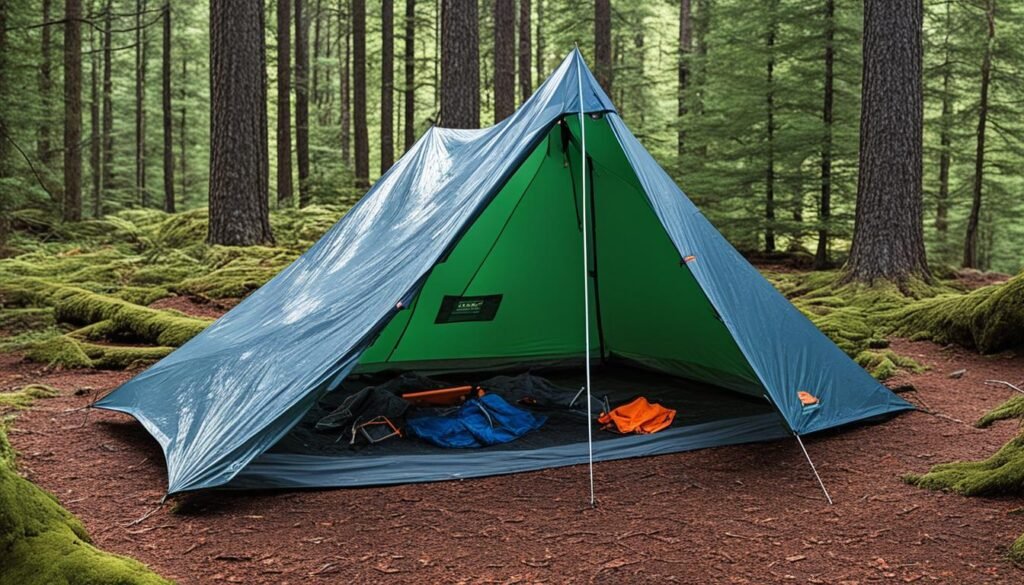
As an avid camper and DIY enthusiast, I’ve often found myself in situations where I needed to repair my camping gear to save the day—and my wallet. One common, but fixable, mishap is a tent’s resilience being compromised by worn-out pole elastic. I’m going to walk you through how to rethread tent pole elastic, which is a straightforward DIY tent pole repair that can extend the life of your shelter. If you’ve experienced the frustration of sagging or loose tent poles, and seek a robust tent pole elastic guide, you’ve come to the right place.
Fortunately, fixing tent pole elastic doesn’t require specialized expertise; rather, it’s about having the right approach and being a little crafty. I personally chose to strengthen my tent’s structure by upgrading from a standard 2mm to a more durable 3mm diameter cord, ensuring greater durability through the seasons.
Let’s dive into how you can take immediate action to ensure your tent stays steadfast and functional, regardless of where you’ve pitched camp.
Key Takeaways
- Identifying the correct diameter cord is critical to a successful tent pole elastic repair.
- Upgrade to a thicker cord for enhanced durability, especially if the original was the typical 2mm cord found in budget tents.
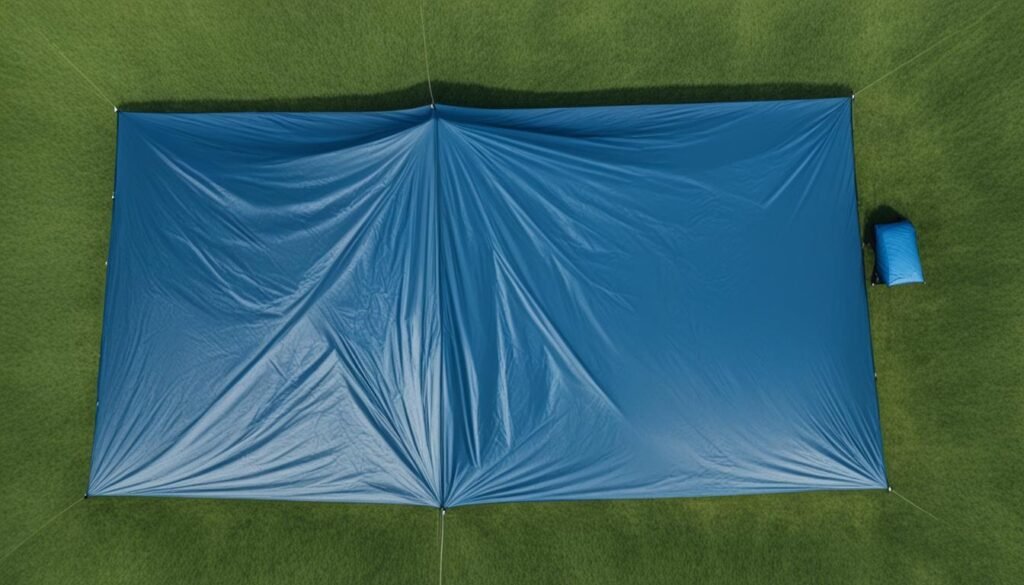
- For a two-man dome tent, start with at least 10 meters of elastic cord; larger tents will require more, depending on pole lengths.
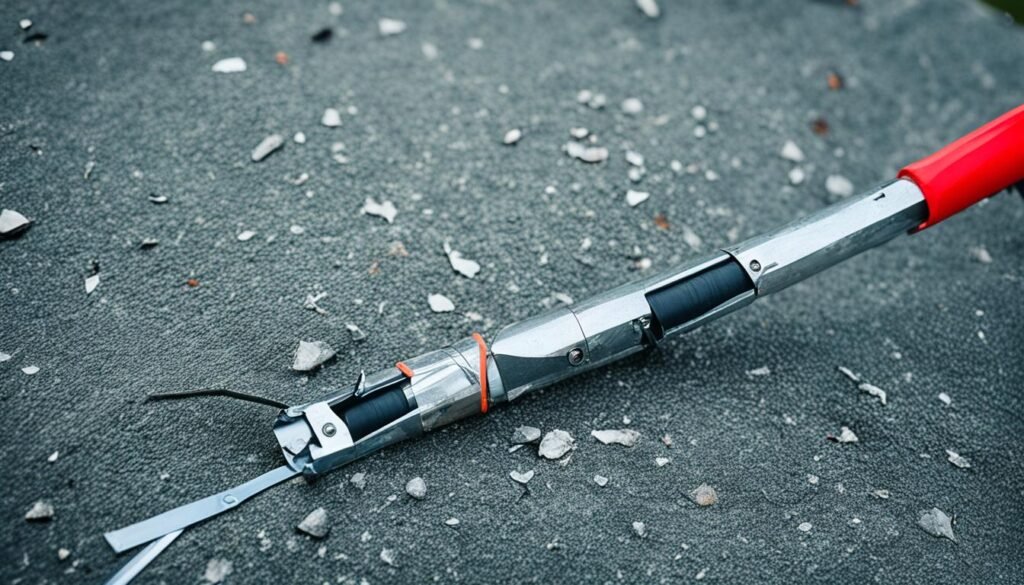
- An old windscreen wiper can be repurposed to create a handy threader for feeding the new elastic through the poles.
- A trial-and-error approach to tension will ensure that the poles are neither too loose nor too stiff for seamless tent assembly.
- Knowing how to rethread tent pole elastic is a valuable skill for DIY tent pole repair and indispensable in remote camping situations.
Introduction to DIY Tent Pole Repair
Embarking on the painstaking yet gratifying journey of tent pole repair, I consider the obligatory first step: scrutinizing the tent pole elastic’s durability. Upon close examination, the telltale signs of wear, or a dearth of elasticity, often unveil the urgent need for a tent pole elastic replacement. To the untrained eye, such telltale signs of deterioration may not scream immediate action, but as someone who revels in the gratification of personally extending my camping equipment’s lifetime, I know better.
It’s the nuances of the repair process—lamenting the lost elasticity and meticulously selecting a robust substitute—that bestow upon it a certain allure. After all, nothing quite compares to solving the puzzle that is an elusive tent pole elastic repair. Yet, the true value of this skill extends beyond mere cost savings; it lies in the subconscious assurance that, should my tent falter while I’m navigating the remote wilderness, I am well-equipped to fix tent pole elastic issues with confidence and finesse.
Assessing the Condition of Tent Pole Elastic
When I lay my hands on the tent pole, stretching the elastic cord and feeling for that resilient snapback—or lack thereof—I’m engaging in a critical diagnostic task. It’s this initial evaluation that dictates whether a simple tightening will suffice or if a full-blown repair is my only recourse. Armed with the knowledge that a fully functioning tent pole elastic is fundamental to a successful camping trip, I approach this step with the meticulous attention to detail it deserves.
The Advantages of Self Tent Pole Elastic Repair
Why would I, or any camper for that matter, take upon themselves the role of tent repair technician? The answers are manifold. There’s undeniable satisfaction in puzzle-solving, a deepened connection with one’s gear, and, not to be understated, significant savings to be pocketed. But on a more instinctual level, it’s the empowerment that self-sufficiency brings—knowledge that amidst nature’s unpredictability, I am my own most reliable resource.
Preparing for Your Tent Pole Elastic Replacement
As I set out to ensure my next camping trip unfolds without structural mishaps, the first thing I focus on is prepping for the all-important task of replacing tent pole elastic. It’s a process I’ve learned never to underestimate, as the integrity of my tent’s framework hangs in the balance. To effectively embark on tent pole repair, precision in preparation is crucial. Gathering the correct tools and materials beforehand paves the way for a seamless repair experience.
Gathering Necessary Tools
Commencing with the inventory, I diligently organize my toolkit. An old windscreen wiper metamorphoses into a proficient metal threader, proving yet again how resourceful a camper needs to be. The ad hoc threader is pivotal for restring tent pole elastic, guiding the new cord through the tent pole channels with ease. A minimalistic setup, it well aligns with my inclination towards efficient and streamlined processes.
Choosing the Right Elastic Cord for Your Tent
Simultaneously, the selection of the correct elastic cord demands attention. Often, the original 2mm cords that accompany many commercial tents falter in resilience. My preference leans towards a sturdier 3mm cord, offering robustness to endure the elements and the occasional wear and tear. After all, a thicker cord can contribute significantly to the longevity of my tent’s framework. Assessing the assembled length of the poles, I procure an adequate length of elastic, considering it should amount to roughly 75% of that length. This heuristic ensures the poles hold together just right, promising stability yet allowing for straightforward assembly and disintegration when the day of departure dawns.
How to Recognize When Tent Pole Elastic Needs Rethreading
As I carefully unpack and inspect my tent equipment, I make it a point to closely examine the condition of the tent pole elastic. It’s a small component, but its role in maintaining the structural integrity of my temporary outdoor abode is paramount. Through firsthand experience, I’ve grown familiar with the signs that indicate the need for tent pole elastic replacement. Sagging tent fabric, poles that refuse to snap into their rightful position, and a general unwieldiness in assembly—all red flags that shout for attention.
It’s not just about inconvenience; it’s about safety and reliability. A tent with compromised pole elasticity can lead to impromptu collapses and inadequate shelter from the elements. Therefore, the immediate question isn’t just ‘how to fix tent pole elastic‘—it’s why we should recognize the early warnings to prevent a full-blown tent malfunction when we least expect it.
Tent pole repair may seem daunting at first, but it’s a skill within the grasp of anyone with a bit of diligence and the right guidance. The elasticity of a tent pole can be assessed with a simple pull test. If the elastic cord stretches beyond its original length without resistance, or fails to return to its original state, it’s time for a rethreading. This DIY preventative measure ensures tension is evenly distributed, which is crucial for the proper function of our outdoor refuge.
- Check the elasticity by stretching the pole segments apart; if there’s little resistance, consider rethreading.
- Examine the cord for fraying or signs of wear and tear that could affect durability.
- Take note of difficulty in tent assembly; this could be due to weakened or damaged elastic.
- Maintain tension by ensuring the cord isn’t loose, preventing poles from disassembling unintentionally.
Being preemptive with tent pole elastic replacement not only extends the life of the tent but also enhances our camping experience, offering peace of mind that our shelter will stand firm against breezes and the bustle of campsite activities. As I’ve often found, a few minor adjustments can make all the difference in the great outdoors.
Step-by-Step Guide on How to Rethread Tent Pole Elastic
When the moment arrives and it’s evident that my tent pole elastic requires rethreading, I attentively gather my arsenal of tools for what I consider a therapeutic DIY tent pole repair session. This regular maintenance not only sharpens my self-reliance skills but also reinforces the longevity of my tent. Here’s how I navigate the rethreading process with systematic precision, ensuring that each step is conducted with an eye toward both functionality and future resilience.
Removing the Old Elastic Cord
The inaugural step in the how to rethread tent pole elastic guide involves delicately expelling the old, fatigued elastic from the tent poles. My method is cautious and methodical, as any hasty movement could lead to damage of the tent’s skeletal foundation—the poles themselves. I begin by unstitching or untying the knots that hold the elastic in place, then slowly withdraw the cord, vigilant not to warp or misplace the pole segments.
Attaching the Cord Threader
With the old cord eclipsed into obsolescence, I transition to the next phase: attaching the new cord to my makeshift threader. In my case, an old windscreen wiper serves admirably as a threader after some minor modifications—a perfect representation of DIY tent pole repair ingenuity. By taping the new cord to the threader with just enough adhesive tape to maintain connection yet not so much as to create friction inside the pole, I strike a delicate balance, critical for smooth rethreading.
For those willing to embark on this journey, a vigilant eye for tension and minutiae regarding the tape’s tackiness is essential. It is imperative to gauge the resistance; an unforgiving pull suggests an overindulgence of tape, warranting adjustment. This finessed subtlety is what ultimately contributes to the sterling glide of the threader within the pole, signifying a seamless succession in the rethreading odyssey.

Now, let’s chart the pertinent table directing us to the specific approach to execute each stage of rethreading seamlessly. This structured guidance is essential in sustaining both your tent’s integrity and your composure during the procedure.
| Action | Description | Tools Required |
|---|---|---|
| Inspect | Check the old elastic for signs of wear and deterioration. | N/A |
| Remove | Gently extract the aged elastic cord from the poles. | Pliers, cutting tool |
| Prepare Threader | Repurpose a windscreen wiper to serve as a metal threader. | Windscreen wiper, adhesive tape |
| Attach New Cord | Adhere the new elastic cord to the threader with minimal tape. | Elastic cord, adhesive tape |
| Rethread | Guide the threader through the tent pole, ensuring a smooth passage. | Metal threader (attached to cord) |
The subsequent steps in the tent pole elastic guide include gauging the requisite tension for the new elastic cord and securing it with a reliable knot. In the essence of conservation and shrewd tent maintenance, these acts are the bedrock upon which a durable and resilient tent cluster rests. Stick with me as I speckle the pathway with tips and tricks accumulated from personal trial and error, ensuring that your rite of passage through tent pole repair may be a touch smoother than my inaugural sojourn.
Measuring and Cutting the Correct Length of Elastic Cord
Once the worn-out cord is removed, it’s time to delve into what I view as a crucial chapter in the tent pole elastic replacement journey: measuring and cutting the new elastic to the perfect length for my tent’s poles. The success of replacing tent pole elastic hinges on exactitude at this stage—a task I approach with the precision of a seasoned artisan.
My advance preparation involves a thorough evaluation of the old cord against the newly acquired one. Doubling as a guide, the old cord’s length, often half the length of the fully-assembled poles, lends insight into the necessary dimensions of the replacement. Now, employing my trusty measuring tape, I proceed with the meticulous ritual of measuring.
Calculating Elastic Cord Length Based on Tent Size
When it comes to tent pole elastic repair, I’ve come to understand that one size doesn’t fit all—a wisdom informed by both personal trial and the collective learning of the camping connoisseur community. Whether for my trusty two-person dome or a more palatial family tent, I ensure ample flexibility by measuring a length that is 75% of the pole assembly’s. It’s a satisfying and practical method that instills within me confidence in the resilience of my shelter.
When to Opt for a Longer Elastic Cord
As I stand in the realm of description and evaluation, I’m cognizant that larger tents, with their grandeur, demand unique attention. In such instances, I’ve found it wise to err on the side of excess, opting for a tent pole elastic guide that allows a little more stretch, thus accommodating the higher tension necessitated by the extended pole structure. This tailored approach is my panacea for ensuring that comfort and security remain uncompromised beneath the canopy of stars.
My reflection on the process of reaffirming the tent’s elasticity commits me to share these insights, so that others may navigate this path with ease and emerge with a tent restored to its former glory.
Tying Knots for Tent Pole Elastic: Techniques and Tips
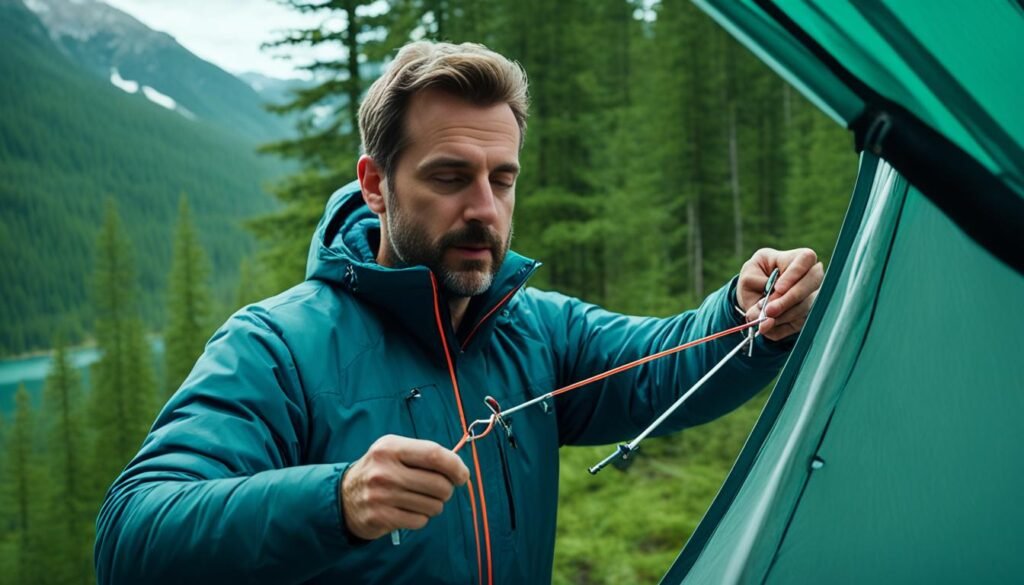
As I approach the final stages of my DIY tent pole elastic repair, I understand that securing the new cord effectively is paramount. Tying a reliable knot and adjusting the tension require a blend of strength and subtlety. The figure of eight knot emerges as the hero in this scenario. Let me elucidate the nuances that elevate this step from routine to an art form within the realm of restring tent pole elastic.
Securing the New Cord with a Strong Knot
My fingers deftly weave the new elastic cord into a figure of eight knot, a choice recommended for its ease of adjustment and resistance to wear. Its larger size offers a functional advantage, preventing the cord from slipping out of place. When looking to fix tent pole elastic, this knot serves as the crucial link that ensures the reassembled poles withstand the necessary tension.
Technique aside, it’s the material and the craft that underscore the efficacy of this part of the repair. In using this approach, I infuse resilience into my tent structure, saved from the precariousness of unreliable elastic.
Determining Tension for Optimal Performance
The tent pole’s tautness is the fulcrum upon which effective reassembly pivots. Through trial and error, I find that optimal balance; the art lies in ensuring the poles remain cohesive yet aren’t oppressively bound. This balance is critical when you’re in the field and necessitates an adjustment for easy tent pole elastic repair. The dialogue between knot and tension is a delicate one, where each informs and refines the other in the flourishing narrative of a well-maintained tent.
In my experience, the right tension allows for the poles to be separated without undue resistance, facilitating a smooth setup and takedown of my shelter. This thoughtful calibration of tension extends beyond mere functionality—it’s a gesture of care for the gear that protects me, reflecting my reverence for the wilderness I so love to explore.
- Inspect the cord for wear before cutting.
- Choose a thick, durable cord, preferably a 3mm diameter for larger tents.
- Tie a figure of eight knot for a secure and adjustable hold.
- Adjust tension so the poles stay together while allowing for separation as needed.
- Testing tension for reliability in various weather conditions.
Restringing Tent Pole Elastic with Ease
Approaching the task of tent pole elastic replacement, I am reminded of the value patience and precision play in the process. Restringing tent pole elastic is comparable to threading a delicate tapestry—each segment must align perfectly to restore the tent’s original form. The tools for this intricate task can be as humble as a makeshift threader, often culled from items readily found in our everyday lives.
The key lies in using this threader—perhaps a repurposed windscreen wiper—to seamlessly feed the new elastic through the poles. As I proceed to restring tent pole elastic, it’s a gentle pull here and a cautious push there, ensuring that the structure within the poles remains undisturbed. This stage is pivotal; it’s where the skill of the craftsperson comes to bear, maneuvering through potential obstructions to ensure that the cord glides through as if on air.
In the table below, I document the steps for a comprehensive tent pole repair, providing clear guidance on restringing your tent pole elastic. Whether you’re a seasoned camper or new to the art of tent maintenance, this structured approach to DIY repair will leave your tent poles as taut and firm as they were on your first outing.
| Step | Instructions |
|---|---|
| 1. Prepare the Threader | Securing a rigid, yet slim metal piece to serve as a threader. The length should exceed that of a single tent pole segment. |
| 2. Attach New Cord | Bind the new elastic cord to your threader using a small amount of tape, ensuring minimal bulk for an unhindered pass-through. |
| 3. Guide Through Poles | With a steady hand, navigate the threader through each pole segment, careful not to exert undue pressure on the poles’ internal conduit. |
| 4. Pull Through Gently | Gently coax the cord through to avoid kinking or tangling, which could compromise the cord’s strength. |
| 5. Check for Snags | After each successful insertion, assess the internal pathway to ensure nothing obstructs the next pass. |
| 6. Finish and Test | Once all segments are threaded, conduct a pull test to ensure there’s adequate tension before the final knotting. |
Implementing these steps dutifully will not only ensure a successful tent pole elastic replacement, but also provide a sense of accomplishment in being able to maintain and care for your essential camping gear. Restringing isn’t merely repair; it’s an act of ensuring your home away from home remains sturdy and welcoming through all of nature’s tests.
Finishing Touches: Finalizing the Elastic Cord Rethread
With the rethreading process nearly complete, it’s imperative to address one of the most delicate stages of tent pole elastic repair: ensuring optimal tension and carrying out a meticulous inspection. This stage is critical for maintaining the structural integrity of the tent, akin to ensuring that the spine of my outdoor refuge is both resilient and adaptable.
Adjusting Tension Before Final Knotting
Adjusting the tension of the tent pole elastic is a balancing act—a taut string may cause excessive strain on the poles, while excessive laxity could lead to a disheveled structure. After tent pole elastic stringing, I methodically tune the tension, testing it to find that sweet spot where the poles remain connected yet can be easily separated by hand when needed. It’s an exercise in precise equilibrium, one that could mean the difference between a well-pitched tent and a frustrating camping experience.
Inspection and Testing Post-Rethreading
Upon applying the final adjustments, I conduct a thorough inspection, a ritual that cements the functionality of my tent for future excursions. It’s in this scrutiny that I can ascertain the success of my efforts to fix tent pole elastic effectively. By simulating the conditions in which the tent will function, I expose any weaknesses in the rethreaded elastic—pulling at the poles, introducing twists and turns, all to ensure what I’ve constructed can withstand the capriciousness of the wild.
This table reflects the steps taken for a rigorous post-rethread inspection, capturing the essence of completeness in tent pole elastic repair.
| Action | Technique | Outcome |
|---|---|---|
| Visual Inspection | Examine the cord throughout all pole segments for any signs of snags or unevenness. | Ensures cord is properly threaded without physical damage. |
| Tension Assessment | Gently pull poles apart to gauge the resistance provided by the new elastic. | Confirms that the tension is appropriate for sturdy assembly. |
| Structural Testing | Attempt to bend and manipulate the tent poles as if in natural setup conditions. | Verifies the poles’ resilience and the cord’s strength under stress. |
| Connectivity Check | Ensure that each pole segment seamlessly connects with the next. | Prevents potential issues during the actual tent setup. |
Confident in my tent pole elastic repair prowess, I look forward to the many nights under the stars that lie ahead, secure in the knowledge that my shelter stands robust, ready to cocoon me through my wilderness jaunts.

Maintenance Tips for Preserving Tent Pole Elastic
My excursions into the wilderness have taught me that diligent maintenance is the cornerstone for ensuring the continued resilience of my camping gear. A crucial component that often needs attention is the tent pole elastic. Over time and after numerous assemblies, the integrity of this elastic can compromise the tent structure if not properly cared for. In my pursuit to fix tent pole elastic troubles and aid fellow outdoor adventurers, I aim to shed light on the most effective maintenance practices that could significantly extend your tent pole’s life.
Key to tent pole repair and maintenance is the routine monitoring of the cord’s elasticity. A simple yet effective way to preserve it is to gently stretch and release the cord, feeling for that robust snapback which signals good health. However, once the snapback begins to wane, it may be time to consider a tent pole elastic replacement. By catching and addressing such signs early, one can avoid the fray that leads to mid-camping woes.
Consistently keeping the poles clean is another indispensable practice. Dirt and grit can not only wear down the cord’s exterior but can also infiltrate the pole segments, causing abrasion from within. Post-trip cleaning, focused on both the poles and the cord, is a preventative measure against gradual damages which often occur unbeknownst to the eye.
Moreover, temperature plays a pivotal role in the elastic’s longevity. Prolonged exposure to extreme temperatures—be it the searing heat or the biting cold—can weaken the cord’s composition. I’ve learned to stow my tent in a temperate environment, shielding it from such harsh conditions. Additionally, mindfulness in coiling techniques, such as using loose loops rather than tight windings, can prevent the elastic from stretching out when stored.
Emphasizing these simple, yet paramount maintenance tips paves the way for reliability and extends your tent pole’s lifespan, ensuring it stands steadfast against the diverse challenges posed by nature. Now, let us visualize these recommendations through a structured table.
| Maintenance Action | Purpose | Benefit |
|---|---|---|
| Regular Elasticity Checks | Detect elasticity loss early | Prevents sudden elastic failure |
| Clean Tent Poles Post-Trip | Remove debris to reduce abrasion | Preserves elastic and extends pole life |
| Avoid Extreme Temperatures | Prevent environmental degradation | Maintains cord strength and flexibility |
| Mindful Coiling Storage | Prevent over-extension | Keeps elastic resilience between uses |
In sharing my methodical approach to tent pole elastic maintenance, I trust these insights will serve as a compass for your own camping endeavors.
Common Mistakes to Avoid While Rethreading
In the pursuit of a successful DIY tent pole repair, particularly when learning how to rethread tent pole elastic, awareness of common pitfalls is as essential as the process itself. Whether you’re a seasoned outdoor enthusiast or a newcomer to the intricacies of tent maintenance, it pays to be well-versed in the tent pole elastic guide and avoid mistakes that can hamper your results.

A pressing error often encountered is the overuse of tape when attaching the new elastic cord to the threader. Excessive tape not only increases resistance but can also cause the threader to snag on the interior of the tent pole, disrupting the rethreading process. Another tricky aspect is the tying of knots—too large and they may not pass through the pole segments smoothly; too small and they risk slipping out, unraveling your hard work. Below, I’ve constructed a table outlining potential mistakes and how they can affect your rethreading, providing insights to assist you in nailing the repair on the first try.
| Mistake | Consequence | Prevention |
|---|---|---|
| Overuse of tape on threader | Increased resistance during rethreading | Use only enough tape to secure the cord |
| Improper Knot Size | Complicates threading or results in slippage | Choose knots that are secure yet pass through poles |
| Forced Threading | Can damage the cord or pole inner surface | Guide elastic gently, ensuring smooth passage |
| Inadequate Tension Testing | Poles may fail to stay assembled | Test and adjust tension accordingly before finalizing |
| Ignoring Pole & Cord Compatibility | Incorrect cord diameter may impair function | Ensure cord chosen fits pole dimensions |
With a nuanced approach, understanding these potential errors, and adhering to the trusted tent pole elastic guide, you can expect to carry out a smooth and effective DIY tent pole repair. Remember, the devil is in the details—the careful application of each step is what separates a makeshift fix from a durable, reliable tent setup.
Alternate Methods for Tent Pole Elastic Stringing
In the varied landscape of outdoor adventures, circumstance often dictates innovation—especially when it comes to restring tent pole elastic. Not every camper is equipped with an ideal toolkit, and conditions in the wild rarely play by the rules. Consequently, my approach to tent pole elastic repair must be adaptable, utilizing whatever materials I can conflate to mimic the professional tools I left at home.
Using Makeshift Tools for Rethreading
Resourcefulness becomes my prime ally when unforeseen repairs call for a prompt tent pole elastic replacement. In instances where my trusty threader is missing in action, I’ve turned to common substitutes like an old wire coat hanger, skillfully fashioned into a makeshift yet effective alternative. With care, I thread the elastic through the narrow confines of tent poles, ever watchful not to damage the integrity of the pole—or the newly installed elastic.
These makeshift tools are not just stopgaps but manifestations of ingenuity on the trail. By bending wire hangers or utilizing strong, thin fishing lines, I ensure that my shelter remains a reliable sanctuary.
Adapting Techniques for Different Pole Types
Not all tent poles are created equal, and each variant—from aluminum to fiberglass or composite materials—commands its own technique for effective tent pole elastic repair. For instance, metal poles may favor a stiffer threader to push through the elastic, whereas composite poles often require a more gentle touch to avoid interior scuffs that could lead to friction and wear.
Variations in inner pole diameter also necessitate a versatile approach. Sometimes, a thinner elastic cord is necessary, whereas other times, the stability promised by a thicker cord is both feasible and advisable. An essential part of the process is to measure not only the poles but also the holes, ensuring that my selected cord won’t be too snug a fit.
| Materials | Pole Type | Technique |
|---|---|---|
| Old wire coat hanger | Metal poles | Stiffer materials for easier pushing |
| Fishing line | Fiberglass/composite poles | Gentle threading to prevent interior damage |
| Thicker cord (3mm) | Larger diameter poles | Ensure fit for additional durability and support |
Whether I’m faced with the pressing need to fix tent pole elastic in the backcountry or prepping for future tours, my ability to adapt to the conditions and utilize what’s at hand often spells the difference between a night under the stars or a collapse at midnight. Embracing flexibility and creativity, I prepare for what lies ahead, moment by moment, repair by repair.
Advanced Techniques: Rethreading Like a Professional
When it’s time to fix tent pole elastic and achieve professional-grade results, I often turn to advanced tent pole elastic stringing methods that elevate my DIY prowess. These sophisticated techniques not only lend a factory finish to my repairs but also significantly bolster the longevity and functionality of my tent poles, ensuring they withstand the rigor of outdoor excursions.
Within my toolkit lies a gem tailored for these situations—a diamond eye threader. It’s specific to the task and performs magnificently, gliding through the poles as it carries the new elastic cord in tow. While resorting to such a tool might seem an excess, the quality it brings to the tent pole elastic guide process is undeniable. It’s these instrumental nuances that transform a simple rethreading into an artisanal craft.
The ingenuity doesn’t stop there. Another trick up my sleeve is using gravity-assisted strategies. This can be as simple as employing a safety pin strategically placed at one end of the thread, allowing gravity to aid the cord’s journey through the maze of tent poles. Such methods are not just clever; they evoke the kind of innovation and problem-solving spirit that camping itself celebrates.

Behold, the meticulous table that showcases these advanced rethreading methods to fix tent pole elastic. This visual guide serves as not just instructions but as a testament to the detail-oriented approach that underlies quality tent maintenance.
| Technique | Description | Benefits |
|---|---|---|
| Diamond Eye Threader | Utilize a device designed to string elastic through poles with precision. | Ensures smooth passage and evenly distributed tension for optimal performance. |
| Gravity-Assisted Rethreading | Attach a weight, like a safety pin, to one end of the elastic and allow gravity to facilitate the process. | Minimizes manual effort and reduces potential damage to the cord or tent poles. |
| Measured Tension Adjustment | Gradually increase tension as the cord is fed through, to find the ideal balance. | Prevents overstressing poles while ensuring the tent’s structural integrity. |
Above all, the key to professional-caliber tent pole elastic repair lies in patience, precision, and the willingness to utilize advanced methods that mimic the finesse of a seasoned craftsperson. It’s a potent blend of skill and innovative thinking that fortifies my connection to the gear that shelters me amidst the unforgiving wilderness.
Resourcefulness During Camping: Using Other Gear for Rethreading Tasks
Resourcefulness on the campsite is often synonymous with innovation, particularly when faced with the unexpected need for tent pole repair. My experiences have shown me that unanticipated situations necessitate a blend of creativity and pragmatism. I’ve found that having a knack for repurposing available everyday items can be a game-changer. An example that comes to mind—an impromptu tent pole elastic replacement—involved a bit of resourceful improvisation using common camping paraphernalia.
Repurposing Everyday Items for Tent Repair
One of the hallmarks of effective DIY tent pole repair is utilizing items that are on hand for unforeseen fixes. For instance, when the elastic threading tool was nowhere to be found, I’ve successfully repurposed windscreen wipers from my vehicle to serve as makeshift threaders. This not only demonstrated resourceful adaptation but also saved my tent’s structure from succumbing to the weight of the canvas.
Creative Solutions for Unexpected Issues
Embracing creative solutions in the face of tent issues enhances one’s ingenuity in the backcountry. It’s about recognizing the potential in items not originally intended for tent pole repair, thereby transforming adversity into advantage. It taught me to perceive my surroundings as a treasure trove of tools, rather than passive elements, while ensuring I can always handle tent pole elastic replacement with confidence and dexterity.
| Item | Usual Use | Repurposed Use in Tent Repair |
|---|---|---|
| Windscreen Wiper | Automotive Window Cleaning | Threading Elastic Cord Through Tent Poles |
| Wire Coat Hanger | Clothes Hanging | Forming a Makeshift Hook to Retrieve Pole Ends |
| Paracord | General Tie-Downs | Alternative Elastic for Poles When Original is Unavailable |
| Safety Pins | Clothing Repairs | Attaching to Elastic Ends to Feed Through Tent Poles |
Conclusion
Throughout this guide, we have traversed the landscape of DIY tent pole repair, demystifying the process of tent pole elastic repair. From the initial assessment of your tent’s elastic needs to meticulously selecting the right tools and cords for the job, the path to restoring your tent’s functionality has been laid out with practical clarity. Remember, how to rethread tent pole elastic is not just about the steps taken but also about the mindful attention to detail—the removal and careful attachment processes, precise measuring and cutting, and the final checks and adjustments to ensure optimal tension.
Recap of Tent Pole Elastic Repair Method
Let me reiterate, the essence of a reliable tent pole elastic repair lies in the harmony between the chosen cord’s strength and its compatibility with the tent’s poles. Recognizing when rethreading is necessary and knowing exactly how to execute this task can save your outdoor abode from unexpected collapse. Your tent is a trusty companion in the wild, and with these insights on DIY tent pole repair, you’re well-equipped to tackle any issues that arise, ensuring many more nights under the stars.
Encouragement for Self-Sufficiency in Camping Gear Maintenance
As we conclude, I must urge you to harness these lessons to foster self-sufficiency. Maintaining your camping gear is not just about saving costs; it’s a meaningful adventure all on its own. The confidence gained from learning how to rethread tent pole elastic, coupled with the satisfaction of extending the life of your tent, embodies the spirit of independence that nature-bound escapades are all about. Take pride in your newfound skills and the assurance that, come what may, you can rely on your own two hands to keep your sanctuary secure.
FAQ
How can I assess the condition of my tent pole elastic?
Look for signs of wear such as fraying, sagging, loss of elasticity, or difficulty in assembling the tent due to the elastic not holding the poles together firmly. These conditions indicate that the elastic may need to be replaced.
What are the benefits of repairing my own tent pole elastic?
By repairing the elastic yourself, you save money and get the satisfaction of extending the life of your tent. Additionally, DIY repairs enhance your self-sufficiency and are handy for emergency tent pole fixes while camping.
What tools do I need for tent pole elastic replacement?
You’ll need a cord threader or makeshift threader, like one crafted from an old windscreen wiper, pliers, scissors or a knife, and tape to attach the new elastic cord to the threader. You may also want a lighter for sealing the ends of the cord.
How do I choose the right elastic cord for restringing my tent poles?
Measure the opening diameter of your tent pole to ensure you get the correct size—usually between 2mm and 3mm in diameter – and choose a cord that matches your tent’s specifications and desired quality. A balance between flexibility for assembly and firmness for structural support is key.
When is it necessary to rethread tent pole elastic?
Rethreading is needed when the elastic cord is overstretched, has lost its resilience, or is physically damaged. Properly functioning elastic is essential for easily assembling and maintaining the structure of your tent.
What is the process for attaching the cord threader?
After removing the old cord, begin by securely attaching the new elastic to your threader with tape. Use just enough tape to hold, but not so much that it increases resistance when pulling through the tent poles.
How do I measure and cut the correct length of new elastic cord?
Measure the length of the old elastic cord as a reference, or consider it to be typically half the length of the tent poles when assembled. Adjust this measurement based on the stretchiness of the new elastic, keeping in mind the size and specifications of your tent.
What knot should I use when securing the new tent pole elastic?
A robust figure of eight knot is commonly recommended because it’s strong, easy to adjust, and less prone to slipping under tension. It ensures that the tent poles are held together effectively.
How should I adjust the tension on the tent pole elastic during rethreading?
The elastic should be tight enough to keep the poles together but flexible enough to allow for easy disassembly. Adjust the tension by tying and testing, ensuring that the poles come apart and snap together with minimal effort.
What maintenance tips can prolong the life of my tent pole elastic?
Regularly check the elasticity, keep the pole clean, avoid extreme temperatures, and be mindful of how you coil the elastic during storage. Correct maintenance prevents premature wear and keeps the elastic functioning well.
What are common mistakes to avoid during the rethreading process?
Avoid using excessive tape when attaching the elastic to the threader, which can hinder the smooth passage through the poles, and be cautious not to tie knots too big or too small that may impact tent performance.
What makeshift tools can I use if I don’t have a cord threader?
Improvised items like old wire coat hangers or sturdy fishing lines can be repurposed as makeshift threaders. These tools can be just as effective when rethreading tent pole elastic in the field.
How do I adapt my rethreading technique if I have different types of tent poles?
Your technique may need to vary depending on whether the poles are metal or composite and the size of the holes. Use a threader that smoothly fits inside the poles and adjust your method to suit the pole specificities.
Can you describe an advanced rethreading technique to mimic professional repairs?
Professional-like repairs can often be achieved by using specialty tools like a diamond eye threader or implementing gravity-assisted stringing, where the tent is positioned to utilize gravity to help with the rethreading.
What are some creative solutions for unexpected tent pole repairs while camping?
Campers can show ingenuity by repurposing everyday items like windscreen wiper blades to create a threader, or using duct tape as a temporary fix. These solutions can save the day when specialized repair tools aren’t available.