As an outdoor enthusiast, the allure of the wilderness often calls me to embrace minimalist camping methods, where every ounce of gear is accounted for. Learning how to set up a wall tent without a frame has expanded my ability to adapt to diverse landscapes and weather conditions. Embracing the concept of a frameless wall tent setup offers not only a lighter pack but also the satisfaction of mastering the environment with creative solutions. Through this guide, I’ll share the insights and innovative approaches gathered from seasoned backpackers to help you achieve a secure no frame wall tent assembly using nature’s own offerings and some cleverly devised strategies.
Key Takeaways
- Mastering a frameless setup includes utilizing natural surroundings such as trees and rocks for structural support.
- Understanding the function and application of advanced knot-tying techniques is fundamental for a stable shelter.
- Trekking poles can double as sturdy tent poles, exemplifying the versatility of outdoor gear.
- Proper ventilation and condensation management are key to maintaining comfort within these minimalistic structures.
- Awareness of the benefits and trade-offs of lightweight materials is crucial when selecting a frameless wall tent.
- A blend of resourcefulness and careful planning is essential in successfully pitching a tent without traditional frames.
Understanding Frameless Wall Tent Design
In my deep-dive into minimalist backcountry living, it’s clear that the frameless wall tent design has revolutionized the way we experience the wild. The shift away from traditional, bulky frameworks to sleek, adaptable shelters not only lightens our load but enhances our connection with nature. Through smart use of materials and design principles, we’ve come to appreciate the nuanced approach of wall tent pitching without frame, which fosters a greater degree of flexibility and engagement with our surroundings.
The Principles Behind Frameless Tent Structure
The core principle of frameless tent designs lies in utilizing the terrain itself as the foundation for your shelter. Whether it’s anchoring the tent to sturdy trees, wedging it between rocks, or using nearby features as windbreakers, the environment becomes an integral part of your setup. Gone are the days when campers are weighed down by metal poles; instead, we step into the wilderness with portable hiking gear that doubles as part of our shelter, crafting a habitat that is both efficient and harmonious with its setting.
Materials Commonly Used for Frameless Wall Tents
I’ve noticed a trend towards using high-tech fabrics such as Dyneema Composite Fabric (DCF) in the construction of frameless wall tents. Renowned for its outstanding strength-to-weight ratio, DCF not only sheds the ounces but also stands firm against the harshest of elements. In embracing these advanced materials, we gain a robust shell that can endure prolonged exposure to nature’s whim without succumbing to wear and tear as quickly as traditional materials.
The Benefits of Frameless Tent Designs
As someone who cherishes every moment in the backcountry, I can attest to the profound benefits that frameless wall tent installations offer. The immediate advantage is a featherlight pack, rendering the journey less about the burden of gear and more about the pure joy of exploration. Moreover, adaptability is another hallmark of these designs. They empower us to curate our setup specific to each adventure, taking into consideration the unique ebb and flow of our planned ventures—whether involving a full tent for protection against the elements or simply a tarp for a starlit canopy.
| Feature | Benefit | Material Example |
|---|---|---|
| Weight | Lighter Pack | Dyneema |
| Weatherproof | Enhanced Durability | SilNylon |
| Adaptable | Environment Versatility | Cuben Fiber |
| Space Efficiency | Maximized Internal Space | Ripstop Nylon |
In conclusion, embracing frameless wall tent designs has revealed a new dimension to my wilderness experience. With a healthy respect for material ingenuity and an understanding of these tents’ inherent benefits, I’ve transformed my outdoor stays into lighter, adaptable, and more attuned encounters with nature. It’s an ongoing journey, one that continually teaches the art of pitching a haven amid the elements with finesse and resilience.
Essential Preparation Before Pitching Your Tent
When embarking on an outdoor adventure, where shelter is a canvas between me and the stars, setting up a wall tent without poles becomes an art and a science. My firsthand experiences have taught me that preparation is the linchpin to mastering this art form, and there are several factors to vet before laying out the first stake or guideline. Emphasizing the importance of readiness aligns with the golden rule of backcountry exploration: never underestimate the impact of your gear and environment.
Gearing up for adventure, I’ve learned the criticality of selecting a tent that balances reliability with portability. Choosing the correct tent involves mapping my journey ahead—considering terrain, oscillating weather patterns, or the presence of pesky insects—so I have the arsenal for a frameless canvas stand-off against Mother Nature. Here come into play tips for setting up a frameless wall tent, where understanding the dynamics of lightweight fabrics, the ploys of condensation, and the tricks of the staying put despite the wind’s bash and lull, steer me to success.
Before I venture out, I dwell on the knowledge at my fingertips; literature and experienced voices guide me through soil types and terrace layouts. There’s more to anchoring a tent than meets the eye. It’s not just about the tent’s blueprint or its weight—it’s the topographical sketch, the potential torrential trials ahead, the solid ground I seek, or the need for those few extra stakes that bear the names of anchors in a tempestuous sea.
The fabric of my tent is not just a material—it’s a statement of purpose. Whether it shields me from the onslaught of an unexpected downpour or breathes easy under the canopy of a coniferous titan, the tent is my trusted ally. Hence, my foray into the wilderness is preceded by a deliberate selection of the fabric—be it Dyneema for its celebrated resilience or SilNylon for its dependable balance of weight and cost.
Let me articulate my creed as an open-air voyager: I fathom a frameless habitat not as a challenge but as an invigorating dalliance with Herculean forces. As I prepare to pit my width of knowledge against the wilderness’s capriciousness, I focus on foresight—a canvas unfurled is a signal sent up to the skies, a signal declaring that I am ready. And thus armed with setting up a wall tent without poles, I step firm-footed into realms untamed and time-honored.
Selecting the Perfect Campsite for Frameless Wall Tents
When venturing into the great outdoors with a minimalist mindset, I’ve found that the selection of a campsite becomes not just a choice, but an essential strategy for frameless wall tent setup. Achieving that idyllic pitch starts long before the stakes touch the ground—it begins with a vision of natural architecture and an understanding of the environment.
As an experienced camper dedicated to refining the wall tent set up guide, I have grown to recognize that every location holds its secrets and potential pitfalls. My aim is to highlight how, with careful consideration, you can find the perfect spot for your shelter, enhancing your wilderness experience while keeping the elements at bay.
Evaluating Terrain and Shelter from Elements
My initial step is always to scan the terrain, seeking out features that offer a natural shield against the wind and rain. Flat land may seem inviting, but is it exposed? Could that picturesque hilltop become a wind tunnel by night? I look for natural windbreaks—a copse of trees, perhaps, or a rocky outcrop—factors that are vital in creating a cozy, weatherproof refuge for the night.
Impact of Soil and Ground Conditions
The ground beneath my feet is the foundation of the setup, and I’ve learned that it cannot be ignored. Soil that’s too soft might cause stakes to loosen, while stony ground could render them useless. I think in terms of balance—sufficiently firm to secure my tent, yet soft enough to accommodate the necessary gear. Sandy or loamy soils might call for wider or longer stakes, or rocks might become pivotal in anchoring my tent in place.
- Flat, Sheltered Terrain: Offers ease of setup and protection from wind.
- Dense Tree Coverage: Useful for tying off guy lines, additional protection from overhead elements.
- Proximity to Water: Essential for hydration but should be balanced with safety considerations like rising levels.
- Rock Features: Provide natural wind breaks and additional anchoring options.
In conclusion, understanding the dynamics of a campsite’s terrain and soil is a subtle art that comes with experience and precision. This knowledge dictates my frameless wall tent’s stability, durability, and my overall comfort during each outdoor pursuit. A well-chosen site is not merely a piece of ground; it is a partnership with nature, a union that will guard and sustain me through the night.
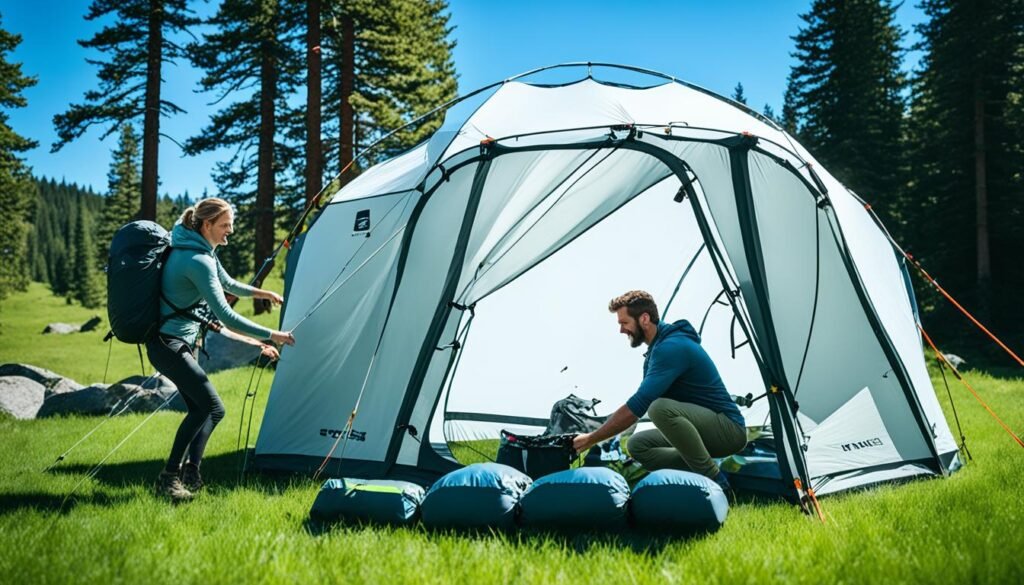
How to set up a wall tent without a frame
Adventuring into the wild with the intent to journey lightly often leads me to innovation. I’ve discovered that mastering how to set up a wall tent without a frame unlocks a level of freedom that traditional camping can’t provide. The key to a functional frameless wall tent lies in my ability to use what nature offers – be it trekking poles, sturdy branches or the solid trunks of trees. These become the essential pillars of support for my shelter.
The process commences with a meticulous selection of anchor points. Whether it’s the crook of an ancient oak or a formation of rocks, they are chosen with precision for their stability and resilience to the capricious whim of the elements. I ensure that each tethering is executed with care, employing various knot-tying techniques that I’ve refined over many expeditions to secure my tent tautly.
Striking the balance between a protective enclosure and one that breathes requires finesse. Thus, strategically orienting the tent not only for maximum defense against wind and rain but also to harmonize with the natural airflow is critical. Proper ventilation is not an afterthought—it’s a meticulous component of my setup to prevent the night’s chill from turning my haven into a damp cocoon.

Here, I offer a glimpse into my explorations and lay down the methodology behind a successful frameless wall tent setup:
- Initial Inspection: Upon reaching a prospective campsite, I scrutinize the terrain, looking for the ideal spots that offer natural protection and proper ground for anchoring.
- Equipment Selection: I regard my trekking poles as dual-purpose tools – for navigation and as pivotal structural components for my tent.
- Knot Mastery: Compiling an inventory of dependable knots, like the bowline or hitch, has proven indispensable for securing my shelter against adverse weather.
- Anchor Point Precision: I elect natural features like trees or boulders that can be used as steadfast anchors to suspend, connect, or serve as a substitute for traditional poles.
- Weather Adaptation: My setup accounts for changes in weather, maintaining tent tautness and employing strategies for any necessary quick adjustments.
In review, the essence of pitching a frameless wall tent is embodied in resourcefulness and adaptivity, leveraging the environment itself as both ally and foundation. The very practice hones my outdoor skills, transforming each camping experience into an exercise in mindful interaction with the world around me. Through this purposeful approach, I achieve that storied blend of minimalism and comfort inherent to modern wilderness quests.
Choosing Your Anchor Points: Trees, Rocks, and Beyond
Embarking on a no frame wall tent assembly adventure invites the challenge of finding reliable anchor points in place of a traditional tent frame. I often find myself scanning the wilderness for robust trees, immovable rocks, or any other features that can support my frameless tent designs. The strategic selection of these natural elements is fundamental to the stability and success of my shelter in the wild.
As someone proficient in minimalist camping techniques, I’ve come to learn that the variety and placement of anchor points can significantly impact the resilience of my tent setup. While trees are a common choice due to their availability and strength, I must evaluate their health to ensure they can withstand additional tension from roped shelters. On the other hand, large rocks provide a different kind of assurance—they are immovable and offer a grounding presence for my tent’s perimeter.
Here’s a quick overview of the natural features I consider when setting up my tent:
- Fragrant pines that signal firm ground and the potential to shield my tent from powerful gusts.
- Boulders that act as steadfast sentinels against the force of nature.
- Configurations of the land itself, such as dips and rises that can play a pivotal role in water management during inclement weather.
What makes selecting anchor points a nuanced endeavor is the need to respect and preserve the natural environment. My aim is to always minimize my presence and impact while harnessing these natural strengths. It’s a delicate balance to maintain—the protection of nature’s resources while relying on them for foundational support.
| Anchor Point | Advantages | Tips |
|---|---|---|
| Trees | Sturdy, wide-spread availability | Choose healthy trees; avoid damaging bark with rope ties |
| Rocks | Unmovable, provide grounding | Look for rocks in sheltered areas to maximize wind protection |
| Ground Features | Natural drainage, additional cover | Use elevations to your advantage, avoiding low points that could collect water |
In summary, the integrity of a frameless tent design relies heavily on the resourceful selection of anchor points within my natural surroundings. Trees and rocks not only provide secure points to affix my shelter, but also enhance its durability against the whims of weather. It’s a practice ingrained in respect; for the might of nature’s fixtures and the breadth of wild beauty they support.
Utilizing Natural Elements to Support Your Tent
Setting up a wall tent without poles demands ingenuity and a harmonious partnership with the environment. My adventures have led me to develop strategies that harness the strength of natural features, allowing for a secure and steadfast camping setup. In this section, I’ll share with you how I leverage the raw power and stability of Mother Nature’s handiwork to support my abode under the stars.
Tree-Lining Techniques for Structure
Nature’s giants, the trees, have served me well as reliable pillars for my wall tent setup. Aligning the tent with a series of trees, a method I refer to as tree-lining, I create a natural framework that rivals the sturdiest of man-made poles. Herein lies the secret: strategic placement and tension distribution. I ensure the tent is well-secured against the trees using cordage that weaves in harmony with the rhythm of the forest, resulting in a structure that integrates seamlessly into the landscape.
How to Leverage Large Rocks for Stability
In locales where trees are scarce, large rocks become my allies in fortifying my frameless shelter. I carefully select these ancient earth fragments for their heft and immobility, using them as anchoring points in my wall tent set up guide. With precision, I position the tent so that every rock contributes to a network of tension points, each one bound to the next, choreographing an enduring dance against the winds and rains that seek to uproot my temporary home.

Whether I’m nestled in a forest’s embrace or perched in a stony moor, the essence of my approach remains the same: adapt, engage, and respect. The wisdom of setting up a wall tent without poles isn’t found in a battle against the elements, but rather in a thoughtful dialogue with them. By utilizing the gifts the Earth offers, from towering trunks to steadfast stones, I create not just a place to sleep, but a sanctuary that echoes the enduring strength and stability of the natural world.
Advanced Knot Tying for Secure Frameless Setup
As I delve into the woods with my frameless wall tent, I carry with me an arsenal of intricate knot-tying prowess that’s indispensable for a steadfast installation. Discovering and mastering **advanced knot tying** is as essential as any tool in my pack. It’s a skill set that serves not just as a means to an end but as the very backbone of **frameless wall tent setup**. In this journey of tying and tensioning, I’ve unearthed knots that are cornerstone to my shelter’s resilience against ever-changing backcountry whims.
The **bowline**, known by many as the ‘king of knots’, is my starting point for creating loop anchors that are both secure and easy to untie. The **taut-line hitch**, a backpacker’s steadfast companion, allows me to adjust guideline tension with ease, adapting to the natural give and take of my surroundings. But most celebrated in my repertoire is the **trucker’s hitch**—the ultimate ally in my quest for tension perfection. It grants me the ability to pull my tarp tight against the gales and the downpours.
The beauty of these knots lies not just in their robustness but also in their versatility. They symbolize a preparedness to embrace the unpredictable arms of Mother Nature while ensuring the very fabric of my temporary abode remains unyielding. Here’s a glance at some of the knots that are threads in the tapestry of my **frameless wall tent installation**:
| Knot Type | Function | Application |
|---|---|---|
| Bowline | Create a fixed loop | Securing tent corners to anchor points |
| Taut-Line Hitch | Adjustable loop for tensioning guidelines | Fine-tuning tarp tension as weather fluctuates |
| Trucker’s Hitch | Apply significant tension on lines | Achieving drum-tight stability across larger spans |
Embracing these knots and the wisdom they impart has proven to transform my outings. They are my silent guardians as night falls over the encampment, preserving the **tips for setting up a frameless wall tent** that I have learned and continue to share. With each loop and pull, I tie myself closer to the essence of living under open heavens, forever learning the graceful art of securing sanctuary in the embrace of the wild.
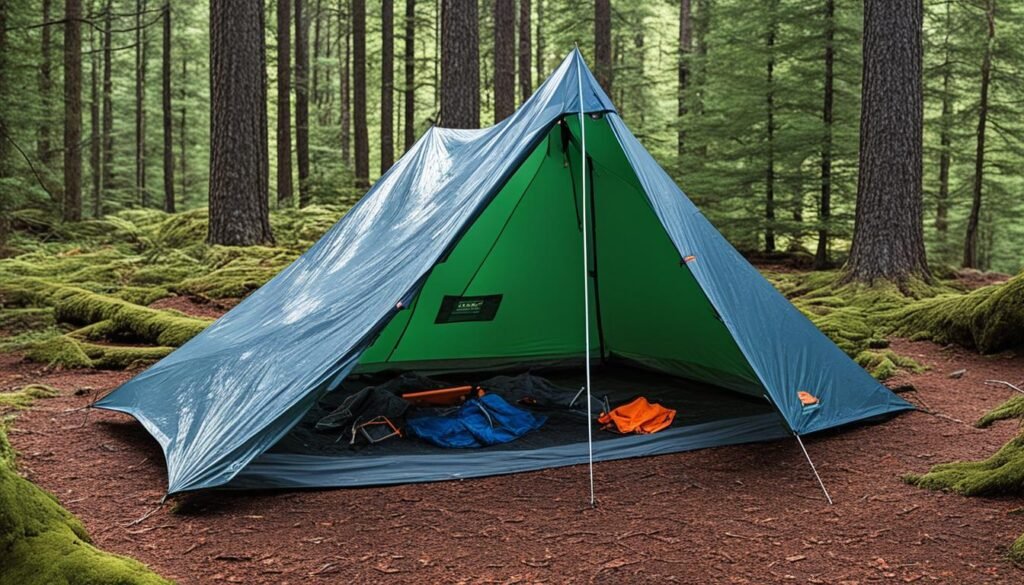
Creating a Makeshift Frame with Trekking Poles and Hiking Staffs
On my backcountry sojourns, I have often leaned on the ingenuity of using what I carry to lay the foundation for my shelter. Discovering how to set up a wall tent without a frame has become a valued skill in my repertoire. The transformation of trekking poles and hiking staffs into a makeshift frame epitomizes resourcefulness in the wilderness.
It begins with envisioning the tent as a structure supported not by rigid frames but by the gear that aids my traverse. Trekking poles, quintessential for stability during hikes, emerge as the pillars of my temporary home. They embody the versatility of tools, serving a dual purpose that marries mobility with habitation.

Proper Pole Placement for Optimal Support
Like an architect, I ascertain the points where support is paramount, and position my poles with deliberation. I’ve learned through practice to identify optimal angles that maximize the tent’s structural integrity. A pole placed with precision can determine whether a tent stands resilient or succumbs to the elements.
In essence, the poles must replicate the skeleton of a traditional tent. Strategic angling and secured bases guarantee that my nocturnal dwelling can withstand the caprices of wind and weather. This judicious setup also maintains the tent’s intended shape, ensuring the interior is as spacious and comfortable as designed.
Preventing Pole Slippage and Movement
In securing the tent, warding off against the gradual migration of the poles under the tent’s tension or weather influences is central to a stable abode. I deftly use rocks and my environment in a lockstep fashion to brace each pole. Where possible, poles are lashed to nearby boulders, using natural depressions or indentations in the land to house their ends securely.
Anchoring each pole with a considered composition of rocks or tying them to immovable objects transforms the tent from fabric and thread to a steadfast bulwark. These techniques are not just preventive measures but also the keys to sustain the tent’s resistance to environmental pressures.
By embracing this craft of setting up a wall tent without poles, I revel in the autonomy of venture, unburdened by excessive gear. It stands as testament to an adaptable soul’s capability to carve comfort into the fabric of the wild.
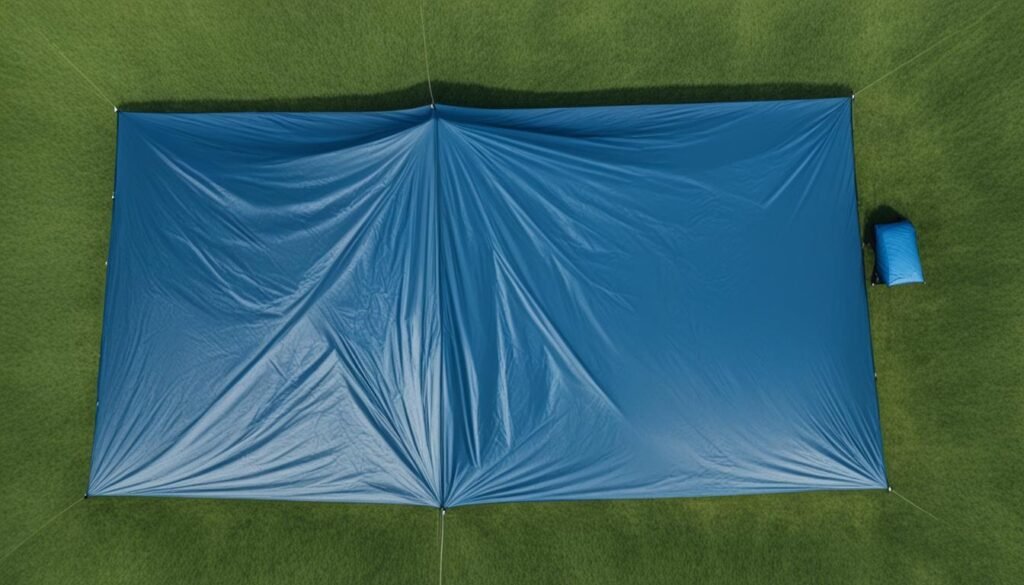
Guidelines for Taut Tarp Pitching Without a Frame
When undertaking a frameless wall tent setup, achieving a taut pitch is as crucial to the process as the fabric that composes the shelter itself. As someone who often engages in wall tent pitching without frame, I’ve distilled my practices into a series of guidelines that cater to both the novice adventurer and the seasoned backwoods navigator alike.
My first step is ensuring an even distribution of tension across the tarp, which is the bedrock of any reliable shelter. This begins with stretching the fabric just enough to remove any slack, safeguarding against sagging that could lead to water pooling or a wind-catching flap.
Next, I focus on the anchor points. They must be chosen not just for their immediate suitability, but also with an eye toward the predicted weather. I take advantage of nature’s sturdy offerings like trees and boulders, and in their absence, I opt for well-placed stakes driven into the ground at precise angles to optimize the tarp’s deflection of the elements.
- Locate solid anchor points and secure the first corner of the tarp.
- Opposite of the first anchor, stretch the tarp to achieve initial tension and secure the second point.
- Adjustable knots should be used on guy lines for fine-tuning tension as the environment shifts.
- Repeat the process for additional corners, ensuring the tarp remains evenly tensioned.
Further finessing of the tarp is achieved through the use of adjustable knots. In my experience, a knot like the taut-line hitch shines, offering a blend of steadfastness and versatility that allows for on-the-fly adjustments—a common need as the tarp material reacts to temperature and humidity changes.
It is with these time-tested guidelines that I have frequently anchored my abode in nature, confident that it will stand firm against the hiccups of unpredictable weather. This knowledge, when paired with a vigilant eye on the sky and a readiness to adapt, transforms a simple piece of fabric into a protective haven.
Remember, the success of a frameless wall tent setup is as dependent on the skills of the camper as on the materials at hand. With careful planning and a little practice, a frameless tarp can offer as much comfort and security as any framed tent.
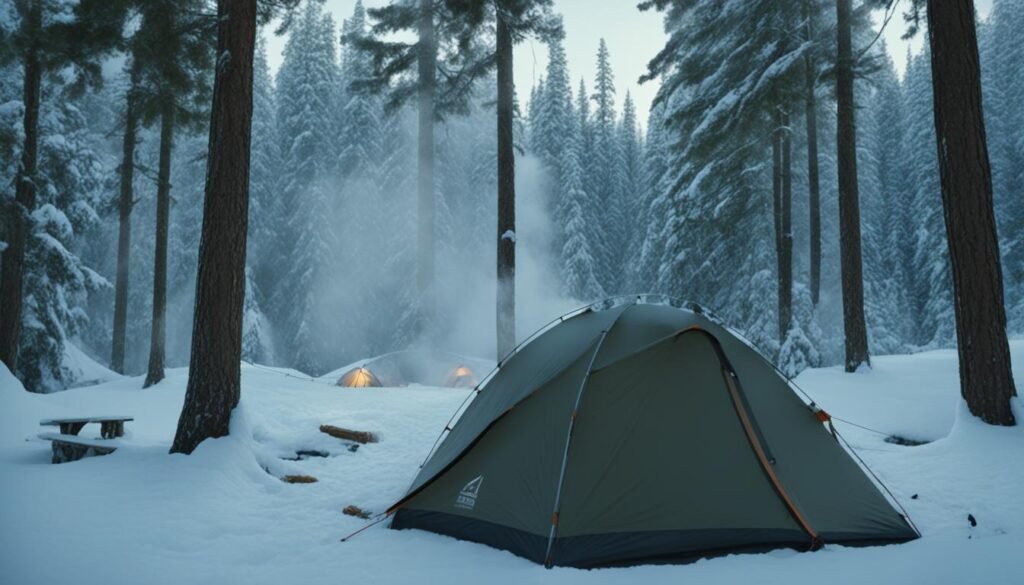
Ensuring Ventilation and Managing Condensation
As someone who relishes the simplicity of frameless wall tent installation, I’ve come to realize the importance of ventilation and condensation management. Ensuring proper airflow is not only about comfort but it’s also crucial for the longevity of the tent fabric. This is where I merge practical techniques and the tent’s inherent design features to maintain a dry interior environment.
Ventilation starts with the way I position the tent. I always look to set up in an area where natural breezes can aid in air circulation, mindful not to obstruct these airways with the tent’s own fabric. Most modern frameless wall tents come with design elements such as closable rear ventilation panels, which I utilize to fine-tune the airflow according to the weather conditions.
To prevent condensation, one of the essential tips for setting up a frameless wall tent I’ve picked up is leaving a small gap between the tarp and the ground. This gap serves as a passageway for moisture to escape and for fresh air to circulate, significantly reducing the chances of waking up to a damp shelter.
| Tent Setup Aspect | Method | Benefit |
|---|---|---|
| Positioning | Aligned with natural wind | Enhances air circulation |
| Rear Panel | Use closable ventilation feature | Regulates internal airflow |
| Gap Management | Maintain space between tarp and ground | Lowers condensation buildup |
Properly executing these methods, my frameless wall tent becomes a bastion against the dampness, ensuring that each morning greets me with a refreshingly dry interior. This, combined with the sheer joy of a lighter pack, cements my preference for the minimalist approach in engaging with the wilderness.
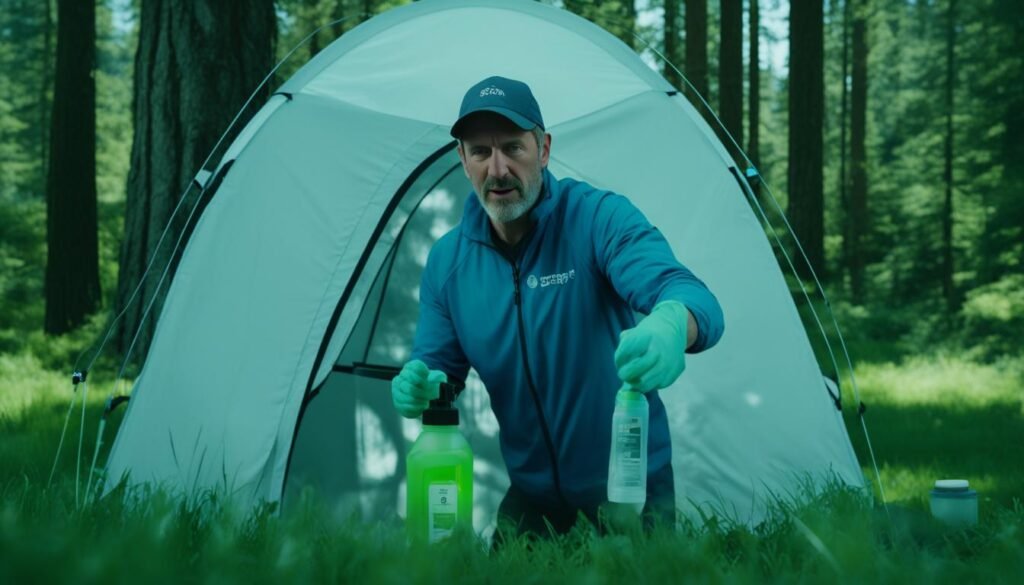
Maintaining Your Frameless Wall Tent: Tips and Tricks
Embarking on a journey with a frameless wall tent design warrants not just an understanding of how to set up a wall tent without a frame, but also how to meticulously maintain it. Reflecting on my trail wisdom, I recognize that preserving this minimalist haven necessitates regular check-ups for wear and tear—a practice that cultivates the longevity of my beloved shelter.
My experiences in various terrains have instilled a routine of thorough post-trip inspections. The key is seeking out any possible areas compromised by the rigors of nature’s realm. Seam sealing, a process not unlike healing wounds, becomes integral, especially when preparing for an unforgiving season ahead. This ritual ensures that my hideaway remains impervious to the penetrating gaze of raindrops.
Cleanliness and dryness are the pillars of tent integrity. Before retiring my shelter to its sabbatical in storage, I attend to it with the care of a curator, ensuring it is pristine and moisture-free, for dampness left unchecked is the silent marauder of fabric, binding and decomposition.
Then there’s the art of folding. A discipline in its own right, proper folding amounts to respecting the delicate nature of ultra-lightweight fabrics such as DCF (Dyneema Composite Fabric). It’s not just about making it fit into its sack, but folding in a manner that mitigates stress and potential punctures from being unsheathed.
Packing, too, is an act of safeguarding. I envision the incarnation of my gear into its pack, each fold an assurance against tears that may await in the realms of the puncture demons that relish the materials we treasure for their feather-like weight.
| Maintenance Task | Benefit | Technique |
|---|---|---|
| Regular Inspections | Prevents small damages from becoming major repairs | Post-trip check on all fabric, seams, and attachment points |
| Seam Sealing | Enhances waterproofness and durability | Apply sealant to seams as recommended by manufacturer |
| Clean and Dry Storage | Mitigates mold and fabric deterioration | Thoroughly air-dry the tent before packing away |
| Thoughtful Folding | Protects material integrity | Fold along different lines each time to prevent creasing |
| Careful Packing | Ensures longevity during off-season | Pack loosely in a breathable bag to reduce compression |
As I navigate the nuances of responsible stewardship for my frameless tent designs, I am reminded that these sanctuaries of solitude are more than a sum of their components—they are the cradle of our open-air dreams, and their preservation echoes the respect we hold for our natural odysseys.
Navigating Challenges and Troubleshooting Common Issues
Embarking on a backcountry adventure, the quest for a streamlined no frame wall tent assembly can occasionally confront assorted hurdles. Unpredictable weather and the nuances of terrain necessitate a set of troubleshooting skills vital for any devoted camper. Recognition and swift response to common issues ensure the longevity and reliability of your shelter, contributing to a safer and more enjoyable outdoor experience.
Addressing Weather-Related Concerns
When nature unfurls its might, a meticulously orchestrated wall tent set up guide becomes my indispensable ally against the elements. Battling the whims of climate requires not just strength in materials but also a keen understanding of dynamic adjustment techniques. Ensuring the wall tent remains waterproof and wind resistant is essential.
At times, guidelines may need to be retightened, stakes driven deeper, or additional tarp sections strategically positioned to deflect rainwater. It is these actions, balanced with a touch of innovation, that stand between a serene night’s sleep and a skirmish with the squall.
Dealing with Sagging and Dipping
Sagging and dipping are perhaps the most common concerns I face during no frame wall tent assembly. Without a rigid structure, maintaining a taut shelter becomes a skill honed over countless camps. The solution often lies in the very guidelines that first gave shape to the tent. Carefully redistributing tension across these lines or adjusting their anchor points can restore the architectural integrity of my canvas haven.
Yet, there are times when the conventional pitch proves inadequate, beckoning alternative strategies or reinforcement. In such cases, I might weave additional guylines through the fabric to disperse wind load or anchor the sidewall to nearby flora for extra support.

Below, I outline a table with the challenges encountered and the deft solutions I’ve garnered through trail and error, a testament to the resourcefulness required in the art of temporary wilderness dwellings.
| Issue | Cause | Solution |
|---|---|---|
| Sagging Roof | Inadequate tension | Adjust guylines for uniform tautness |
| Flapping Walls | Wind pressure | Add extra anchor points and secure with additional stakes |
| Water Pooling | Improper pitch angle | Create an angled pitch for better water runoff |
| Loose Stakes | Soft soil or rocks | Use alternate staking methods or natural anchors |
| Condensation Build-up | Poor ventilation | Maximize airflow by adjusting the position of the tent and utilising built-in vents |
Whether the sky opens up in a sudden downpour or the wind begins its relentless assault, my frameless wall tent stands as a competent fortification. Through consistent practice and an unwavering readiness to meet nature’s challenges head-on, I find peace in the heart of the tempest, secure within my age-old, yet ever-modern, fabric fortress.
Are the Setup Methods for a Frameless Wall Tent Similar to Putting Up a 12×12 Tent?
Yes, the setup methods for a frameless wall tent and a 12×12 tent are quite similar. Both require following the stepbystep tent setup instructions to ensure proper assembly. However, the frameless wall tent may have some specific instructions due to its unique design.
Conclusion
In reviewing the innovative tactics I’ve amassed, it’s clear that mastering a frameless wall tent setup requires a synergy between skill, foresight, and the natural world. From the selection of appropriate anchor points to the delicate craft of knot-tying, each step is integral to creating a dependable shelter. The journey has shown that setting up a wall tent without poles is not merely a technique but a testament to the resilience and ingenuity of the human spirit.
Review of Techniques for Frameless Wall Tent Setup
Throughout my explorations, employing techniques such as leveraging sturdy trees and rocks, firmly securing tarps with advanced knots, and improvising with trekking poles has enabled a reliable construction for my temporary home. The tips for setting up a frameless wall tent that have been shared serve as a guide to fellow adventurers seeking autonomy in their communion with nature. As I reflect on these methods, I recognize them as a narrative of triumph over the limitations once imposed by heavier camping equipment.
Final Thoughts on No Frame Wall Tent Assembly
The lightness of my pack and the minimal footprint I leave behind are the true fulfillments of a frameless ethos. When approached with meticulous attention to preparation, site selection, and condensation management, a frameless wall tent setup stands on par with more traditional structures. This discourse has unraveled the multi-faceted layers of establishing a robust no frame wall tent assembly, underscoring its advantageous blend of practicality and minimalism that is highly valued among modern backpackers.
FAQ
What are the principles behind frameless tent structure?
Frameless tent structures rely on utilizing natural features and portable hiking gear instead of a traditional frame. This approach allows for versatility in where and how the tent can be pitched, depending on the environment and available resources such as trees, rocks, and trekking poles.
What materials are commonly used for frameless wall tents?
High-strength, lightweight materials like Dyneema Composite Fabric are often used for frameless wall tents. These materials provide durability and weather resistance while being significantly lighter than traditional tent materials.
What are the benefits of frameless tent designs?
Frameless tent designs offer reduced pack weight, increased adaptability to the environment, and the ability to modify the setup based on specific trip needs. They’re also preferred for their durability, weatherproofness, and spacious interiors.
How should I prepare before pitching a frameless wall tent?
Preparation for pitching a frameless wall tent includes selecting the right tent for your trip, considering factors like weight and material, knowing the components you may need (like a bug net), and understanding the environmental conditions you’ll face, such as terrain and weather patterns.
How do I evaluate terrain and shelter when selecting a campsite for a frameless wall tent?
When choosing a campsite, look for terrain that provides natural shelter from wind and rain, and ensure that the soil and ground conditions are stable enough to support your tent securely. Consider the presence of trees and rocks for natural anchoring points.
What impact do soil and ground conditions have on frameless wall tent setup?
The type of soil and ground conditions can greatly affect the stability and integrity of your frameless wall tent. Soft, uneven, or rocky terrain may require different pitching strategies and anchor points to ensure that your tent remains stable and secure.
How can I utilize natural elements to support my frameless wall tent?
Natural elements like trees can be used for tree-lining techniques, where the tent is secured against a row of trees for support. Large rocks can act as anchor points, especially in tree-scarce areas, to add stability to your tent pitch.
What advanced knot-tying techniques are useful for a secure frameless tent setup?
Advanced knots such as the bowline, taut-line hitch, and trucker’s hitch are invaluable for securing a frameless tent to natural anchor points. These knots allow you to adjust tension for a stable structure that can withstand variable weather conditions.
How do you create a makeshift frame with trekking poles for a frameless wall tent?
To create a makeshift frame, strategically position trekking poles at the tent corners or sides, ensuring they’re angled for optimal support. You can prevent slippage of these poles by using rocks for anchoring or by tying them to other solid objects.
What are the guidelines for taut tarp pitching without a frame?
When pitching a taut tarp, ensure even tension distribution, use adjustable knots for precise tensioning, and correctly position anchor points and guidelines. A taut setup resists weather fluctuations and maintains the tent’s shape.
How can I ensure proper ventilation and manage condensation in a frameless wall tent?
Ensure your tent is pitched to allow for natural airflow and employ any built-in ventilation features, like closable rear panels, to facilitate circulation. Additionally, maintain a gap between the tarp and the ground to reduce condensation inside the tent.
What are some tips for maintaining my frameless wall tent?
Regular maintenance includes inspecting the tent for damage, keeping it clean, seam sealing as needed, and storing it dry. Also, be sure to fold and pack it properly to prevent unnecessary wear on the fabric.
How do I address weather-related concerns and common challenges when setting up a frameless wall tent?
To address weather-related concerns, waterproof properly, ensure that the tent can resist wind, and regularly adjust guidelines and anchor points to prevent sagging or dipping. If issues persist, consider alternative pitching strategies or additional reinforcements.