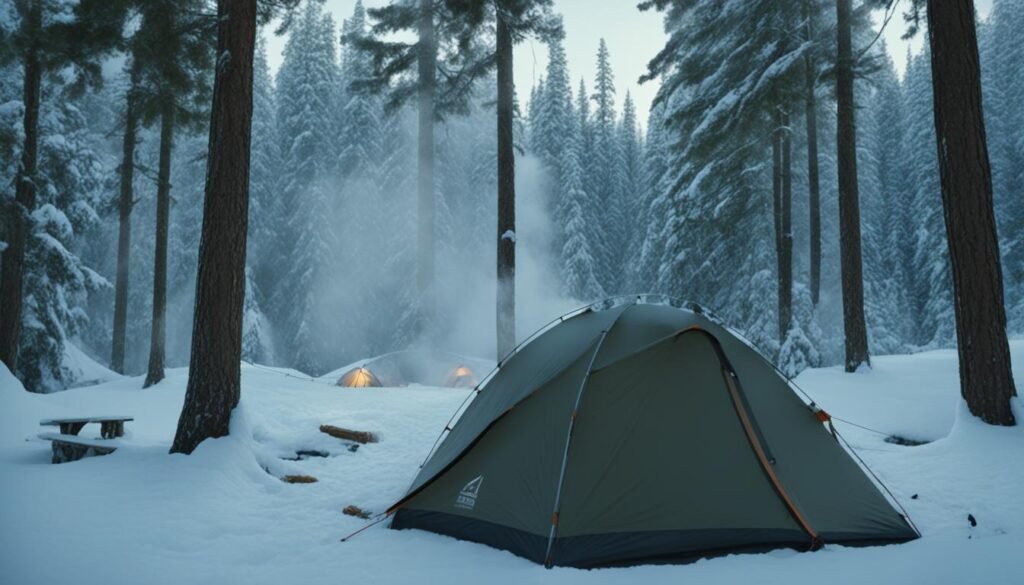

Setting up a tent can seem overwhelming for beginners, but with the right guidance, it can be a straightforward process. In this beginner’s guide, I will provide you with step-by-step instructions and tips on how to successfully pitch your tent.
Key Takeaways:
- Learn how to set up a tent with this comprehensive guide
- Discover essential tent pitching tips and best practices
- Master the step-by-step process for easy tent assembly
- Explore outdoor tenting techniques for a successful camping shelter installation
- Ensure a seamless tent erection by following the recommended tent setup practices
Lay a Tarp Down Before Putting Up Your Tent
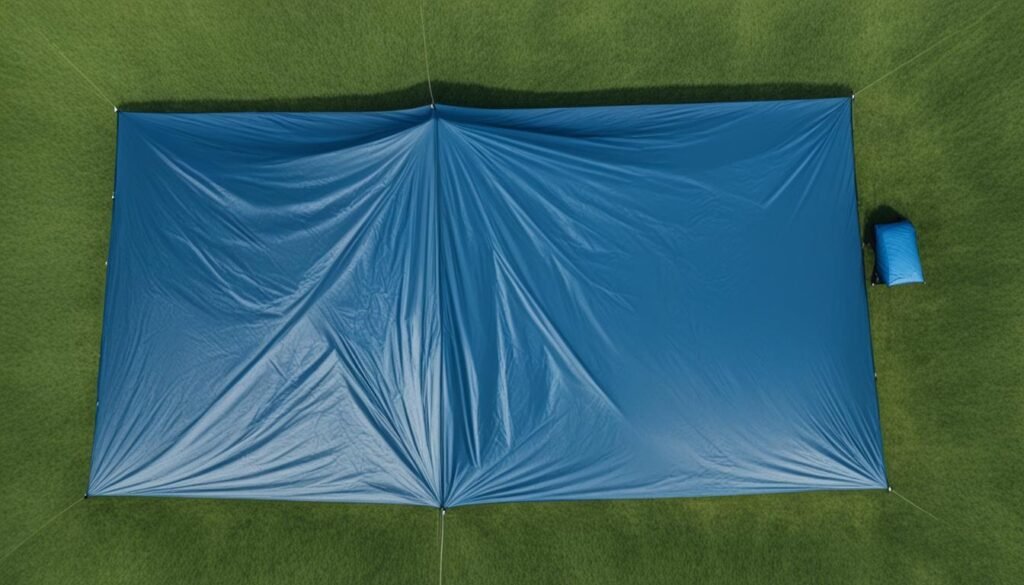
Before setting up your tent, it’s important to lay down a tarp to protect the bottom of your tent from moisture. A good-quality plastic or vinyl tarp should accompany any tent.
Fold the tarp into the shape of the tent, slightly smaller, and ensure no part hangs out beyond the edge. This will prevent water accumulation underneath the tent in case of rain.
By laying a tarp down before setting up your tent, you create a barrier between your tent and the ground, safeguarding it from moisture. This simple step can help prolong the lifespan of your tent and enhance your overall camping experience.
Lay Out and Account for All the Components of Your Tent
Before starting the tent setup process, it is crucial to lay out and account for all the components of your tent. This step ensures that you have everything you need for a successful tent assembly. Most modern tents consist of lightweight nylon, all-in-one tent poles, and stakes. By carefully checking your tent components, you can avoid any surprises or missing parts during the setup.
Here is a basic list of tent components you should have:
- The tent itself
- All-in-one tent poles
- Stakes
- Additional components specific to your tent model
Pro Tip: Refer to the manual or instructions provided with your tent to ensure you have all the necessary components for your specific model.
Once you have gathered all the components, lay them out in a clear and organized manner. This will give you a visual representation of all the parts, allowing you to check if anything is missing or damaged. It’s better to spot any issues before you start setting up the tent.
Now that you have your tent components ready, it’s time to move on to the next step of the tent assembly process. In the following section, I will guide you through the process of laying your tent onto the tarp.
Lay Your Tent Onto the Tarp
Now that you have all the components ready, it’s time to prepare your tent for setup. Find a suitable spot where you want to pitch your tent and lay down a tarp to protect the bottom of your tent from moisture. This simple step can greatly extend the lifespan of your tent by preventing water accumulation and damage.
To begin, locate the bottom side of your tent and carefully place it onto the tarp. Consider the orientation of the windows and door of the tent and position them in the desired direction. This will ensure proper ventilation and accessibility once the tent is fully set up.
Take a moment to ensure that the tent is laid out flat and there are no folds or wrinkles in the fabric. If necessary, smooth out any imperfections to ensure a stable and comfortable sleeping area inside the tent.
By paying attention to tent placement and preparing the tent for setup on a tarp, you’re taking important steps to ensure a successful camping experience. Your tent will be protected from moisture, and you’ll have a comfortable and dry shelter to relax in after a day of outdoor adventures.
| Tent Placement Tips |
|---|
|
By following these tent placement tips, you can optimize your camping experience and create a comfortable and secure shelter for your outdoor adventures.
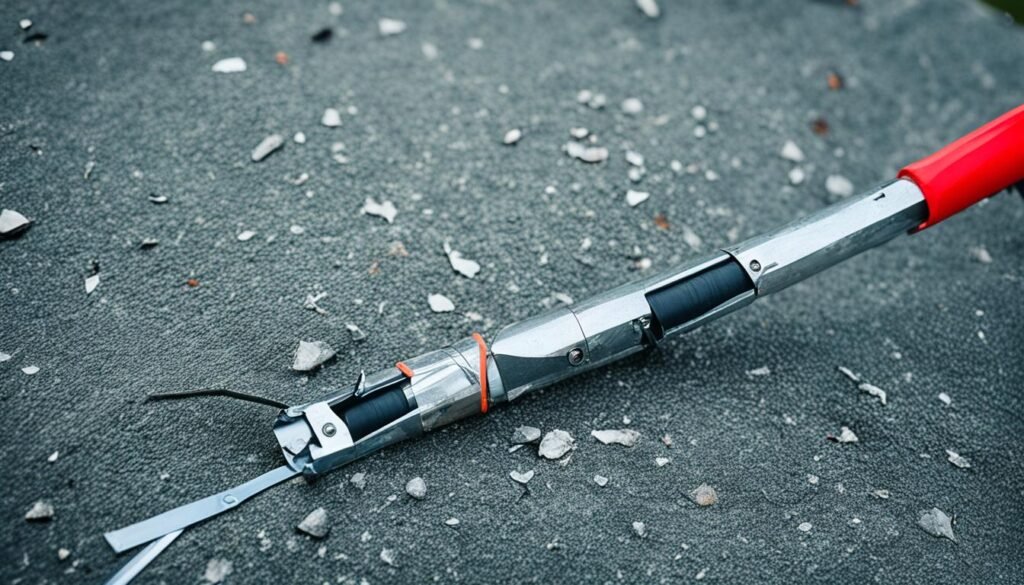
Connect Your Tent Poles
Once you have accounted for all the components of your tent, it’s time to connect the tent poles. The method for connecting tent poles may vary depending on your tent model. Some tents have bungee ropes that automatically connect the poles, while others have numbered poles for manual assembly.
Ensure that each pole is properly connected before proceeding. You don’t want any loose or insecure connections that could compromise the stability of your tent structure. Take a moment to double-check each pole and make any necessary adjustments.
Once the tent poles are connected, lay them across the flat tent in their designated positions. Align them with the provided loops or sleeves on the tent fabric to ensure proper placement.
Tent Pole Connections:
| Tent Model | Connection Method |
|---|---|
| Kelty Salida 2 | Bungee Ropes |
| The North Face Stormbreak 2 | Numbered Poles |
| REI Co-op Half Dome 2 Plus | Bungee Ropes |
Refer to the specific instructions provided with your tent model to ensure proper assembly of the tent poles. This will help you create a secure and stable tent structure for your camping adventures.
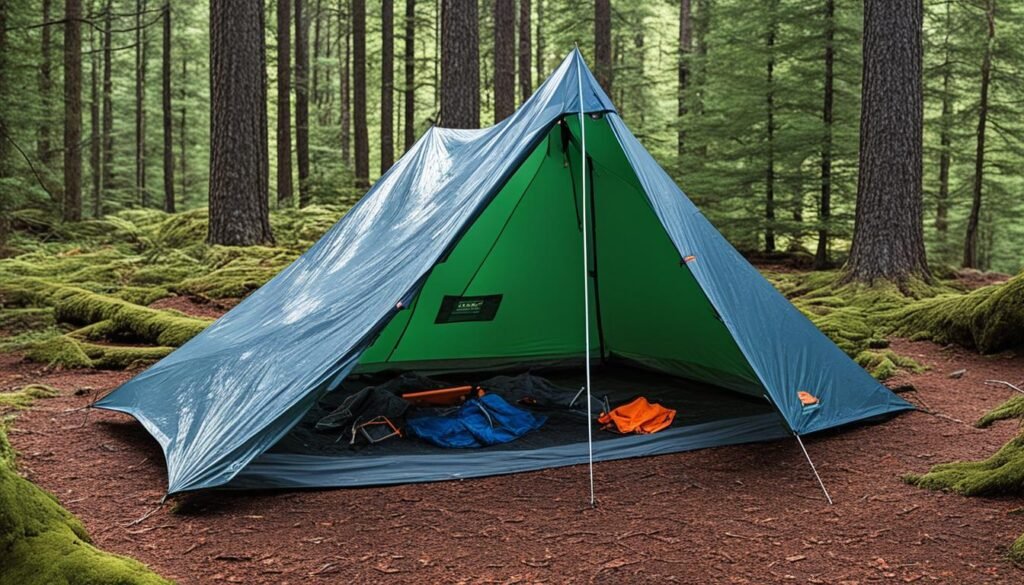
Insert Tent Poles into the Corresponding Flaps in the Tent
When setting up your tent, it’s crucial to properly insert the tent poles into the corresponding flaps to ensure a sturdy and secure structure. Most basic tents feature two poles that cross each other, forming an X-shaped frame that provides stability. Follow these simple steps to insert the tent poles:
- Start by identifying the bottom corners of your tent.
- Locate the eyelets or loops on the tent fabric at each corner.
- Take one of the tent poles and insert the end into the eyelet at one corner.
- Gently push the pole through the flap until it reaches the opposite eyelet.
- Repeat the process with the second pole, crossing it over the first pole to form the X-shape.
- Ensure that the poles are fully inserted into the flaps and securely positioned.
It’s important to refer to the instructions provided with your specific tent model for any additional steps or considerations regarding pole placement. Following the manufacturer’s guidelines will help you achieve optimal tent setup.
Image: Tent poles being inserted into the corresponding flaps in the tent.
Raise the Tent
Coordinating tent raising and securing the tent frame
Raising the tent is a crucial step in the setup process and requires coordination, especially if you have a larger tent. It’s helpful to have a partner to assist you in this task. Once you have connected the tent poles and placed them across the flat tent, it’s time to raise the tent and secure its frame.
To raise the tent:
- Position yourself on one side of the tent and have your partner stand on the opposite side.
- Hold onto the poles near the bottom and start lifting them simultaneously.
- As you lift the poles, the tent should start to take shape and rise off the ground.
- Continue lifting until the tent is fully raised and the poles are extended to their maximum height.
Once the tent is raised, it’s important to ensure the corners are pulled apart to maintain a square shape and to secure the poles tightly. This will provide stability and prevent the tent from collapsing during your camping adventure. Give the tent a gentle shake to confirm that the poles are secure and there are no loose connections.
Tip:
To make the tent raising process easier, practice coordinating with your partner before your camping trip. This will allow you to familiarize yourselves with the tent and fine-tune your teamwork.
Some tents may require additional structural components, such as guylines or clips, to be attached for added stability. Refer to your tent’s instruction manual for specific guidelines on securing the tent frame. These components play a vital role in ensuring your tent can withstand the elements and keep you protected.
Stake the Tent to the Ground
After successfully raising your tent, the next step is to ensure its stability by staking it to the ground. This crucial step will help prevent your tent from being toppled by strong winds and provides added security for your shelter. Follow these guidelines to securely stake your tent:
-
Locate the metal tent stakes provided with your tent and gather them for use.
-
Identify the flaps near the ground at the corners of your tent where the stakes will be inserted.
-
Position the stakes through the designated flaps, making sure they are tightly secured.
-
If the ground is particularly rocky or hard, use a hammer to gently tap the stakes into the ground, ensuring they are deeply anchored. Be cautious not to bend the stakes while hammering.
By properly staking your tent, you enhance its stability and minimize the risk of it becoming unstable during your camping trip. Remember to stake each corner of the tent for maximum security and to regularly check the stakes throughout your camping experience to ensure they remain firmly in place.
Benefits of Tent Staking
Staking your tent offers several advantages:
- Tent Stability: Staked tents are less likely to shift or collapse in challenging weather conditions, providing a stable and secure shelter.
- Wind Resistance: Securely anchored tents are better equipped to withstand strong wind gusts, keeping you protected and comfortable inside.
- Enhanced Safety: By staking your tent to the ground, you reduce the risk of tripping and falling due to a shifting tent.
- Prevention of Damage: Proper tent staking prevents excessive movement, reducing the likelihood of tears, rips, or structural damage to your tent.
“Staking your tent to the ground is a fundamental aspect of ensuring the stability and security of your outdoor shelter.”
| Benefits of Tent Staking |
|---|
| Tent Stability |
| Wind Resistance |
| Enhanced Safety |
| Prevention of Damage |
What Is the Best Way to Secure a Tent Without Using Stakes?
When it comes to a stake-free tent setup, utilizing heavy objects like rocks or sandbags can help anchor the corners. Alternatively, using guylines and tying them to surrounding trees or other sturdy anchors can provide extra stability. Additionally, some tents offer special design features for securing without stakes.
Add On the Rain Fly, If You Have One
When it comes to ensuring optimal rain protection for your tent, adding a rain fly is a crucial step. A rain fly is an extra layer of defense against wet weather, shielding your tent from rain and preventing water from seeping through the fabric. If your tent includes a rain fly, follow the provided instructions to attach it securely and effectively.
To assemble the rain fly, refer to the specifications of your tent model. Follow the step-by-step instructions carefully, ensuring that each component is properly aligned and attached. Pay close attention to any markings or labels that indicate the correct orientation and placement of the rain fly.
Attaching the rain fly typically involves sliding it over the top of the tent and securing it to the tent’s frame. Most rain flies are designed to fit snugly and securely, preventing any gaps that could potentially allow water to enter the tent. Make sure the rain fly is taut and evenly distributed over the tent to maximize protection.
Here is an example of how to attach a rain fly to a tent:
- Unfold the rain fly and familiarize yourself with its components.
- Identify the designated attachment points on the rain fly and the corresponding attachment points on the tent.
- Slide the rain fly over the top of the tent, ensuring that it aligns with the tent’s shape and size.
- Secure the rain fly to the tent’s frame by attaching the provided hooks, clips, or other fasteners to the corresponding loops, straps, or anchor points.
- Adjust the tension of the rain fly to ensure a proper fit, making sure it is neither too loose nor too tight.
- Check for any gaps or areas where the rain fly is not properly attached. Adjust and re-secure if necessary.
Attaching the rain fly may vary depending on the design of your tent and rain fly, so always consult the manufacturer’s instructions for specific guidance. With the rain fly properly attached, you can enjoy added peace of mind knowing that your tent is well-protected against rain and moisture.
Let the Tent Air Dry Before Packing It Away
If your tent gets wet during your camping trip, it’s essential to let it air dry before packing it away. Hanging it up in a well-ventilated area allows for thorough drying and helps prevent the growth of mildew, ensuring your tent is ready for future use.
Here are some key steps to follow:
- Choose a location: Find a well-ventilated area where you can hang your tent to dry. This could be low-hanging branches, a clothesline, or any other secure spot that allows air circulation.
- Remove excess moisture: Gently shake off any excess water from the tent to hasten the drying process.
- Hang the tent: Using sturdy cords or straps, hang your tent upside down. Ensure it’s fully extended and not folded to aid in proper air circulation.
- Open windows and doors: Open all windows and doors of the tent to promote airflow and ventilation.
- Wait patiently: Allow ample time for the tent to air dry completely. This process may take several hours or even days, depending on the weather conditions.
- Check for dryness: Before packing away your tent, ensure it is completely dry. It should feel dry to the touch, with no moisture or damp spots remaining.
Remember, thorough tent drying is critical for preventing mildew growth and preserving the longevity of your camping equipment.
A properly dried tent ensures a comfortable and pleasant camping experience.
Tent Drying Tips
Here are some additional tips to aid in tent drying:
- Choose a sunny day: If possible, select a sunny day to dry your tent as sunlight aids in the evaporation process.
- Don’t rush: Avoid the temptation to pack away a slightly damp tent as it can lead to unpleasant odors and mold formation.
- Check the forecast: Before setting up your tent to air dry, check the weather forecast to ensure there won’t be any rain or moisture that could impede the drying process.
- Inspect the tent: While the tent is drying, take the opportunity to inspect it for any damage or signs of wear and tear. This way, you can address any issues before your next camping adventure.
By following these tent drying tips, you can maintain the quality and condition of your tent, enhancing its lifespan and ensuring many more enjoyable camping trips ahead.

Roll Up Each Tent Component Separately
When it comes time to pack up your tent, it’s important to roll up each component separately to ensure a smooth and organized packing process. By taking the time to pack your tent properly, you’ll not only make your next camping trip more convenient but also protect your tent components from potential damage or loss.
If your tent came with a stuff sack, make use of it for efficient packing. Follow these steps to pack your tent components:
- Lay each tent component, such as the tent itself and the rain fly, flat on the ground.
- Fold each component lengthwise into a neat and compact shape.
- Roll up each component as tightly as possible.
- Insert the rolled-up components into the stuff sack one by one.
By rolling up each component separately, you ensure that your tent remains organized and easy to unpack on your next camping adventure. It also helps to minimize the risk of tangling or damaging any delicate tent parts.
| Tent Component | Packing Method |
|---|---|
| Tent | Roll up tightly and insert into stuff sack |
| Rain Fly | Roll up tightly and insert into stuff sack |
| Tent Poles | Wrap in a separate bag or secure with elastic bands |
| Stakes | Place in a secure pocket or bag |
Remember to check your tent’s instructions or consult the manufacturer’s guidelines for specific packing tips and recommendations. By adopting the habit of rolling up each tent component separately, you’ll be able to pack and unpack your tent with ease, ensuring a hassle-free camping experience.
Avoid Folding Tents the Same Way Each Time
When it comes to storing your tent, it’s crucial to avoid folding it the same way every time. Folding your tent in the same manner repeatedly can lead to creases in the fabric, which can weaken the material and eventually result in holes or tears. To preserve the integrity of your tent and extend its lifespan, try alternative methods of packing it away.
Instead of meticulously folding your tent, consider rolling, stuffing, or cramming it when storing. These techniques help distribute the stress on the fabric more evenly, preventing concentrated pressure points that can lead to creases or damage.
Rolling your tent is a popular method that minimizes creasing. Start by laying the tent flat on the ground and then carefully roll it up from one end to the other. This technique helps maintain the fabric’s integrity and reduces the chances of developing weak spots.
If you prefer a more compact storage option, you can stuff your tent into its storage bag or sack. This method involves loosely packing the tent by stuffing it into the bag without worrying about wrinkles or achieving a perfect appearance. While it may not look as neat, the goal is to minimize stress on the fabric and prevent creasing.
Another alternative is to cram your tent into its storage bag by compressing it tightly. This technique can be particularly useful when space is limited. While cramming may result in more pronounced wrinkles or creases, the fabric’s integrity is still preserved, reducing the risk of long-term damage.
Remember, the objective is to avoid folding your tent in the same manner repetitively. Experiment with different packing techniques to find the method that works best for you and your tent. By doing so, you can help protect your tent from unnecessary creasing and maintain its durability for future outdoor adventures.
Benefits of Alternative Tent Folding Methods:
- Prevents creases and weak spots in the fabric
- Preserves the integrity and longevity of the tent
- Offers compact storage options
- Reduces the risk of long-term damage
| Pros | Cons |
|——|——|
| Minimizes creasing in the fabric | May result in more pronounced wrinkles or creases |
| Preserves the durability of the tent | Does not achieve a visually perfect appearance |
| Offers different storage options | Requires finding the packing method that suits your needs |
| Reduces the risk of long-term damage | May require more effort in rolling or cramming the tent |
I always make sure to avoid folding my tent the same way each time. By using alternative methods like rolling or stuffing, I can prevent creases in the fabric and maintain the tent’s integrity. It’s a small adjustment that can make a big difference in the lifespan of my shelter.
Open Up and Air Out Tents Regularly
To ensure the longevity of your tent, it’s important to prioritize tent maintenance, ventilation, and fabric preservation. Taking the time to open up and air out your tent regularly, even when it’s not in use, can help prevent moisture buildup and potential damage to the fabric. By following this simple step, you can extend the lifespan of your camping shelter and ensure it’s always ready for your next adventure.
When you open up your tent, be sure to shake it out to remove any debris that may have accumulated. This helps maintain a clean and fresh interior for your future camping trips. Afterward, find a well-ventilated area, such as a backyard or a spacious room, to let your tent air out.
Airflow is crucial for tent fabric preservation, as it helps prevent musty odors and the growth of mold or mildew. By allowing fresh air to circulate through your tent, you’re giving the fabric a chance to breathe and dry out completely. This is particularly important if your tent got wet during your last camping trip or if you stored it in a humid environment.
“Regularly opening and airing out your tent is a simple yet effective way to enhance its durability and functionality. By taking this small step, you can prevent moisture-related issues and ensure your tent remains in optimal condition.”
Remember, tent ventilation plays a crucial role in reducing condensation inside the tent. When moisture accumulates on the interior walls, it can lead to dampness and discomfort during your camping experience. Airing out your tent allows moisture to evaporate and reduces the risk of fabric damage. It’s particularly important for tents made of breathable materials or those with mesh panels for enhanced airflow.
By implementing this tent maintenance practice as part of your camping routine, you’re actively preserving the quality and functionality of your tent. Whether you’re a frequent camper or an occasional adventurer, investing a few extra minutes to open up and air out your tent will pay off in the long run.
Tent Maintenance and Ventilation Tips:
- Open up your tent completely to promote air circulation
- Shake out any debris or dirt that may have accumulated
- Find a well-ventilated area, indoors or outdoors, to air out your tent
- Avoid storing your tent in damp or humid conditions
- Regularly check for any signs of mold, mildew, or damage
Remember, taking care of your tent ensures it will be ready for your next camping adventure. Prioritize tent maintenance, ventilation, and fabric preservation to keep your shelter in top-notch condition for years to come.

| Tent Maintenance Tips | Tent Ventilation Benefits | Tent Fabric Preservation |
|---|---|---|
| Regularly air out your tent | Prevents condensation and moisture buildup | Reduces the risk of fabric damage |
| Shake out debris and dirt | Enhances comfort during camping trips | Prevents musty odors and mold growth |
| Store in a dry, well-ventilated area | Improves overall airflow inside the tent | Prolongs the lifespan of your tent |
Conclusion
After learning the basics of setting up a tent, you can confidently pitch your tent like a pro. By following the step-by-step instructions in this guide and considering the specific details of your tent model, you will be able to assemble your shelter efficiently. Remember, proper tent maintenance and storage are essential for prolonging the lifespan of your camping shelter.
Happy camping! Whether you’re heading out for a weekend getaway or embarking on a longer adventure, a well-pitched tent provides you with a cozy and reliable home in the great outdoors. With practice, you’ll become even more efficient at setting up your tent, allowing you to spend more time enjoying nature and creating unforgettable memories.
So, gather your friends or family, pack your camping gear, and get ready to explore the beauty of nature. With your newfound knowledge of tent setup, you’ll be well-prepared to embark on your next outdoor adventure. Enjoy the tranquility, fresh air, and the freedom that camping brings. Happy tenting!
FAQ
Do I need to lay down a tarp before setting up my tent?
Yes, it’s important to lay down a tarp to protect the bottom of your tent from moisture. This will prevent water accumulation underneath the tent in case of rain.
What components should I account for before setting up my tent?
Make sure you have the tent itself, the tent poles, and any additional components required for your specific tent model.
How do I properly lay my tent onto the tarp?
Lay the bottom side of the tent on the tarp and orient the windows and door in the desired direction. Ensure the tent is flat and ready for setup.
How do I connect the tent poles?
Depending on your tent model, the poles may be connected with bungee ropes or numbered for manual connection. Follow the instructions provided with your tent for proper pole placement.
How do I insert the tent poles into the corresponding flaps in the tent?
Insert the poles into the eyelets at each corner of the tent, following the instructions provided with your specific tent model.
How do I raise the tent?
Fit both poles through their connection spots, then pull the corners apart to ensure they’re square and the poles are secure. Some tents may require additional structural components for stability.
How do I stake the tent to the ground?
Use the metal tent stakes provided and fit them through the flaps near the ground at the corners of the tent. Hammer the stakes into the ground if necessary.
Should I add on the rain fly?
If your tent includes a rain fly, refer to the instructions provided to learn how to properly attach it. The rain fly provides additional protection against wet weather.
How do I let the tent air dry before packing it away?
Hang it up in a well-ventilated area, such as low-hanging branches or a clothesline, and make sure it’s completely dry to prevent the growth of mildew.
How should I roll up each component of the tent?
Lay each item flat, fold them lengthwise, and then roll them up tightly. Use a stuff sack if your tent came with one.
Should I avoid folding my tent the same way each time?
Yes, it’s best to roll, stuff, and cram your tent when packing it away to avoid creating weak spots and creases in the fabric.
How often should I open up and air out my tent?
It’s a good idea to open it up and air it out regularly, even when not in use, to prevent moisture buildup and potential damage to the fabric.
What are some final thoughts on tent setup and assembly?
By following the step-by-step instructions in this guide and considering the specific details of your tent model, you can confidently and efficiently pitch your tent like a pro. Remember to practice proper tent maintenance and storage to prolong the lifespan of your camping shelter.