Whether you’re a novice camper or an experienced outdoor enthusiast, knowing how to properly set up and anchor your tent is essential for a comfortable and safe night in the wilderness.
In this article, I will provide you with a step-by-step guide that covers everything you need to know about tent setup, from pre-trip preparation to campsite selection, pitching tips, and guylines guidance. By following these expert tips and techniques, you’ll be able to confidently pitch your tent and ensure it stays secure against the elements.
Key Takeaways:
- Proper tent setup and anchoring are crucial for a successful camping experience.
- Practice pitching your tent at home before your trip to familiarize yourself with the process.
- Choose a campsite wisely, considering natural windbreaks and avoiding low-lying areas.
- Clear the debris from your tent site and stake down the corners of your tent.
- Utilize guylines for extra stability and consider different anchoring strategies on wooden platforms.
Tent Setup: Pre-Trip Preparation
Before heading out on your camping trip, it is essential to practice pitching your tent at home. This allows you to familiarize yourself with the process and ensure you have all the necessary parts. Read the instructions carefully and inventory the components. Consider using a footprint or tarp to protect the tent floor from abrasion.
When preparing for tent setup, take the time to familiarize yourself with the tent’s structure and assembly process. Carefully review the instructions provided by the manufacturer to ensure you understand the specific steps involved in setting up your tent.
Check that all the necessary components are present and in working order. This includes tent poles, stakes, rainfly, guy lines, and any additional accessories. Inspect the condition of these items, looking for any signs of damage or wear that may affect the tent’s stability or functionality.
If your tent requires the use of tent pegs or stakes, ensure you have an adequate supply for the terrain in which you will be camping. Consider bringing extras to account for any loss or damage that may occur during setup.
Additionally, consider using a footprint or tarp as a protective layer between the tent floor and the ground. This helps prevent abrasion, water seepage, and damage from sharp objects, prolonging the lifespan of your tent.
By properly preparing for tent setup, you can ensure that you have all the necessary components and a clear understanding of the assembly process. This will help streamline your camping experience and ensure a secure and comfortable shelter during your outdoor adventures.
Tent Setup: Campsite Selection
When it comes to setting up your tent, choosing the right campsite is crucial for a comfortable and enjoyable camping experience. Campsite selection involves considering factors such as tent placement, weather protection, and environmental impact. By following Leave No Trace principles and making informed decisions, you can ensure a successful camping trip.
Here are some key considerations for campsite selection:
Natural Windbreaks
One important factor to consider is the presence of natural windbreaks. Look for campsites that are shielded from strong winds by features such as hills, dense vegetation, or rock formations. These natural barriers can provide excellent protection for your tent and make your camping experience more comfortable.
Avoid Camping Near Damaged Trees
It’s important to avoid camping near damaged or dead trees. These trees pose a safety risk, as branches or even the entire tree can fall unexpectedly. Additionally, strong winds can further weaken damaged trees, increasing the risk of falling debris. Choose a campsite away from damaged trees to mitigate these hazards.
Higher, Drier Ground
Look for higher ground when selecting a campsite. Areas with higher elevation tend to be drier and better drained, reducing the risk of water pooling around your tent. This helps to minimize condensation and keeps your camping gear dry. Avoid low-lying areas that can collect water during rainstorms.
Door Orientation
While setting up your tent, consider the direction of the prevailing wind. Orient the tent’s door away from the wind to prevent it from blowing directly into your tent. This helps to maintain a comfortable and draft-free sleeping environment.
Seek Sites Under Trees
Sites under trees can provide additional protection from the elements. Not only do trees offer shade during hot summer days, but they can also act as natural windbreaks. Just be mindful of any dead branches or the potential for falling debris when choosing a site under trees.
By carefully considering these factors and making informed decisions, you can select a campsite that provides optimal tent placement and weather protection. Remember to leave the campsite as you found it, minimizing your impact on the environment.
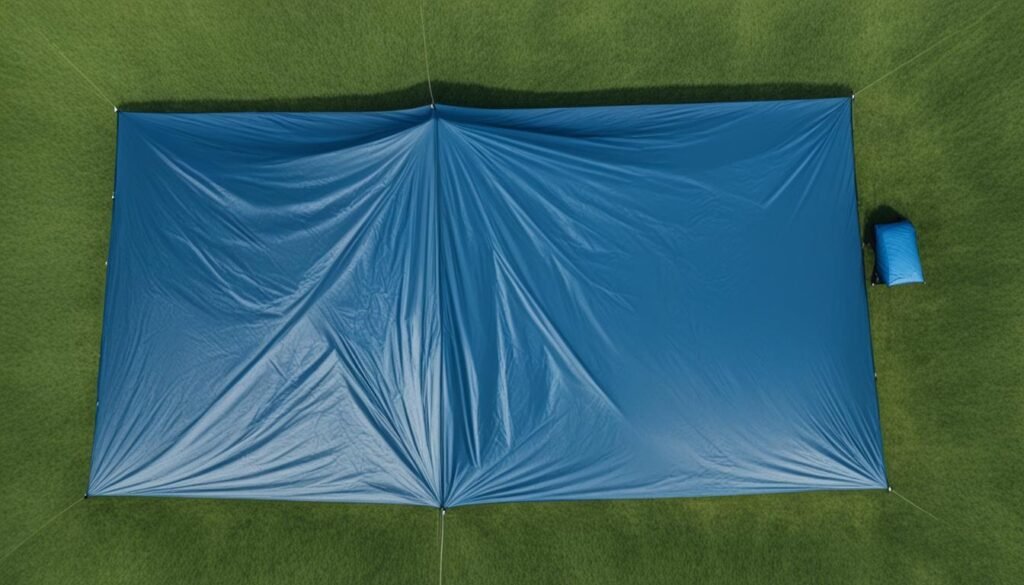
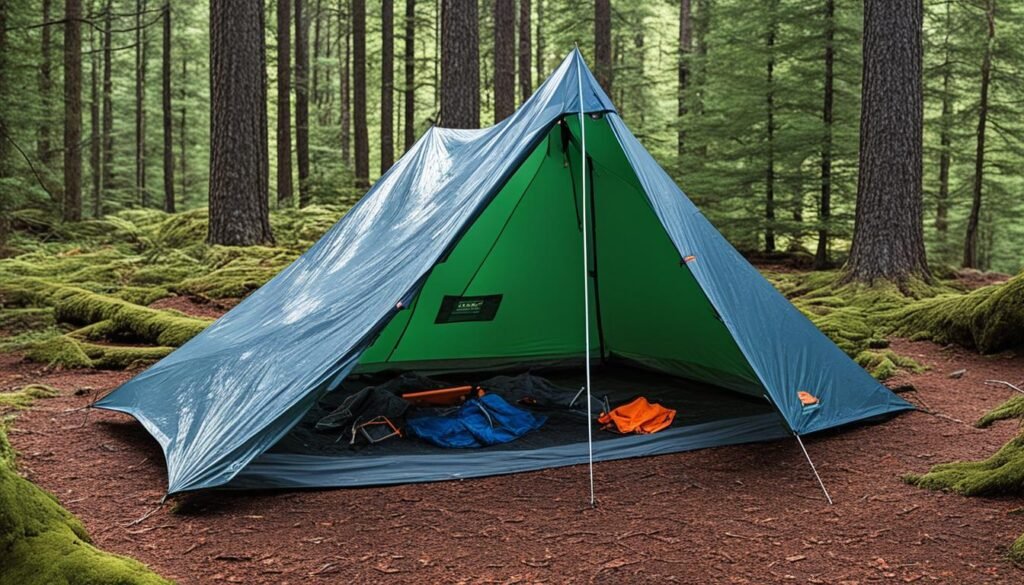
Tent Setup: Pitching Tips
When it comes to setting up your tent, there are a few pitching tips that can greatly improve your camping experience. From clearing the debris to staking down the corners, these techniques ensure a secure and hassle-free setup.
Clearing the Tent Site
Before pitching your tent, clear the site of any debris such as rocks, sticks, or sharp objects. This not only protects the floor of your tent from punctures and tears but also makes the setup process much easier and smoother.
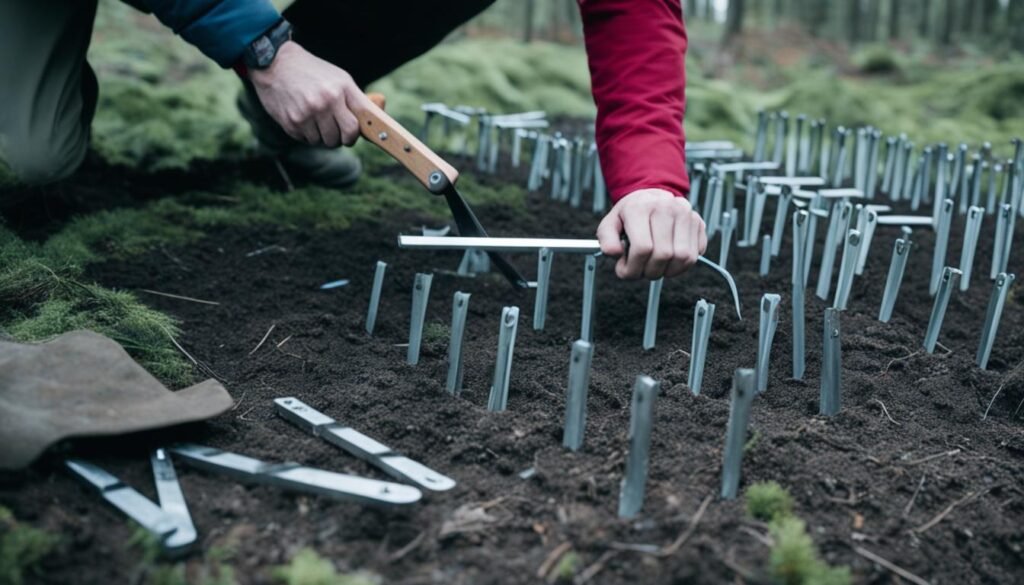
Staking Down the Corners
To prevent your tent from being blown away during strong winds, it’s crucial to stake down the corners. Use sturdy tent stakes and drive them into the ground at a 45-degree angle, ensuring they are securely anchored. This provides stability and prevents your tent from becoming a sail in gusty conditions.
Take Your Time with the Poles
Properly seating the poles is essential for a sturdy and well-pitched tent. Take your time and carefully insert each pole into the corresponding sleeve or attachment point. Ensure that all poles are fully extended and locked in place before continuing with the setup process.
Utilizing Rainfly Wraps
Rainfly wraps are an excellent tool for ensuring a taut rainfly. These wraps are designed to cinch the rainfly tightly around the tent, eliminating any sagging or flapping that may occur. Take advantage of rainfly wraps to keep your tent dry during rainy weather and maintain optimal airflow inside the tent.
Remember, proper tent pitching is crucial for a comfortable and secure camping experience. Clear the site, stake down the corners, take your time with the poles, and utilize rainfly wraps for a taut setup.
Tent Setup: Guyline Guidance
One of the key factors in ensuring tent stability, especially in windy conditions, is the proper use of tent guylines. These guylines are additional ropes or cords that can be attached to your tent to provide extra reinforcement and prevent your tent from getting blown away. In this section, I will guide you on how to effectively use and tie guylines for maximum stability.
When setting up your tent, locate the sturdy loops or attachment points on your tent where you can secure the guylines. These loops are typically positioned at strategic points, such as the corners and sides of the tent, to provide optimal stability. Attach the guylines to these loops, ensuring that they are properly tensioned.
Packing extra cord and stakes is highly recommended, as it allows you to have additional flexibility in securing your tent. The extra cord can be used to extend the length of the guylines if needed, allowing you to tie them to nearby trees or other anchor points. This gives you the advantage of a wider range of options for pitching your tent in varying terrain and wind conditions.
Learning different knots for guylines is essential for a secure setup. Some commonly used knots include the bowline knot, taut-line hitch, and trucker’s hitch. These knots provide reliable tension and can be easily adjusted if needed. When tying the guylines, make sure they are taut but not overly tight, as this can strain the tent fabric.
Proper Placement of Guylines
To maximize the stability of your tent, it is crucial to understand where to attach the guylines for optimal performance. The placement of guylines will vary depending on the design and structure of your tent, but the general rule of thumb is to attach them to points that will create a triangulation effect. This means attaching the guylines at an angle away from the tent, forming a triangle shape with the ground.
Remember, the key to tent stability is distributing the forces evenly. By attaching the guylines at appropriate angles, the tension is spread across multiple points, minimizing the strain on any single area of the tent.
Here is a useful table that illustrates common guylines attachment points for different tent designs:
| Tent Design | Recommended Guylines Attachment Points |
|---|---|
| Dome | Attach guylines to each corner and midpoint of the sides. |
| Tunnel | Attach guylines to each corner and midpoint of the sides. Additional guylines may be required along the length of the tunnel. |
| A-Frame | Attach guylines to each corner and midpoint of the ridge line. |
| Cabin | Attach guylines to each corner and midpoint of the sides. Additional guylines may be required along the length of the ridge. |
| Geodesic | Attach guylines to each corner and multiple attachment points along the sides, forming a triangulated pattern. |
Following these guidelines will ensure that your tent stays securely in place, even during strong winds and challenging weather conditions.
Remember, the proper use of tent guylines is crucial for achieving optimal tent stability, especially in windy conditions. By attaching and tensioning guylines correctly, and understanding where to attach them for maximum stability, you can enjoy a safe and comfortable camping experience.
Tent Anchoring on Wooden Platforms
Setting up a tent on a wooden platform can present unique challenges compared to pitching on the ground. However, there are several effective techniques you can use to ensure your tent is securely anchored. By implementing these methods, you can enjoy a safe and comfortable camping experience on a wooden platform.
1. Using Dedicated Wood Platform Stakes
If you’re setting up your tent on a wooden platform, consider using dedicated wood platform stakes. These special stakes, such as the Fishbone Stakes, are designed to be inserted into the gaps between the platform boards. They provide a sturdy anchor point for your tent, even in windy conditions.
2. Utilizing Pre-Existing Attachments on the Platform
Many wooden platforms have pre-existing metal hooks, rings, or chains along the perimeter. These attachments can serve as convenient anchor points for your tent. Simply attach your guy lines to these pre-existing features, ensuring a secure setup. However, it is advisable to use other anchoring methods in addition to these attachments for added stability.
3. Using the Wedge Method
If the gaps between the wooden platform boards are not suitable for inserting stakes, you can use the wedge method. Find a stick or piece of wood that fits snugly between the boards and wedge it in. This creates a secure anchor point for your tent, especially in the interior area of the platform.
4. Employing the Horizontal Stake Anchor Technique
To create a strong anchor point on the edges of a wooden platform, utilize the horizontal stake anchor technique. Slide tent stakes horizontally under the overhanging boards, ensuring that the guyline is attached in the middle and runs between the gap of two boards. This unique anchor technique provides stability to your tent on the platform.
5. Using Rock Anchors
If the gaps between the wooden planks on the platform are too small to accommodate stakes, you can use rocks as anchors. Tie your guyline around a small rock and place it where you want the anchor to be. Then, use a larger rock between the tent and the small rock to anchor the line down. This technique is particularly useful when other anchoring methods are not feasible.
6. Utilizing the Ground and Nearby Trees
In some cases, your guylines may be long enough to reach the ground or nearby trees from the wooden platform. Take advantage of this by using the ground or trees as anchor points for your tent. This simple method eliminates the need for complex anchoring techniques and provides a secure setup.
Remember, when setting up your tent on a wooden platform, it’s crucial to prioritize safety and stability. By following these tent anchoring techniques, you can ensure that your tent remains securely pitched regardless of the platform’s surface. Now that you have learned how to anchor your tent on a wooden platform, you are ready to enjoy a comfortable camping experience amidst nature’s beauty.
Tent Platform Anchoring Strategies: Dedicated Wood Platform Stakes
When it comes to anchoring your tent on wooden platforms, using dedicated wood platform stakes can provide a secure and reliable solution. One popular option is the Fishbone Stake, specifically designed for setting up tents on wooden platforms. These stakes are specially engineered to fit into the gaps between the wooden platform boards, ensuring a tight and stable anchor point.
Unlike jerry-rigged methods, dedicated wood platform stakes like the Fishbone Stakes provide a hassle-free solution for tent setup on wooden platforms. Their unique design allows them to be easily inserted between the boards and rotated to secure them in place. This creates a solid connection between the stake and the platform, adding stability to your tent structure.
Wood platform stakes offer several advantages when it comes to tent anchoring. Firstly, they provide a strong anchor point that can withstand windy conditions, ensuring that your tent remains securely in place. Secondly, they eliminate the need for makeshift solutions, providing a more efficient and professional approach to tent setup on wooden platforms.
By using dedicated wood platform stakes, you can enhance the overall stability of your tent and enjoy a worry-free camping experience. Image source: https://seowriting.ai/32_6.png
Tent Platform Anchoring Strategies: Pre Existing Attachments
When setting up your tent on a wooden platform, you may come across pre-existing metal hooks, rings, or chains on the perimeter of the platform. These attachments can serve as convenient anchor points for securing your tent. By utilizing these pre-existing attachments, you can achieve a secure setup without the need for additional equipment or modifications.
If your guy lines are long enough, simply attach them to these pre-existing metal attachments. This will provide stability and prevent your tent from shifting or being blown away by strong winds. The pre-existing attachments can act as reliable anchor points, ensuring that your tent remains securely in place on the wooden platform.
However, it is important to note that relying solely on these pre-existing attachments may not provide optimal stability. While they can serve as a convenient anchor point, it is advisable to use other anchoring methods in addition to these attachments. This will provide extra stability and help ensure a safe and secure tent setup on the wooden platform.
By combining the use of pre-existing attachments with other anchoring techniques, such as using dedicated wood platform stakes or utilizing the wedge method, you can enhance the overall stability of your tent on the wooden platform. This will allow you to enjoy a worry-free camping experience, knowing that your tent is securely anchored and protected.
Remember to always assess the conditions of the wooden platform and carefully inspect the pre-existing attachments before relying on them for tent anchoring. If any attachments appear damaged or unstable, it is advisable to use alternative anchoring methods to ensure the safety of your tent setup.
Next, let’s explore the wedge method, another effective tent platform anchoring strategy.
Tent Platform Anchoring Strategies: Wedge Method
When setting up your tent on a wooden platform, you may encounter situations where utilizing the gaps between the wooden boards is not possible. In such cases, the wedge method can come in handy to create a sturdy anchor point for your tent.
To use the wedge method, you’ll need to find a stick of the right size that can fit between the boards on the platform. Make sure the stick is strong and secure, as it will serve as the anchor point for your tent.
Here’s how to utilize the wedge method for anchoring your tent on a wooden platform:
- Select a stick that is long enough to reach from the ground to the underside of the platform.
- Insert one end of the stick between the boards on the platform.
- Push the stick firmly to wedge it in between the boards, creating a secure anchor point for your tent.
- Repeat this process for each corner of your tent, ensuring that all sides are securely anchored.
The wedge method is particularly useful when you need to anchor your tent in the interior area of the platform, where the gaps between the boards are not accessible. It provides a reliable and secure anchoring solution, giving you peace of mind during your camping adventures.
Remember to test the stability of the stick by applying pressure before relying on it as an anchor point. It’s essential to ensure that the stick is securely wedged between the boards to prevent any movement or displacement during high winds or inclement weather.
The wedge method is a clever technique for anchoring your tent on a wooden platform when utilizing the gaps between the boards is not an option. It offers a secure and reliable way to set up your tent, providing stability and peace of mind during your camping experience.
Next, let’s explore another effective technique for anchoring your tent on a wooden platform: the horizontal stake anchor.
Tent Platform Anchoring Strategies: Horizontal Stake Anchor
When setting up your tent on a wooden platform, the challenge lies in finding a way to anchor it securely. One effective anchoring technique is the horizontal stake anchor. This method involves sliding tent stakes horizontally under the overhanging boards of the platform, providing stability and preventing your tent from shifting or being blown away.
To use the horizontal stake anchor technique, follow these steps:
- Select a suitable location along the edge of the wooden platform where you want to anchor your tent.
- Slide a tent stake under the overhanging board, positioning it parallel to the ground.
- Attach the guy line to the stake in the middle and have it run between the gap of two boards, ensuring it is taut.
This unique anchor method creates a strong anchor point, firmly securing your tent to the wooden platform. By utilizing the horizontal stake anchor technique, you can set up your tent with confidence knowing that it will remain stable throughout your camping adventure.
| Anchor Technique | Difficulty Level | Anchor Strength | Wind Resistance | Suitability |
|---|---|---|---|---|
| Wood Platform Stakes | Easy | High | Excellent | Suitable for most wooden platforms |
| Pre Existing Attachments | Easy | Medium | Good | Dependent on platform design |
| Wedge Method | Moderate | Medium | Good | Interior areas of the platform |
| Horizontal Stake Anchor | Moderate | High | Excellent | Edges of the platform |
| Rock Anchors | Difficult | Low | Fair | When other methods are not feasible |
| Ground and Tree Anchors | Easy | High | Excellent | Dependent on nearby trees and ground conditions |
Tent Platform Anchoring Strategies: Rock Anchors
When it comes to tent anchoring on wooden platforms, sometimes the gaps between the wooden planks are just too small for traditional tent stakes. In such cases, using rocks as anchors can be a clever and effective solution. Rock anchors provide a secure hold, ensuring that your tent stays in place even on a sturdy wooden platform.
To utilize rock anchors, start by selecting a small rock that fits comfortably in your hand. Tie your guyline securely around the rock, making sure it is tightly secured. Then, place the small rock where you want the anchor point to be. To enhance stability, position a larger rock between the small rock and the tent. The weight of the larger rock will secure the line and prevent it from slipping or loosening.
This technique is particularly useful when other anchoring methods on the wooden platform are not feasible due to limited space or restrictions. Rock anchors provide a reliable and adaptable solution, allowing you to anchor your tent effectively and enjoy a secure camping experience.
Key Benefits of Rock Anchors:
- Provides a viable anchoring solution when gaps on the wooden platform are too small for standard tent stakes
- Offers flexibility and adaptability in securing your tent on the platform
- Ensures a sturdy and stable setup, even in challenging conditions
- Easy to find and utilize rocks as anchor points
Rock anchors are a smart alternative for tent setup on wooden platforms when traditional stakes won’t do the job. By leveraging the weight and stability of rocks, you can securely anchor your tent and enjoy a worry-free camping experience.
Tent Platform Anchoring Strategies: Utilize the Ground and Trees
In some cases, your guylines may be long enough to reach the ground or nearby trees. Take advantage of this and use the ground or trees as anchor points for your tent. This method eliminates the need for complex anchoring techniques and provides a secure setup.
Anchoring Your Tent to the Ground
If the ground is soft enough, you can anchor your tent directly into the soil. The following steps will help you secure your tent using the ground as an anchor:
- Find a suitable spot near your tent where the ground is soft and easy to insert stakes.
- Drive tent stakes into the ground at a 45-degree angle, ensuring they are firmly secured.
- Attach your guylines to the stakes and tension them appropriately.
- Repeat this process for all corners of your tent.
Using the ground as an anchor provides a reliable and straightforward method for securing your tent in various camping environments.
Utilizing Trees as Anchor Points
If you’re camping in a wooded area, you can utilize nearby trees to anchor your tent. Here’s how:
- Identify sturdy trees close to your tent that can serve as anchor points.
- Wrap your guylines around the trunks of the trees at a height that provides adequate tension.
- Secure the guylines tightly and ensure they are anchored securely to the tree.
- Repeat this process for each corner of your tent.
Using trees as anchor points offers a natural and reliable solution for securing your tent, especially in areas where the ground may not be suitable for stakes.
Benefits of Ground and Tree Anchoring
Utilizing the ground and trees as anchor points for your tent setup on wooden platforms offers several benefits:
- Simple and straightforward setup without the need for complex anchoring techniques.
- Reliable and stable tent anchoring in various camping environments.
- Flexibility to adapt to different ground conditions and available resources.
- Enhanced stability and resistance to strong winds or other external forces.
Remember, when anchoring your tent to the ground or trees, ensure that your guylines are tensioned correctly for maximum stability and security.

Note: The image above illustrates a tent anchored to the ground using guylines and stakes. It demonstrates the practicality and effectiveness of utilizing the ground as an anchor point for your tent setup on wooden platforms.
| Benefits of Ground and Tree Anchoring | Method |
|---|---|
| Simple and straightforward setup without the need for complex anchoring techniques. | Utilize the Ground |
| Reliable and stable tent anchoring in various camping environments. | Utilize the Ground |
| Flexibility to adapt to different ground conditions and available resources. | Utilize the Ground |
| Enhanced stability and resistance to strong winds or other external forces. | Utilize the Ground or Trees |
Tent Care Basics
Taking care of your tent is crucial for its longevity and ensuring it remains in good condition for many camping trips to come. Here are some essential tips and advice for basic tent care:
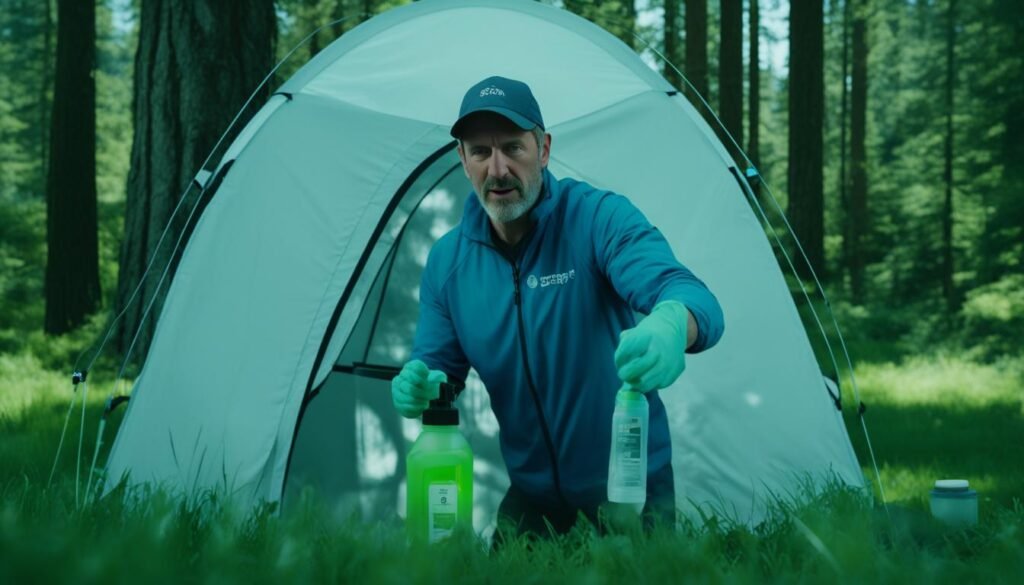
Cleaning Your Tent
Regularly cleaning your tent is essential for maintaining its durability. To clean your tent:
- Set up the tent and remove any loose dirt or debris with a soft brush or cloth.
- Use a mild soap or specialized tent cleaner and a sponge to gently scrub the tent’s interior and exterior.
- Rinse thoroughly with clean water.
- Avoid using harsh chemicals, bleach, or machine washing as they can damage the tent’s fabric and waterproof coating.
- Allow the tent to dry completely before storing.
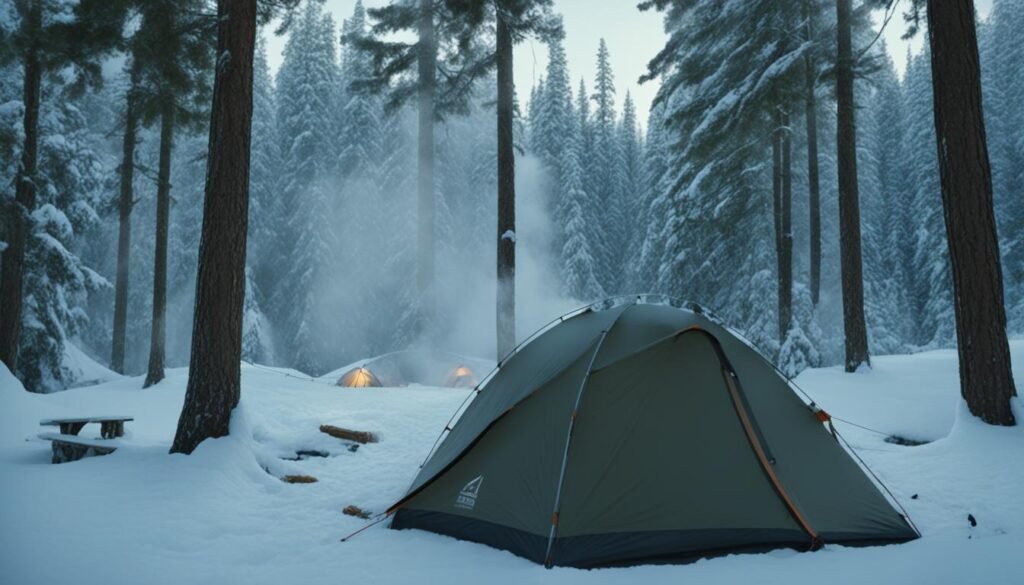
Storing Your Tent
Proper storage is vital to prevent damage and prolong your tent’s lifespan:
- Ensure your tent is completely dry before packing it away to prevent mold and mildew growth.
- Store your tent in a breathable storage bag or sack to allow air circulation.
- Avoid compressing or folding the tent too tightly, as it can damage the fabric and waterproof coating.
- Keep your tent in a cool, dry place away from direct sunlight, extreme temperatures, and pests.
Repairing Your Tent
Regular inspections and prompt repairs can prevent small issues from becoming more significant problems. Here are some tips for repairing your tent:
- Carry a repair kit that includes adhesive patches, seam sealer, spare tent stakes, and a multi-tool.
- If you notice a small tear, use an adhesive patch to repair it immediately.
- If the tent’s seams are leaking, apply seam sealer to reinforce the waterproofing.
- Replace any damaged tent stakes to ensure proper anchoring.
- Follow the manufacturer’s instructions for more extensive repairs or consult a professional if needed.
Quote
By properly caring for and maintaining your tent, you can extend its durability and ensure it remains your reliable shelter during camping adventures.
Tent Care Supplies Checklist
| Item | Description |
|---|---|
| Soft brush | To remove loose dirt and debris. |
| Sponge | For gentle scrubbing during cleaning. |
| Mild soap or tent cleaner | To clean the tent’s interior and exterior. |
| Adhesive patches | For quick repairs of small tears. |
| Seam sealer | To reinforce the tent’s waterproofing. |
| Spare tent stakes | To replace damaged or lost stakes. |
| Multi-tool | For various repair tasks. |
Proper maintenance and care will significantly contribute to the durability and longevity of your tent. By following these tips, your tent will continue to protect you during countless camping adventures.
How to Repair a Tent
Sometimes, tents can sustain damage during camping trips. Knowing how to repair your tent is essential for maintaining its longevity and ensuring it remains functional for future adventures. In this section, I will provide you with guidance on how to effectively repair common tent issues, including patching holes, fixing broken poles, and repairing torn seams.
Patching Holes
If your tent has a hole or tear, it’s crucial to address it promptly to prevent further damage. Here’s a step-by-step guide to patching holes in your tent:
- Locate the hole or tear in the tent fabric.
- Clean the area around the hole with a mild detergent and water.
- Apply a tent repair patch over the hole, ensuring it is slightly larger than the damaged area.
- Press down firmly to secure the patch to the tent fabric.
- Allow the patch to cure according to the manufacturer’s instructions before using the tent again.
By patching holes promptly, you can prevent moisture from entering the tent and maintain its waterproof capabilities.
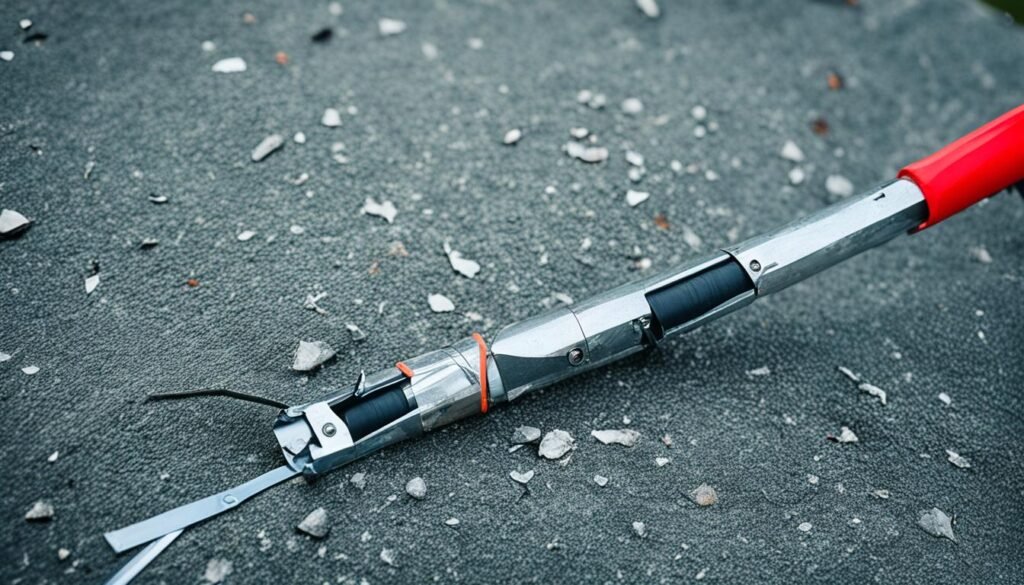
Fixing Broken Poles
Broken tent poles can be a common issue, especially if subjected to strong winds or accidental impact. Here’s how you can fix broken tent poles:
- Remove the broken section of the pole from the tent.
- If you have a repair sleeve or splint, slide it over the broken section to provide support.
- Use duct tape or repair tape to secure the broken sections together.
- Ensure the taped sections are aligned and stable.
- Test the repaired pole by assembling the tent to ensure the tension is maintained.
It’s important to note that while this fix is temporary, it can suffice for the duration of your camping trip. Consider replacing the broken pole section with a new one once you return home to ensure a long-term solution.
Repairing Torn Seams
Torn seams can compromise the integrity of your tent, allowing water to seep through. Here’s how you can repair torn seams:
- Identify the torn seam on your tent.
- Clean the area around the tear with a mild detergent and water.
- Apply a seam sealer or specialized tent repair adhesive to the torn seam.
- Gently press the torn edges together to ensure a secure bond.
- Wipe away any excess sealer or adhesive.
- Allow the repaired seam to dry completely before using the tent.
Repairing torn seams will help maintain the tent’s waterproof properties and prevent further tearing.
| Common Tent Repairs | Materials Needed |
|---|---|
| Patching Holes | – Tent repair patch – Mild detergent – Clean cloth – Scissors |
| Fixing Broken Poles | – Repair sleeve or splint – Duct tape or repair tape – Scissors |
| Repairing Torn Seams | – Seam sealer or tent repair adhesive – Mild detergent – Clean cloth |
Remember, proper tent repair and maintenance are essential for ensuring the longevity of your camping gear. By addressing issues promptly and utilizing the right techniques and materials, you can extend the lifespan of your tent and continue to enjoy your outdoor adventures.
Backpacking Repair Kit Checklist
When embarking on a backpacking adventure, it’s essential to be prepared for any equipment failures or repairs that may arise during your camping journey. Carrying a comprehensive repair kit can ensure that you are ready to address unexpected issues and continue enjoying your outdoor experience. Here is a checklist of essential items to include in your backpacking repair kit:
Tent Repair Tools:
- Duct Tape: A versatile adhesive tape that can be used for temporary tent repairs, fixing gear, or patching small holes.
- Repair Patches: Self-adhesive patches designed specifically for tent fabric, providing a durable solution for rips or tears.
- Tent Seam Sealant: A specialized adhesive that helps seal and waterproof tent seams to prevent leakage.
- Tent Pole Splint: A repair sleeve or splint to fix broken tent poles, ensuring the structural integrity of your shelter.
- Tent Guyline Cord: Extra cord or replacement guylines to repair or replace damaged or worn-out lines.
Camping Gear Maintenance:
- Multi-Tool: A compact tool that combines various functions like pliers, knife, screwdriver, and more, useful for general gear maintenance and repairs.
- Zipper Lubricant: A silicone-based lubricant to keep zippers running smoothly, preventing snagging or sticking.
- Extra Buckles and Fasteners: Spare buckles, clips, and fasteners for gear like backpacks, tents, or hammocks.
- Repair Tape: An adhesive tape designed for outdoor gear repairs, suitable for fixing sleeping pads, rain jackets, or backpacks.
- Sewing Kit: Basic sewing materials, including needles, thread, and small scissors, for quick repairs to camping gear or clothing.
By packing these essential items in your backpacking repair kit, you can tackle common gear issues and ensure a smooth and enjoyable camping experience. Having the right tools at your disposal empowers you to address equipment failures promptly, keeping the adventure going strong.

| Item | Description |
|---|---|
| Duct Tape | Versatile adhesive tape for temporary repairs |
| Repair Patches | Self-adhesive patches for tent fabric |
| Tent Seam Sealant | Adhesive to seal and waterproof tent seams |
| Tent Pole Splint | Repair sleeve or splint for broken tent poles |
| Tent Guyline Cord | Extra cord or replacement for damaged guylines |
| Multi-Tool | Compact tool with various functions |
| Zipper Lubricant | Silicone-based lubricant for smooth zippers |
| Extra Buckles and Fasteners | Spare buckles, clips, and fasteners for gear |
| Repair Tape | Adhesive tape for outdoor gear repairs |
| Sewing Kit | Basic sewing materials for gear and clothing repairs |
Conclusion
Mastering the art of tent setup and secure anchoring is essential for an enjoyable and successful camping experience. By following a comprehensive tent setup guide, you can ensure that your tent stands strong against the elements. The process begins with proper pre-trip preparation, where you familiarize yourself with the tent and its components. A careful campsite selection is crucial for finding a suitable location that provides weather protection and minimizes condensation. As you pitch the tent, remember to stake down the corners, properly seat the poles, and tension the rainfly for optimal stability.
When setting up on wooden platforms, there are several anchoring strategies to secure your tent. Dedicated wood platform stakes, such as Fishbone Stakes, provide a reliable anchor point. Pre-existing attachments on the platform can also be utilized, but it is advisable to use other anchor methods in addition to these attachments. The wedge method is useful for anchoring the tent in the interior area of the platform, while the horizontal stake anchor technique provides stability on the platform edges. In cases where gaps are too small, rock anchors or utilizing the ground and nearby trees can be effective alternatives.
To ensure your tent’s longevity, remember to follow tent care basics, including cleaning, storing, and repairing your tent. Carry a backpacking repair kit that includes essential items like duct tape, repair patches, extra tent stakes, and a multi-tool. With the knowledge and preparation gained from this tent setup guide, you are now equipped to confidently anchor your tent and enjoy a comfortable night’s sleep in the great outdoors. Happy camping!
FAQ
How important is pre-trip preparation for tent setup?
Pre-trip preparation is crucial for tent setup. It allows you to familiarize yourself with the process and ensure you have all the necessary parts. It is also a good opportunity to practice pitching your tent at home.
What should I consider when selecting a campsite for tent setup?
When selecting a campsite, consider using existing campsites in well-traveled areas. Look for natural windbreaks, avoid damaged trees, and choose higher, drier ground to minimize condensation. Also, orient the tent’s door away from the wind and seek sites under trees for added protection.
How can I ensure a secure tent setup?
To ensure a secure tent setup, clear the debris from your tent site, stake down the corners of your tent, and take your time with the poles to ensure they are properly seated. Utilize rainfly wraps and master the art of fly tensioning for a taut rainfly. Attach and tension guylines for extra stability in strong winds.
How can I anchor my tent securely on a wooden platform?
There are several anchoring strategies you can use on wooden platforms, including using dedicated wood platform stakes, utilizing pre-existing attachments, using the wedge method, employing the horizontal stake anchor technique, using rock anchors, and utilizing the ground and nearby trees for anchor points.
What are some tent care basics I should know?
Tent care basics include cleaning, storing, and repairing your tent. Proper care and maintenance will ensure that your tent remains in good condition for many camping trips to come.
How can I repair a tent?
Tent repairs can include patching holes, fixing broken poles, and repairing torn seams. With the right techniques and materials, you can easily fix common tent issues and extend the lifespan of your tent.
What should I include in my backpacking repair kit?
Essential items to include in your backpacking repair kit are duct tape, repair patches, extra tent stakes, and a multi-tool. Being prepared with a repair kit ensures that you can handle any unexpected repairs during your camping adventures.