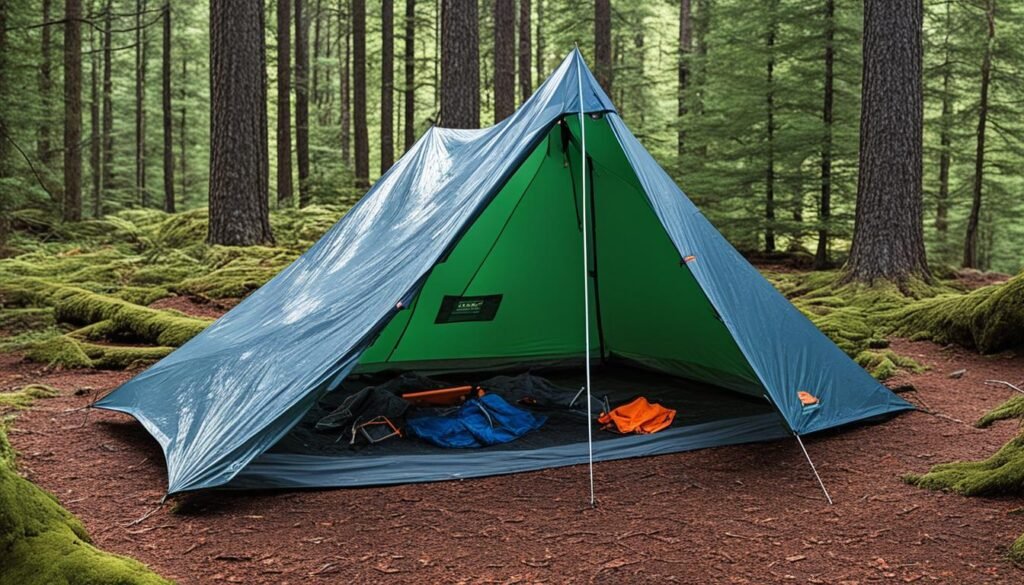
Learning how to repair rips and tears in your canvas tent can save you money and ensure the longevity of your outdoor gear. Whether your tent has been damaged during a camping trip or due to general wear and tear, there are various techniques you can use to fix it yourself.
Key Takeaways:
- Knowing how to repair your canvas tent can save you money and extend its lifespan.
- Assess the extent of the damage before deciding on the repair method.
- Patching with a sewing machine and using adhesive-backed patches are both effective repair techniques.
- Consider using waterproof canvas and applying seam sealer to make the repair watertight.
- Reinforce chafed areas to prevent further damage.
Assessing the Damage
Before you begin repairing your canvas tent, it’s crucial to assess the extent of the damage. This assessment will help you determine the appropriate repair method for your canvas tent. Two common causes of damage are external forces and chafing, and each requires a different approach.
Detecting External Forces
If the damage to your canvas tent was caused by external forces such as branches or rough terrain, it’s important to closely examine the tear. Check for any signs of tearing or stress to the fabric surrounding the damaged area. Look for any additional small punctures or weakened seams that may need attention.
Assessing the damage caused by external forces will help you determine the size and shape of the repair needed. It will also give you an idea of the strength and durability required to restore your canvas tent to its former condition.
Evaluating Chafing Damage
Chafing is another common cause of damage to canvas tents, often resulting from friction between the tent and a nearby object. To assess chafing damage, inspect the affected area for signs of wear, thinning fabric, or weakened stitching. This type of damage may appear as a long, thin stretch or a larger worn-out area.
Understanding the extent of chafing damage is crucial to prevent further tearing and ensure a strong repair. It will help you determine the appropriate reinforcement technique and the type of materials needed to address the weakened sections.
Considering Tent Lifespan
When assessing the damage, it’s essential to consider the overall lifespan of your canvas tent. If the fabric is old and nearing the end of its usable life, it may be more cost-effective to replace the entire cover rather than repairing individual tears.
Replacing the cover ensures a fresh and durable base for your tent, providing long-term protection from the elements. Additionally, it eliminates the risk of further damage caused by weakened or aged fabric. However, if the damage is minor and the tent has many years of life remaining, repairing the tears may be a viable and economical option.
Visualizing the Damage:
| Type of Damage | Description |
|---|---|
| External Forces | Caused by branches, rough terrain, or external objects; identifiable tears, punctures, or stressed fabric |
| Chafing Damage | Result of friction between the tent and nearby objects; thinning fabric, weakened stitching, or larger worn-out areas |
| Tent Lifespan | Determine whether the canvas is old and nearing the end of its life, requiring a replacement cover instead of repairs |
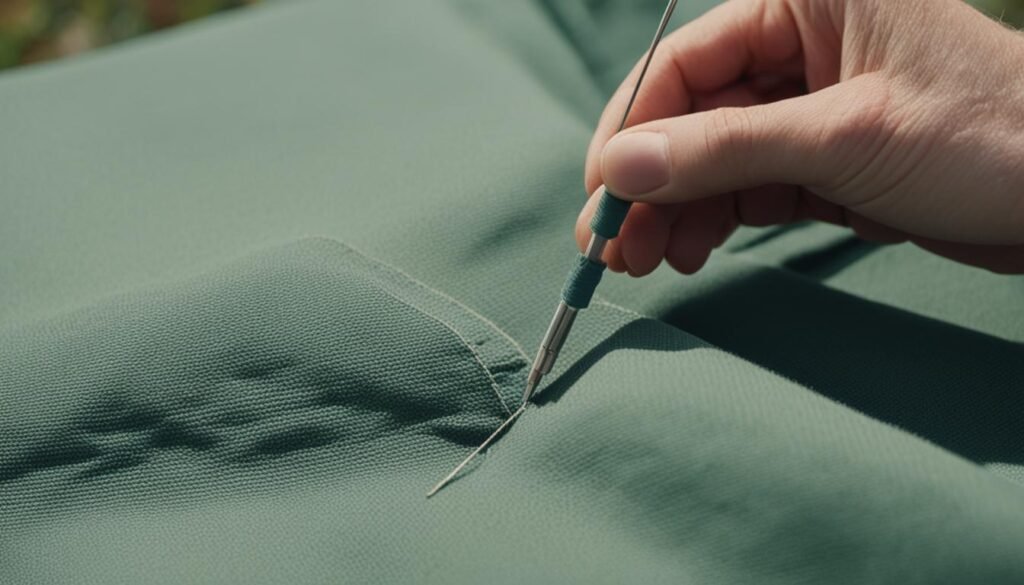
Patching with Sewing Machine
If the damage to your canvas tent was caused by external forces, you can patch it up using the same material as the cover. Here’s how to patch your canvas tent using a sewing machine:
Cut and Fold:
Begin by cutting out a rectangle around the rip in your canvas tent. Make sure to leave a small margin around the tear for a more secure patch. Next, fold the edges of the patch under to create a clean edge for sewing.
Tip: Use fabric scissors to achieve precise cuts and ensure a neat patch.
Secure and Stitch:
Once the patch is folded, position it over the hole in the tent and baste it in place. Basting involves sewing a temporary stitch to hold the patch in place while you sew it permanently. After basting, use a sewing machine to stitch around the perimeter of the patch, securing it firmly to the tent.
Tip: Use a sturdy thread and a zigzag or straight stitch for added strength and durability.
Hem the Patch:
To prevent fraying and ensure a professional finish, cut a larger rectangle of new patch material and hem its edges. Hemming involves folding and sewing the raw edge of the fabric to create a clean, finished edge. This will make your patch more robust and less prone to unraveling.
Tip: If your patch material is vinyl, you can use a hotknife to eliminate the need for hemming.
By following these steps, you can effectively patch your canvas tent using a sewing machine. Remember to choose a patch material that matches the cover of your tent to ensure a seamless repair.
Patching in Place
When it comes to quick canvas tent repairs that require no sewing, Tear-Aid Type A adhesive-backed patches are a convenient solution. These patches are specially designed to provide a strong and long-lasting bond to your canvas tent, making them perfect for emergency repairs.
Before applying the patches, it’s important to clean the fabric thoroughly and let it dry. This will ensure optimal adhesion and prevent any dirt or debris from interfering with the patching process.
If you have access to both sides of the torn fabric, you can also use a Speedy Stitcher® Sewing Awl to sew on a patch without removing the fabric. This tool allows you to stitch the patch securely in place, providing extra reinforcement for the damaged area.
“The Tear-Aid patches are a lifesaver! I had a tear in my canvas tent during a camping trip, and these patches saved the day. Quick and easy to use, they provided a strong and durable repair that lasted throughout the entire trip.” – Sarah, avid camper
With Tear-Aid patches and the option to use a Speedy Stitcher® Sewing Awl, you can quickly and effectively repair your canvas tent without the need for extensive sewing or professional assistance. Enjoy peace of mind knowing that your tent is well-maintained and ready for your next outdoor adventure.
Keep reading to learn about using waterproof canvas for covering and the importance of proper maintenance for extending the lifespan of your canvas tent.
Using Waterproof Canvas for Covering
Once you’ve sewn up the tear in your canvas tent, it’s essential to cover it with a waterproof patch to ensure lasting durability. Using a waterproof canvas patch will provide added protection against the elements and prevent further damage.
To create a waterproof covering, start by cutting a piece of waterproof canvas larger than the tear. It should overlap the tear completely and cover some of the surrounding area. This extra coverage will reinforce the repair and safeguard against future tears.
For a professional finish, round the corners of the patch before sewing it onto the inside of the tent. This technique helps prevent any sharp edges that could potentially cause new tears or snags in the fabric.
To secure the patch on the outside of the tent, use canvas cement. Apply the cement according to the manufacturer’s instructions, ensuring proper drying and bonding. Canvas cement provides a strong, reliable seal that is resistant to water, making it ideal for creating a waterproof canvas repair.
Benefits of Using Waterproof Canvas
Choosing a waterproof canvas patch for covering your tent tear offers several advantages:
- Durability: Waterproof canvas is designed to withstand harsh weather conditions, providing long-lasting protection for your tent.
- Waterproofing: The waterproof properties of the canvas patch ensure that your repaired tent remains dry during rainy or damp conditions.
- Flexibility: This type of canvas is highly flexible and less prone to cracking or tearing, making it an excellent choice for tent repairs.
- Easy to work with: Waterproof canvas is easy to cut, sew, and manipulate, allowing for a straightforward and effective repair process.
Comparison of Waterproof Canvas Patch and Other Repair Methods
| Repair Method | Waterproof | Durability | Ease of Application |
|---|---|---|---|
| Waterproof Canvas Patch | ✅ | ✅ | ✅ |
| Sewing Machine Patch | ❌ | ✅ | ✅ |
| Patching in Place with Tear-Aid | ❌ | ❌ | ✅ |
| Using Old Sail Material | ❌ | ❌ | ✅ |
Applying Canvas Seam Sealer
When it comes to waterproofing your canvas tent repair, applying canvas seam sealer is crucial. This step ensures that the repaired area remains watertight, preventing any moisture from seeping in. By following the instructions of the seam sealer product, you can achieve a durable and long-lasting repair.
Canvas seam sealer is specifically designed to create a protective barrier along the edges of the patches. It works by sealing off any potential areas where water could penetrate, such as the stitched seams. This extra layer of protection maintains the waterproof integrity of your tent, even after the repair.
Before applying the canvas seam sealer, make sure the repaired area is clean and dry. Any dirt or moisture can interfere with the effectiveness of the sealer. Once the area is prepared, carefully apply the seam sealer along the edges of both patches.
It is important to use the right amount of seam sealer to achieve the desired waterproofing. Following the instructions provided with the product will ensure that you apply the appropriate quantity. Too little seam sealer may leave gaps that compromise the repair, while too much can create a messy and ineffective seal.
By applying canvas seam sealer to your repaired canvas tent, you can ensure that the stitches used in the repair remain secure and that your tent remains watertight. This step is essential for maintaining the overall integrity and functionality of your tent, allowing you to continue enjoying outdoor adventures without worrying about water leakage.
Using Old Sail Material for Repair
If you have access to old sail material, it can be a valuable resource for repairing your canvas tent. Sail materials are often designed to withstand harsh weather conditions, making them durable and suitable for tent repair. Here are some sail cloth options you can consider:
1. Standard White Dacron Sail Material
Standard white dacron sail material is a popular choice for repairing canvas tents. It is more water-resistant than regular canvas and easier to work with. Dacron sail material is known for its strength and durability, making it a reliable option for patching up tent tears. When using this material, ensure you select an appropriate weight for your specific tent repair needs.
2. Spinnaker Cloth
If you’re looking for a lightweight and water-resistant sail material, consider using spinnaker cloth. Spinnaker cloth is commonly used in sailing for its low weight and ability to withstand water exposure. While it may not be as durable as other sail materials, it can be a suitable patching option for minor tent tears. Keep in mind that you may need additional reinforcement for larger or more significant damage.
3. Sunbrella Canvas
Sunbrella is a durable canvas material often used in the production of high-quality outdoor products. It offers excellent resistance to UV rays, mildew, and water. Sunbrella canvas can be an ideal option for repairing tent tears, providing a long-lasting and weather-resistant solution. When using Sunbrella material, ensure you choose the appropriate weight and color to match your existing tent fabric.
Remember, when using old sail material for tent repair, it’s essential to assess the condition of the fabric and ensure it is suitable for your specific repair needs. Cut the sail material to size, hem the edges, and securely attach it to the damaged area using appropriate stitching techniques.
| Sail Material | Advantages |
|---|---|
| Standard White Dacron Sail Material | More water-resistant and easier to work with compared to regular canvas. Known for its strength and durability. |
| Spinnaker Cloth | Lightweight, fairly water-resistant, and commonly used in sailing. Suitable for minor tent tears. |
| Sunbrella Canvas | Durable, offers excellent resistance to UV rays, mildew, and water. Ideal for long-lasting repairs. |
Purchasing Military Canvas Pup-Tents for Material
If you’re looking for a cost-effective option to obtain quality canvas for repairing your tent, consider purchasing old military canvas “pup-tents.” These tents, often available for sale on platforms like eBay, are generally in decent condition and provide a large amount of canvas material. They can serve as an excellent source for canvas to patch and reinforce your tent.
One of the advantages of military canvas pup-tents is their cost-effectiveness. Compared to purchasing new canvas material, buying these used tents can save you money while still providing reliable and durable fabric for your repairs.
Moreover, military canvas pup-tents are typically treated with waterproofing, making them suitable for patching and reinforcing your tent’s water resistance. This feature ensures that your repairs effectively protect your tent from the elements.
When purchasing military canvas pup-tents for material, ensure that you choose tents in good condition. Thoroughly inspect the tent for any signs of damage or wear that could impact the quality of the canvas. Additionally, consider the dimensions of the tent and verify that it will provide an adequate amount of canvas material for your repair needs.
By acquiring military canvas pup-tents, you can obtain a cost-effective and reliable source of canvas material for your tent repairs. This approach allows you to save money while still ensuring the longevity of your tent.
Reinforcing Chafed Areas
If chafing caused the tear in your canvas tent, it’s important to reinforce the area to prevent future damage. Chafing occurs when the canvas fabric rubs against a rough surface, such as a pole or a tree branch. Over time, this friction weakens the fabric, leading to tears and rips. To strengthen the weakened area and protect it from further ripping, follow these steps:
- Identify the chafed section of the tent canvas.
- Cut a piece of chafe-resistant material, such as Shelter-Rite® or Sur Last®, slightly larger than the damaged area.
- Place the chafe-resistant material on the inside of the tent, directly over the chafed area.
- Use a strong adhesive, such as fabric glue or contact cement, to secure the chafe-resistant material in place.
- Allow sufficient time for the adhesive to dry completely before proceeding.
- On the outside of the tent, cut a piece of canvas that matches the color and thickness of the tent cover.
- Apply the same adhesive to the chafed area on the outside of the tent.
- Position the canvas patch over the chafed area and press it firmly onto the adhesive.
- Smooth out any wrinkles or air bubbles, ensuring a secure bond between the patch and the tent fabric.
- Allow the adhesive to dry completely according to the manufacturer’s instructions.
By reinforcing the chafed areas with a chafe-resistant material on the inside and patching the outside with matching canvas material, you’ll provide added protection to the weakened section of your tent. This repair technique will help extend the lifespan of your canvas tent and prevent further damage caused by chafing.
Remember, proactive reinforcement is key when it comes to maintaining the durability of your canvas tent. Regularly inspect your tent for signs of chafing and address them promptly to avoid costly repairs in the future.
Benefits of Chafe-Resistant Material:
- Offers superior resistance to friction and abrasion.
- Increases the longevity of the reinforced areas.
- Provides added protection against chafing and ripping.
- Ensures a secure and long-lasting repair.
| Pros | Cons |
|---|---|
| Effectively prevents further damage caused by chafing. | Requires additional material and adhesive. |
| Provides added strength and durability to the weakened areas. | May be more complex than a simple patch repair. |
| Long-lasting reinforcement solution for your canvas tent. | Requires thorough drying time for the adhesive. |
Hemming and Folding Techniques for Precise Patching
If you’re looking for a technical, sturdy, and precise method to patch a tear in your canvas tent, hemming and folding techniques are your best bet. Follow these steps to achieve a professional-grade repair:
- Cut out a rectangle around the tear, making sure to extend a few inches past the damaged area. This will provide a sturdy foundation for your patch.
- Fold the edges of the patch under to create a clean finish and prevent fraying. Use an iron to press the fold in place.
- Hem the edges of the patch fabric by folding them over and sewing them down. This will add further strength and durability to your repair.
- Position the patch over the hole in the tent cover, ensuring that it fully covers the damaged area.
- Baste the patch onto the cover, temporarily securing it in place.
- Finally, sew around the perimeter of the patch using a straight stitch or a zigzag stitch. This will permanently secure the patch and prevent it from shifting or unraveling over time.
If the tear is in a vinyl patch material, you can eliminate the need for hemming by using a hotknife to create a clean, sealed edge.
By employing these hemming and folding techniques, you’ll achieve a precise patch that seamlessly blends into the rest of the canvas tent, ensuring a long-lasting repair.
| Hemming and Folding Techniques for Precise Patching | |
|---|---|
| Benefits | Guidelines |
| Technical and sturdy patch | Cut out a rectangle around the tear |
| Precise and professional finish | Fold the edges of the patch under |
| Enhanced durability | Hem the edges of the patch fabric |
| Seamless integration with tent | Position and baste the patch onto the tent cover |
| Secure and long-lasting repair | Permanent sewing around the patch perimeter |
When to Replace the Entire Cover
If your canvas tent cover is showing signs of age and wear, you may be wondering whether it’s time to replace it. While repairing a damaged cover can be a viable option, there are instances where replacing the entire cover is the more practical choice. It’s essential to consider the age, condition, and remaining lifespan of your old canvas tent cover before making a decision.
One common material used for canvas tent covers is Sunbrella canvas, which typically has a lifespan of about 10 years. If your cover is reaching the end of its lifespan, it may not be cost-effective to invest time and effort into repairing it, especially if other areas of the cover are also showing signs of wear and tear. In such cases, replacing the cover can provide a fresh, durable solution that will last for years to come.
By assessing the time and effort required for the repair and comparing it to the remaining lifespan of the cover, you can make an informed decision. Consider the cost of materials, the complexity of the repair, and whether it’s a temporary fix or a more permanent solution. Sometimes, the benefits of replacing the cover outweigh the costs and effort of repairing it.

| Repair | Replace |
|---|---|
| Can be cost-effective for minor damages | Provides a fresh, durable solution |
| Preserves the original aesthetic and charm of the tent | Ensures the tent is protected from future wear and tear |
| May extend the life of the cover for a season or two | Can last for years, depending on the quality of the replacement |
Cost-Benefit Analysis for Repairing vs. Replacing
Before making a decision to repair or replace your canvas tent, it’s important to conduct a cost-benefit analysis. Taking into consideration various factors can help guide your choice and ensure a cost-effective solution.
When evaluating the cost of repair, consider the expenses associated with obtaining the necessary materials for the repair, such as patches, adhesive, and seam sealers. Additionally, factor in the cost of any specialized tools or equipment required for the repair process.
In contrast, when assessing the cost of replacement, consider the price of purchasing a brand-new canvas tent or a replacement cover. Take into account the quality and durability of the replacement, as well as any additional features or improvements that may come with a new tent.
Alongside the financial considerations, it’s essential to evaluate the time and effort required for both repair and replacement options. Repairing a canvas tent can be a time-consuming process, especially if the damage is extensive. On the other hand, replacing the entire tent cover or investing in a new tent may require less effort and provide a quicker solution.
The remaining lifespan of your canvas tent is another crucial aspect to consider. If the tent is relatively new and in good overall condition, repairing specific areas of damage could significantly extend its usefulness. However, if the tent is already nearing the end of its lifespan and displaying signs of significant wear and tear, a replacement may be the more practical choice.
Remember that a temporary repair can sometimes be a viable option to extend the life of your tent in the short term. By evaluating the cost, time, effort, and remaining lifespan, you can make an informed decision about repairing or replacing your canvas tent that aligns with your needs and budget.
Cost-Benefit Analysis
| Factors | Repair | Replace |
|---|---|---|
| Cost of Materials/Replacement Cover | Dependent on extent of damage and materials needed | Cost of a brand-new canvas tent or replacement cover |
| Time and Effort | May be time-consuming depending on the extent of damage | Less effort required, quicker solution |
| Remaining Lifespan of Tent | Significantly extends the lifespan if tent is relatively new | Practical choice if tent is nearing the end of its lifespan |
By carefully considering these factors, you can determine whether a cost-effective tent repair or a complete canvas tent replacement is the best course of action for your particular situation.
Maintenance Tips for Extending Tent Lifespan
Proper maintenance is essential for prolonging the lifespan of your canvas tent. By following these tent care tips, you can ensure that your tent remains in good condition for years to come.
- Clean and Dry Regularly: It’s important to clean your canvas tent regularly to prevent the buildup of dirt, debris, and mold. Use a mild detergent and a soft brush to clean the tent fabric. After cleaning, make sure to thoroughly dry the tent before storing it. This helps prevent mold and mildew growth, which can weaken the fabric and shorten its lifespan.
- Avoid Storing While Damp: Never pack away a damp or wet tent. Moisture trapped in the fabric can lead to mold, mildew, and unpleasant odors. Before storing, ensure that your tent is completely dry to prevent any damage.
- Apply Waterproofing Treatments: To maintain the water resistance of your canvas tent, it is recommended to periodically apply waterproofing treatments. These treatments help to replenish the tent’s natural water repellency and protect against moisture penetration. Check the manufacturer’s instructions or consult a tent specialist for the appropriate waterproofing products for your tent.
- Inspect for Wear and Damage: Regularly inspect your canvas tent for any signs of wear, tear, or damage. Check the seams, zippers, and other components for stitching issues or weak points. Address any issues promptly to prevent further damage and ensure the longevity of your tent.
Following these canvas tent maintenance tips will help you extend the lifespan of your tent and maximize your outdoor adventures.
“A well-maintained canvas tent can weather many outdoor escapades, providing shelter and comfort for years. It is the attention to detail and the routine care that make all the difference in extending its lifespan.” – Tent Enthusiast
Repairing Grommets and Snaps
In addition to repairing rips and tears, canvas tents may also require repair to grommets and snaps. These small but essential components play a crucial role in the proper functioning of your tent, ensuring a secure and reliable shelter. Damaged or missing grommets and snaps can compromise the overall integrity of your tent and its ability to withstand the elements.
Grommet Repair Techniques
When it comes to canvas grommet repair, there are a few techniques you can try depending on the extent of the damage. If a grommet is loose or detached from the fabric, you can reattach it by carefully aligning the grommet with the existing hole and using a grommet tool to secure it in place. If the grommet is damaged beyond repair, you may need to replace it entirely. Ensure you choose a grommet that matches the specifications of your tent’s fabric and consult the manufacturer’s instructions or professional advice if necessary.
Snap Repair Techniques
When dealing with broken or malfunctioning snaps, the first step is to assess the type of snap used in your tent. There are various snap fasteners available, such as press studs, snap buttons, or snap tape. Depending on the type of snap and the specific issue, you can often replace individual components of the snap or use a snap repair kit to fix the problem. It’s important to follow the manufacturer’s instructions or consult a professional if you’re unsure how to proceed.
Pro Tip: Regularly inspecting and maintaining the grommets and snaps on your canvas tent can help prevent damage and ensure they remain functional for years to come.
By repairing grommets and snaps, you can extend the lifespan of your canvas tent and avoid the need for costly replacements. Stay tuned for our upcoming article, where we will dive deeper into the techniques and best practices for repairing these essential components of your canvas tent.

Finding Replacement Parts and Materials
If you need to purchase replacement parts or materials for repairing your canvas tent, there are several options available to you.
One option is to check online platforms like eBay for old military canvas pup-tents or remnants of Sunbrella canvas. These platforms often have a variety of materials at affordable prices, giving you access to the specific canvas materials you need to repair your tent.
Another option is to visit specialized stores like Sailrite.com. These stores offer a wide range of supplies specifically designed for canvas repair. You can find canvas patch material, seam sealers, sewing machines, and other tools and accessories necessary for completing your tent repair project.
By finding the right materials and tools, you can ensure a successful repair that restores the durability and integrity of your canvas tent. Whether you choose to purchase from online platforms or specialized stores, be sure to compare prices and read reviews to make an informed decision.
Conclusion
Repairing rips and tears in your canvas tent can save you money and extend the lifespan of your tent. By assessing the damage, choosing the appropriate repair technique, and using high-quality materials, you can ensure a durable and long-lasting solution.
Regular maintenance and prompt attention to any issues are essential to keeping your canvas tent in good condition for future adventures. Cleaning and drying the tent regularly, avoiding storing it while damp, and applying waterproofing treatments as needed will help extend its lifespan.
Remember to inspect your tent for any signs of wear or damage and address them promptly. By taking these steps, you can enjoy your canvas tent for many years to come, confident in its durability and reliability.
FAQ
How can I assess the damage to my canvas tent?
Before repairing your canvas tent, assess the extent of the damage by determining whether the tear was caused by external forces or chafing. This will help you choose the appropriate repair method.
Can I use a sewing machine to patch my canvas tent?
Yes, you can patch your canvas tent using a sewing machine. Cut out a rectangle around the tear, fold the edges of the patch under, and sew it in place. Hem the edges of a larger rectangle of new patch material and sew it onto the hole to secure it.
Are there any no-sew options for repairing my canvas tent?
Yes, Tear-Aid Type A adhesive-backed patches provide a quick, no-sew repair option. Clean and dry the fabric before applying the patches.
How do I make the repaired area of my canvas tent waterproof?
To make the repaired area waterproof, cut a piece of waterproof canvas larger than the tear, round the corners, and sew it onto the inside of the tent. Use canvas cement to secure the patch on the outside. Apply canvas seam sealer along the edges of both patches to maintain the tent’s water resistance.
What materials can I use to repair my canvas tent?
You can use old sail material, such as dacron sail material or spinnaker cloth, to repair your canvas tent. Sunbrella, a durable canvas material, is also suitable for patching and reinforcing your tent.
Where can I find canvas material for repairing my tent?
You can find old military canvas “pup-tents” for sale on platforms like eBay, which provide a cost-effective option for obtaining quality canvas for repairing your tent. Sailrite.com and other stores offer a wide range of supplies specifically for canvas repair.
How can I reinforce chafed areas of my canvas tent?
Use a chafe-resistant material like Shelter-Rite or Sur Last to patch the inside of the canvas and protect the weakened area. Patch the outside with the same material as the cover for added reinforcement.
What is the best technique for precise patching of a canvas tent tear?
For a technical and sturdy patch, cut out a rectangle around the tear, fold the edges of the patch under, and sew it in place. Hem the edges of the patch fabric and baste it onto the hole. Sew around the perimeter of the patch to secure it. If the patch material is vinyl, you can use a hotknife to eliminate the need for hemming.
When should I replace the entire cover of my canvas tent?
If your canvas tent cover is old and nearing its lifespan, it may be more cost-effective to replace the entire cover instead of repairing it. Consider the time and effort required for the repair versus the remaining lifespan of the cover.
How can I extend the lifespan of my canvas tent?
Regularly clean and dry your canvas tent to prevent mold and mildew. Avoid storing the tent while it is damp. Apply waterproofing treatments as needed and promptly address any signs of wear or damage.
How can I repair the grommets and snaps on my canvas tent?
Techniques for repairing grommets and snaps on canvas tents will be discussed in a future installment of this series.
Where can I find replacement parts and materials for repairing my canvas tent?
Check online platforms like eBay for old military canvas pup-tents or remnants of Sunbrella canvas. Stores like Sailrite.com offer a wide range of supplies specifically for canvas repair.